
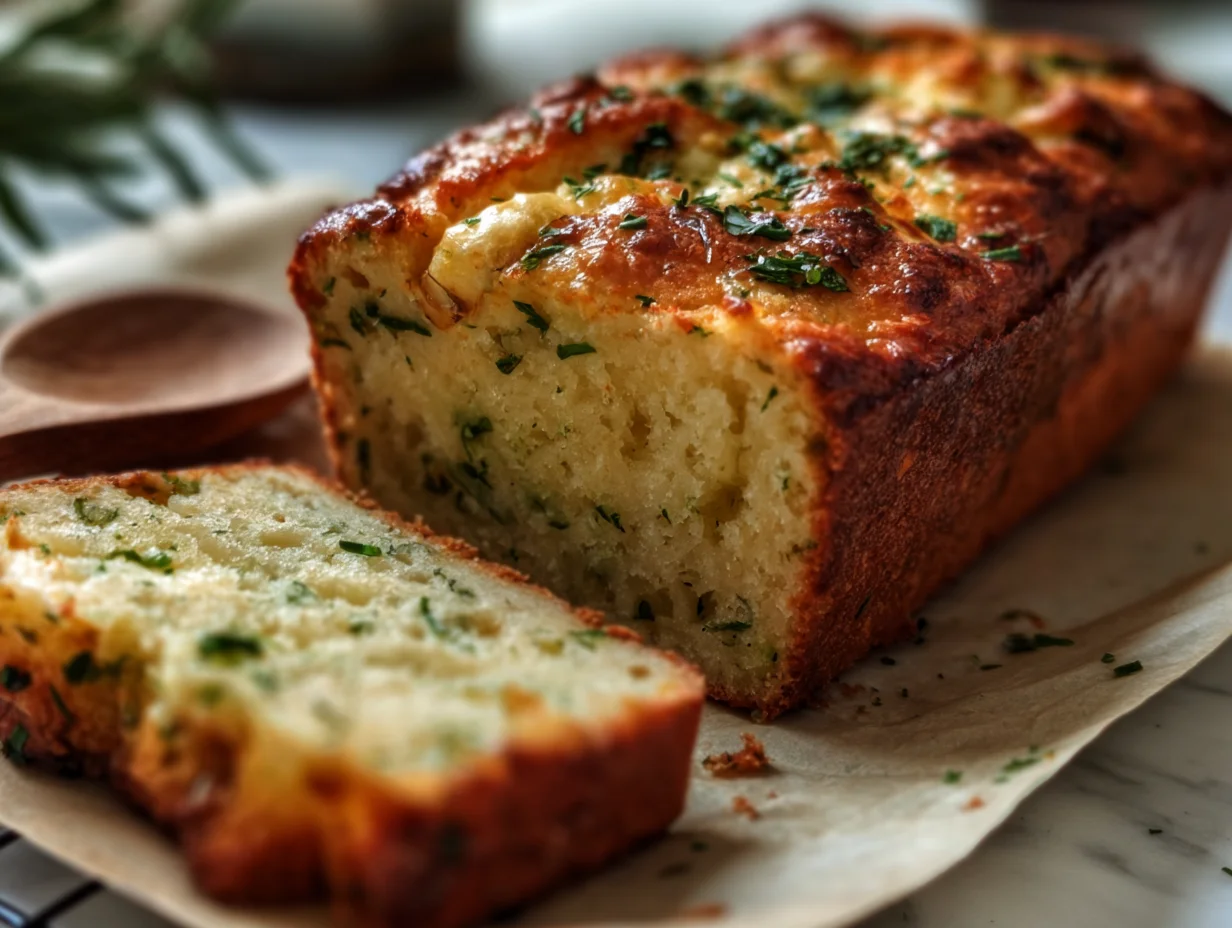
If you’ve ever found yourself craving warm, homemade bread but didn’t have a packet of yeast in sight, you’re in for a treat today. This No-Yeast Wonder Bread is exactly what it sounds like—a total lifesaver when you’re low on ingredients but high on cravings. It’s soft, tender, lightly golden on the outside, and perfectly satisfying… all without a single speck of yeast.
This recipe has quickly become a go-to in my kitchen, especially on busy weeknights or when the bread stash runs low and a store run feels like too much effort. I can’t tell you how many times I’ve pulled this out of the oven, sliced off a warm piece, slathered it with butter, and called it dinner (no shame!). Plus, with a total bake time of under an hour, it’s faster than waiting for a dough to rise.
So whether you’re new to bread-making or just need something quick, this is your new secret weapon.
Let’s dive into the first steps!
Why You’ll Love This No-Yeast Bread
-
No rise time – skip the yeast and save hours
-
Simple pantry ingredients – nothing fancy required
-
Ready in under an hour
-
Soft, fluffy texture with a beautiful golden crust
-
Customizable – add cheese, herbs, or garlic for a flavor twist
Ingredients You’ll Need
Before we get started, here’s what you’ll need for this magic loaf:
-
2 cups all-purpose flour
-
1 tablespoon baking powder
-
½ teaspoon baking soda
-
½ teaspoon salt
-
1 tablespoon sugar
-
1 cup buttermilk (or make your own: 1 cup milk + 1 tablespoon vinegar, let sit 5 mins)
-
¼ cup neutral oil (like vegetable or canola)
-
1 large egg
That’s it! All stuff you likely already have in your kitchen. The buttermilk gives it a subtle tang and helps with rise and tenderness. If you don’t keep buttermilk on hand, the milk + vinegar trick works perfectly.

STEP-BY-STEP INSTRUCTIONS
Step 1: Prep Your Pan and Preheat the Oven
Start by preheating your oven to 350°F. Grease a standard 9×5-inch loaf pan with non-stick spray or a bit of oil. Set it aside. This bread bakes best in a standard loaf pan to give it that classic sandwich shape.
Step 2: Mix the Dry Ingredients
In a large mixing bowl, whisk together:
-
2 cups all-purpose flour
-
1 tablespoon baking powder
-
½ teaspoon baking soda
-
½ teaspoon salt
-
1 tablespoon sugar
Give it a good mix to make sure all the leavening agents are evenly distributed. This helps the bread rise evenly without any weird pockets of baking powder.
Step 3: Whisk the Wet Ingredients
In a separate medium bowl, combine:
-
1 cup buttermilk (or milk + vinegar substitute)
-
¼ cup neutral oil
-
1 large egg
Whisk until the mixture is smooth and the egg is fully incorporated. This wet mix is what’s going to give the bread its moisture and softness.
Step 4: Combine Wet and Dry
Now for the most satisfying part—bringing it all together.
Pour the wet mixture into the bowl of dry ingredients and gently stir with a wooden spoon or rubber spatula. Be careful not to overmix. The batter will be thick and a little sticky, and that’s exactly what we want. Overmixing can lead to dense bread, so just stir until everything is combined and no streaks of flour remain.

How to Bake No-Yeast Wonder Bread to Golden Perfection
Welcome to Part 2 of this delicious journey! If you’ve already mixed up your batter and it’s sitting there thick and ready, you’re just a few steps away from a warm, homemade loaf of bread that’s as comforting as it is simple.
This no-yeast bread really is a wonder. It skips the kneading, skips the rise time, and goes straight into the oven. And yet, the result is still tender, sliceable, and so satisfying—especially when you pull it out warm and fragrant.
Alright, let’s get this beauty into the oven!
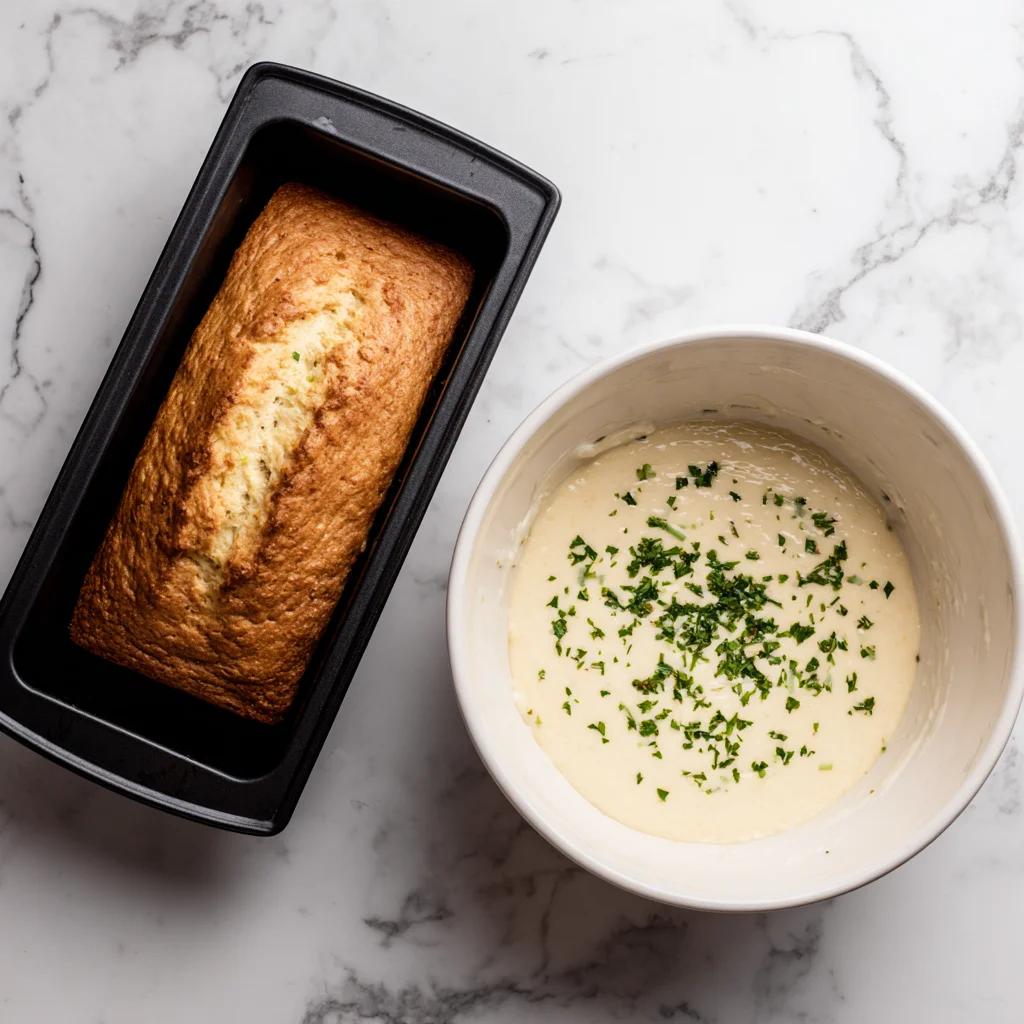
Step 5: Transfer to the Pan
Once your batter is fully mixed, pour it into your prepared loaf pan. It’ll be thick, so you might need to use a spatula to spread it evenly and smooth out the top. Don’t worry if it doesn’t look like traditional bread dough—this one behaves more like a muffin batter and that’s totally okay.
Try to even it out as much as possible so it bakes uniformly. You’ll notice it already has a nice rise to it, thanks to the baking powder and soda working their magic the moment the buttermilk was added.

Step 6: Bake It
Place the loaf pan into your preheated 350°F oven and bake for 40 to 45 minutes.
You’ll know it’s ready when the top is golden brown and a toothpick inserted into the center comes out clean. Depending on your oven, you might want to check it around the 40-minute mark, especially if your oven tends to run hot.
If the top is browning too quickly before the inside is done, just loosely tent a piece of foil over it for the last 10 minutes of baking.
Step 7: Cool Before Slicing
This is the hardest part—waiting! But it’s worth it.
Let the bread cool in the pan for about 10 minutes. Then, carefully remove it and transfer to a wire rack to cool completely. Slicing too early can cause the inside to get gummy, so try to resist the urge to cut into it while it’s still hot.
Once cooled, the texture firms up just enough to give you clean slices that are perfect for toast or sandwiches.
Tips for the Best No-Yeast Bread
Even though this recipe is super simple, a few extra tips can take your loaf from good to great:
-
Use fresh baking powder and soda: Since these are your leavening agents, make sure they’re not expired. Stale ingredients = a flat, dense loaf.
-
Don’t overmix: The batter should be combined, but don’t beat it to death. A few lumps are fine.
-
Customize your flavors: This is a super versatile base recipe. Stir in ½ cup of shredded cheese, 1–2 teaspoons of dried herbs, or a dash of garlic powder for something extra special.
-
Make your own buttermilk: If you don’t have store-bought buttermilk, no problem. Just mix 1 cup milk with 1 tablespoon white vinegar or lemon juice, let it sit for 5 minutes, and you’re good to go.
-
Watch the bake time: Every oven is different. Keep an eye on your loaf starting at 40 minutes, and test with a toothpick to be sure it’s fully baked.
Ways to Serve Your No-Yeast Wonder Bread
This bread isn’t just easy—it’s useful. Here are a few ways I love serving it:
-
Toasted with butter or jam – Simple and so satisfying.
-
Grilled cheese – Slices hold up beautifully when toasted or grilled.
-
Hearty sandwich bread – Great for stacking with meats, veggies, or spreads.
-
Breakfast base – Top with eggs, avocado, or even a little honey and cinnamon.
The neutral flavor makes it a blank canvas, and the texture holds up really well whether you’re eating it fresh or toasted the next day.
No-Yeast Wonder Bread FAQs and Final Thoughts
We’ve walked through the ingredients, the simple steps, and even a few flavor variations—but before you head off to whip up your first (or fifth) loaf of this quick and cozy bread, let’s answer some of the most common questions readers have about this recipe.
Whether you’re baking this on a whim, for a weeknight dinner, or just because the craving hit, this last part will help make sure your loaf turns out just right.

Frequently Asked Questions
1. Can I use whole wheat flour instead of all-purpose?
Yes, but keep in mind it will result in a denser loaf. If you’re using whole wheat, try substituting just half of the flour with whole wheat and keep the rest all-purpose. You may also need a touch more buttermilk, as whole wheat absorbs more moisture.
2. What if I don’t have buttermilk?
You can easily make a substitute at home. Mix 1 cup of milk (preferably whole milk) with 1 tablespoon of white vinegar or lemon juice. Let it sit for 5 minutes before using. This DIY buttermilk helps activate the baking soda for a good rise.
3. Can I add mix-ins like cheese or herbs?
Absolutely. This bread is super versatile. Try mixing in ½ cup shredded cheddar, a tablespoon of chopped chives, or a teaspoon of garlic powder. Just stir them into the dry ingredients before adding the wet.
4. Why is my bread dense or gummy in the middle?
This usually happens if the batter is overmixed or the loaf didn’t bake long enough. Make sure to stir only until the ingredients are combined, and always test with a toothpick to ensure the center is fully cooked before removing it from the oven.
5. How should I store the bread?
Store your cooled loaf in an airtight container or tightly wrapped in plastic wrap at room temperature for up to 2 days. For longer storage, slice and freeze it—then just pop a slice in the toaster when needed.
6. Can I make this recipe dairy-free?
Yes. Use a plant-based milk (like almond or oat milk) mixed with vinegar to replace the buttermilk. Also, choose an oil instead of butter if you plan to grease the pan or serve with a spread.
7. Is this bread good for sandwiches?
It’s perfect for sandwiches. The crumb is sturdy enough to hold up to fillings, and it slices cleanly once cooled. I especially love it with egg salad or grilled cheese.
Final Thoughts
There’s something really satisfying about pulling a loaf of bread out of the oven—especially when it came together with basic ingredients and almost no effort. That’s the beauty of this No-Yeast Wonder Bread.
No yeast? No problem. No time for rising? Still fine. This recipe is here to fill the gap between store-bought and traditional bread-making, and it does the job deliciously. Whether you’re new to baking or just looking for a quick fix, this loaf is forgiving, versatile, and almost impossible to mess up.
I hope you give this recipe a try and make it your own! Maybe you’ll add garlic and rosemary, or maybe you’ll toast it up for breakfast all week. However you slice it, this bread is a keeper.
If you do try it, I’d love to hear how it turns out. Leave a comment with your favorite variations or tips—sharing your version might just inspire someone else to give it a go, too.
Print
A No-Yeast Wonder Bread
- Author: Sophia
Description
This No-Yeast Wonder Bread is soft, tender, and incredibly easy to make. Perfect for those times when you’re out of yeast or just want fresh bread in under an hour. It’s made with simple pantry staples and rises beautifully using baking powder and baking soda instead of yeast. Ideal for sandwiches, toast, or served warm with butter.
Ingredients
2 cups all-purpose flour
1 tablespoon baking powder
½ teaspoon baking soda
½ teaspoon salt
1 tablespoon sugar
1 cup buttermilk (or 1 cup milk + 1 tablespoon vinegar, rested 5 minutes)
¼ cup neutral oil (vegetable or canola)
1 large egg
Instructions
1 Preheat your oven to 350°F. Grease a standard loaf pan and set aside.
2 In a large mixing bowl, whisk together the flour, baking powder, baking soda, salt, and sugar until well combined.
3 In a separate bowl, mix the buttermilk, oil, and egg until smooth.
4 Pour the wet ingredients into the dry and stir with a spatula or wooden spoon just until the mixture comes together. Do not overmix. The batter will be thick.
5 Transfer the batter to the prepared loaf pan and smooth the top.
6 Bake for 40 to 45 minutes, or until the top is golden and a toothpick inserted in the center comes out clean.
7 Let the bread cool in the pan for 10 minutes, then remove and transfer to a wire rack to cool completely before slicing.
Notes
This bread is best enjoyed fresh but can be stored in an airtight container at room temperature for up to 2 days. Toast slices for extra flavor or use it as a base for sandwiches and melts. You can add herbs, shredded cheese, or garlic powder for variations. If you don’t have buttermilk, make a quick substitute by adding vinegar or lemon juice to regular milk.


