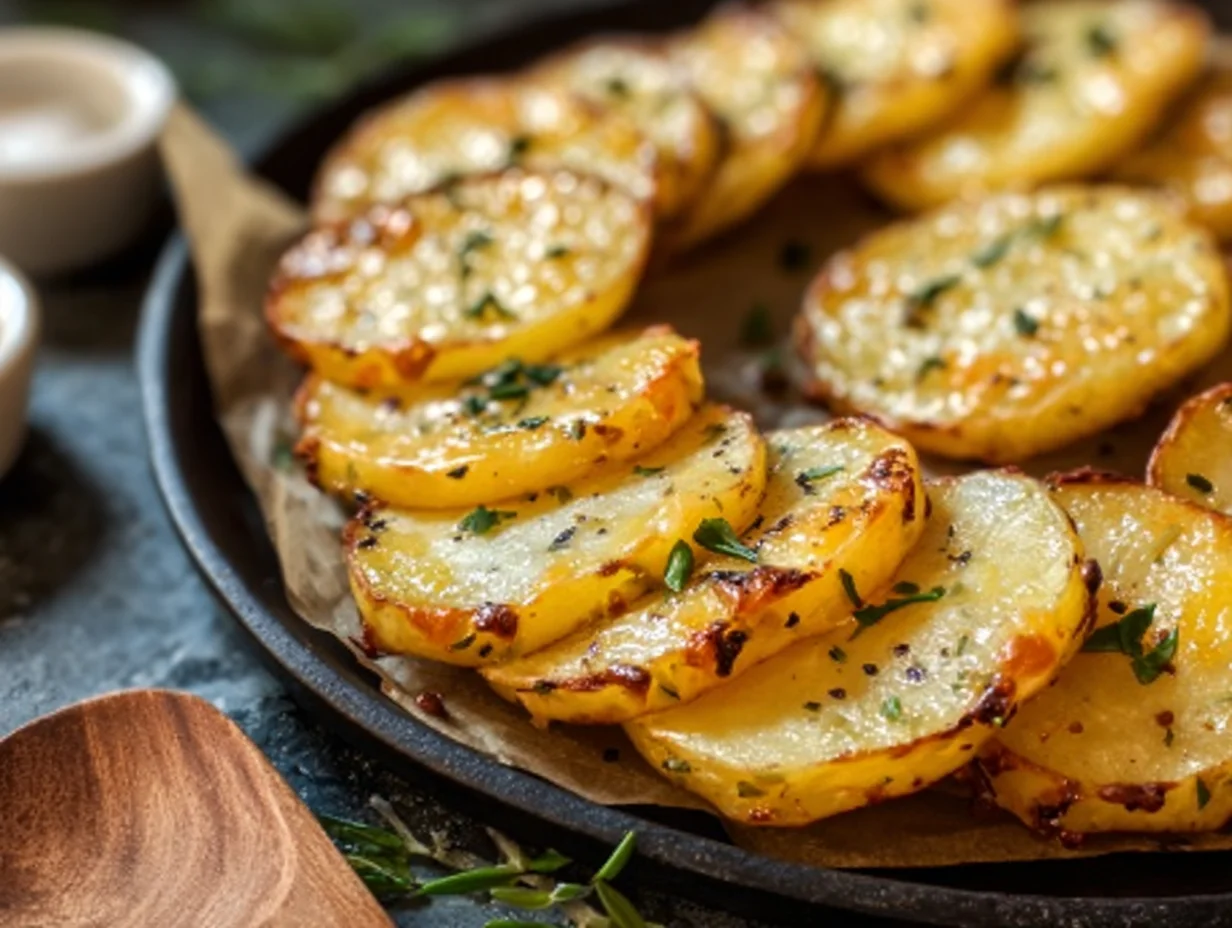
If there’s one thing I know to be true, it’s that you can never go wrong with potatoes—especially when they’re baked to crispy perfection and easy enough to make any night of the week. These Baked Potato Slices are the kind of side dish that quietly steals the show. Whether you’re making a cozy family dinner or looking for something snack-worthy for game day, this recipe is a guaranteed crowd-pleaser.
There’s something so comforting about the way these potato slices come out of the oven—golden-brown on the edges, tender in the center, and full of flavor from the garlic, paprika, and olive oil. And the best part? You don’t need any fancy tools or complicated ingredients. This is one of those recipes that proves the simplest dishes are often the most satisfying.
I actually started making these on a whim one night when I didn’t feel like peeling a whole batch of potatoes for mashed potatoes. I sliced them up, tossed them with a few spices, and popped them in the oven. The result? A perfectly crisp, flavor-packed side dish that had my family reaching for seconds—and thirds!
So whether you’re trying to sneak more veggies onto the plate or just want a healthier alternative to fries, you’re going to want to keep this recipe close. Let’s dive in!
Why You’ll Love These Baked Potato Slices
-
Quick and easy: Just 10 minutes of prep and 30 minutes in the oven.
-
Customizable: Add cheese, fresh herbs, or even bacon to take it to the next level.
-
Perfect texture: Crispy edges with soft, tender centers.
-
Healthy-ish: A lighter alternative to deep-fried potatoes.
Ingredients You’ll Need
Before we get to the how-to, here’s what you’ll need to make these delicious baked potato slices:
-
3 medium russet potatoes, scrubbed clean
-
2 tablespoons olive oil
-
1 teaspoon garlic powder
-
1 teaspoon paprika
-
Salt and black pepper, to taste
-
1 tablespoon chopped fresh parsley (optional, for garnish)
-
½ cup shredded cheddar cheese (optional, for a cheesy twist)
STEP 1: PREHEAT YOUR OVEN
Set your oven to 400°F and line a large baking sheet with parchment paper. This helps prevent sticking and makes cleanup super easy. You could also use a silicone baking mat if you have one on hand.

STEP 2: SLICE YOUR POTATOES
Using a sharp knife or mandoline, slice the potatoes into ¼-inch thick rounds. Try to keep the slices as even as possible so they bake uniformly. No one wants half-burnt, half-undercooked potatoes!
Optional tip: If you have some extra time, soak the potato slices in a bowl of cold water for 20 minutes. This helps remove excess starch, which means crispier potatoes in the end. Just make sure to dry them thoroughly with a clean kitchen towel or paper towels before seasoning.
STEP 3: SEASON THEM UP
Place the sliced potatoes in a large mixing bowl. Drizzle with olive oil, then sprinkle in the garlic powder, paprika, salt, and black pepper. Toss everything together until the slices are evenly coated. This is where all that delicious flavor starts to build.
STEP 4: ARRANGE ON BAKING SHEET
Lay the seasoned potato slices in a single layer on your prepared baking sheet. Make sure they don’t overlap—this is key to getting that crispy edge on every slice. If they’re too crowded, use a second baking sheet.
STEP 5: BAKE TO PERFECTION
Slide the tray into the oven and bake for 25 to 30 minutes, flipping the slices halfway through. When they’re done, the edges should be golden and crispy, and the centers soft and tender.
If you’re adding cheese, sprinkle it on during the last 5 minutes of baking so it melts into gooey, golden perfection.

Baked Potato Slices: Tips, Variations & Serving Ideas
Alright, now that we’ve got our golden, crispy slices baking away in the oven, let’s talk about how to really make this recipe your own. Whether you like your potatoes cheesy, herby, or loaded with toppings, this dish is super easy to customize. That’s part of what makes it such a winner—you can serve it plain and simple, or dress it up into something a little extra special.
What I love most about this recipe is its versatility. One day it’s a quick weeknight side dish, and the next it’s the star of your snack board at a get-together. So let’s keep going and talk about what happens after the oven—and how to get the most flavor and crunch out of every bite.
STEP 6: ADD OPTIONAL TOPPINGS
If you’re going the extra mile with toppings like cheese, now is the time to add it. Pull the tray out of the oven during the last 5 minutes of baking and sprinkle the potato slices with shredded cheddar cheese (or any cheese you love).
Let it melt and bubble until it just starts to brown—then you know it’s perfect.
You can also get creative here:
-
Try a sprinkle of Parmesan for a salty, nutty twist.
-
Crumble cooked bacon on top for loaded baked potato vibes.
-
Add thinly sliced green onions or a dollop of sour cream after baking for a full-on appetizer moment.
STEP 7: COOL SLIGHTLY & GARNISH
Once your slices are done, take them out of the oven and let them cool for a few minutes right on the baking sheet. They’ll continue to crisp up slightly as they rest.
If you’re using fresh parsley, now’s the time to add it. It’s not just for looks—it adds a pop of freshness that balances out the richness of the potatoes and cheese. A little chopped chives would be great too if you have some on hand.
Tips for Perfect Baked Potato Slices
Even though this recipe is simple, a few smart tips can take it from good to absolutely delicious. Here are a few things I’ve learned from making this dish more times than I can count:
-
Slice evenly: Try to keep your potato slices as uniform as possible. This ensures even cooking and avoids some slices burning while others are still underdone.
-
Don’t skip the parchment: It prevents sticking and helps the potatoes brown more evenly.
-
Use high-starch potatoes: Russet potatoes work best because they get nice and crispy. You can also use Yukon Golds for a creamier texture and a slight buttery flavor.
-
Space them out: If the slices are overlapping or too crowded, they’ll steam instead of crisp. Use two trays if needed.
-
Flip halfway: This helps both sides get that nice golden-brown crispiness.
Tasty Variations to Try
This base recipe is super flexible, and you can switch things up depending on what you’re craving or what’s in your pantry:
-
Spicy Kick: Add a pinch of cayenne pepper or chili powder along with the paprika for a little heat.
-
Italian Style: Swap garlic powder and paprika for dried oregano, basil, and a sprinkle of Parmesan.
-
Ranch Lovers: Toss the potatoes in a bit of ranch seasoning before baking.
-
Loaded Baked Style: Top with shredded cheese, crispy bacon, sour cream, and green onions.
-
Smoky BBQ: Add a bit of BBQ dry rub or smoked paprika for a smoky, savory flavor.
These are just a few ideas, but once you get the basic recipe down, you’ll find it super easy to adapt it to your taste—or the theme of your meal.

How to Serve Baked Potato Slices
These slices are more than just a side dish. Here are a few ways to serve them:
-
As a side: Pair with grilled chicken, steak, or burgers.
-
As an appetizer: Serve on a platter with dipping sauces like ranch, sour cream, or chipotle mayo.
-
As a snack: Perfect for movie night or game day.
-
As a base: Use them as a foundation for toppings like pulled pork, chili, or sautéed mushrooms.
Honestly, once you’ve made them once, you’ll start seeing the possibilities everywhere.
Storing & Reheating Leftovers
If you happen to have any leftovers (which is rare in my house), they store really well.
-
To Store: Place cooled potato slices in an airtight container and refrigerate for up to 3 days.
-
To Reheat: For best results, reheat in the oven at 375°F for about 8-10 minutes or in an air fryer until crisp again. Avoid the microwave if you can—it tends to make them a little soggy.
Baked Potato Slices: FAQs & Final Thoughts
By now, you’ve got everything you need to make the most irresistible, crispy baked potato slices from scratch. But before we wrap things up, let’s cover a few of the most common questions that pop up when people try this recipe for the first time. Whether you’re wondering about substitutions, how to get them extra crispy, or what kind of potatoes work best, I’ve got you covered.
Frequently Asked Questions
1. Can I use a different type of potato?
Yes! While russet potatoes are the go-to for that classic crispy texture, Yukon Gold potatoes work great too. They have a naturally buttery flavor and still crisp up nicely. Just avoid waxy varieties like red potatoes, as they don’t get as crispy.
2. Do I need to peel the potatoes?
Not at all. In fact, I recommend leaving the skin on for added texture and nutrients. Just be sure to scrub them well before slicing.
3. Why do I need to flip the slices halfway through?
Flipping helps ensure that both sides cook evenly and get that beautiful golden-brown crispiness. If you skip this step, the bottoms may get too dark while the tops stay soft.
4. How do I get them extra crispy?
Here are a few tricks:
-
Soak the slices in cold water for 20 minutes before baking to remove excess starch.
-
Make sure to pat them completely dry before tossing with oil and spices.
-
Don’t overcrowd the pan—give each slice space.
-
Use a hot oven (400°F or higher) and bake on the middle rack.
5. Can I make these in an air fryer?
Yes, and they turn out amazing! Cook at 375°F for 10–15 minutes, shaking or flipping halfway through. You may need to do them in batches depending on the size of your air fryer.
6. What are the best dipping sauces for these?
These potato slices are super dippable! Here are a few favorite sauces:
-
Ranch dressing
-
Garlic aioli
-
Spicy sriracha mayo
-
Honey mustard
-
Classic ketchup or even BBQ sauce
7. Can I make them ahead of time?
These are best served fresh for peak crispiness, but you can prep them ahead by slicing and seasoning the potatoes, then storing them in the fridge (covered) until you’re ready to bake. Don’t slice too far in advance though—potatoes can oxidize and turn brown.
Final Thoughts: Your New Favorite Side Dish
These Baked Potato Slices are the kind of recipe you’ll find yourself coming back to again and again. They’re everything a good side dish should be—easy, versatile, and absolutely delicious. Whether you’re serving them next to grilled chicken on a weeknight or loading them up with toppings for a party snack, they always hit the spot.
And let’s be honest, they’re a whole lot more fun than your standard roasted potatoes. Something about that crispy edge and tender center just keeps people coming back for more.
I hope you give this recipe a try, and when you do, don’t forget to come back and let me know how it turned out! Did you add cheese? Go full loaded style? Or maybe try a new seasoning blend? I’d love to hear what variations you come up with.
Print
Baked Potato Slices
- Author: Sophia
Description
Baked Potato Slices are a simple, crispy, and flavorful side dish that pairs well with just about any main course. These thinly sliced potatoes are oven-roasted to golden perfection and can be customized with your favorite herbs, cheeses, or dipping sauces. They’re perfect for snacking, entertaining, or as a lighter alternative to traditional fries.
Ingredients
3 medium russet potatoes, scrubbed clean
2 tablespoons olive oil
1 teaspoon garlic powder
1 teaspoon paprika
Salt and black pepper to taste
1 tablespoon chopped fresh parsley (optional)
½ cup shredded cheddar cheese (optional)
Instructions
Preheat the oven to 400°F and line a large baking sheet with parchment paper. Slice the potatoes into ¼-inch thick rounds. Place them in a large bowl and toss with olive oil, garlic powder, paprika, salt, and pepper until evenly coated. Arrange the potato slices in a single layer on the prepared baking sheet, making sure they do not overlap.
Bake for 25 to 30 minutes, flipping halfway through, until the edges are crisp and the centers are tender. If using cheese, sprinkle it over the slices during the last 5 minutes of baking and allow it to melt. Remove from the oven and let them cool slightly before serving. Garnish with parsley if desired.
Notes
For extra crispiness, soak the sliced potatoes in cold water for 20 minutes before baking, then dry thoroughly. Yukon gold potatoes also work well and have a slightly buttery flavor. You can top the slices with sour cream, green onions, or crumbled bacon for a loaded version. Leftovers reheat best in the oven or air fryer to maintain their texture.