If there’s one thing that instantly takes me back to cozy weekends at home, it’s the smell of fresh biscuits baking in the oven. There’s something so comforting about pulling out a golden, buttery batch, steam rising, ready to be slathered with jam or honey—or just devoured as-is because they’re that good.
Today, I’m sharing a recipe that holds a special place in my heart (and my recipe box): Butter Swim Biscuits. The name might sound fancy, but trust me, these biscuits are as simple to make as they are delicious. What makes them so special? It’s all in the name—the dough literally “swims” in butter as it bakes, giving you a perfectly crisp, golden bottom and a soft, tender inside that practically melts in your mouth.
Whether you’re whipping these up for a lazy Sunday breakfast, a brunch with friends, or to serve alongside your favorite comfort food dinner, Butter Swim Biscuits never disappoint. Plus, you don’t need any fancy equipment or hard-to-find ingredients—just good ol’ pantry staples and a stick of butter.
Let’s get started!
INGREDIENTS YOU’LL NEED
Before we dive into the steps, here’s everything you’ll need to make these heavenly biscuits:
-
2 1/2 cups all-purpose flour
-
1 tablespoon granulated sugar
-
1 tablespoon baking powder
-
1 teaspoon salt
-
1 3/4 cups buttermilk
-
1/2 cup (1 stick) unsalted butter, melted
Note: I’ll also share a quick tip for a buttermilk substitute a bit later, just in case you don’t have any on hand!
STEP-BY-STEP INSTRUCTIONS: STARTING THE BISCUITS
STEP 1: PREHEAT YOUR OVEN
First things first—preheat your oven to 450°F (230°C). These biscuits bake at a higher temperature to get that perfectly golden top and buttery crust.
STEP 2: MIX YOUR DRY INGREDIENTS
In a large mixing bowl, whisk together the flour, sugar, baking powder, and salt. Make sure everything is well combined. This ensures your biscuits rise evenly and have a balanced flavor.

STEP 3: ADD THE BUTTERMILK
Pour in the buttermilk and gently stir until a soft dough forms. Be careful not to overmix here—overworking the dough can make your biscuits tough instead of tender and fluffy. The dough will be sticky, and that’s exactly what we want.
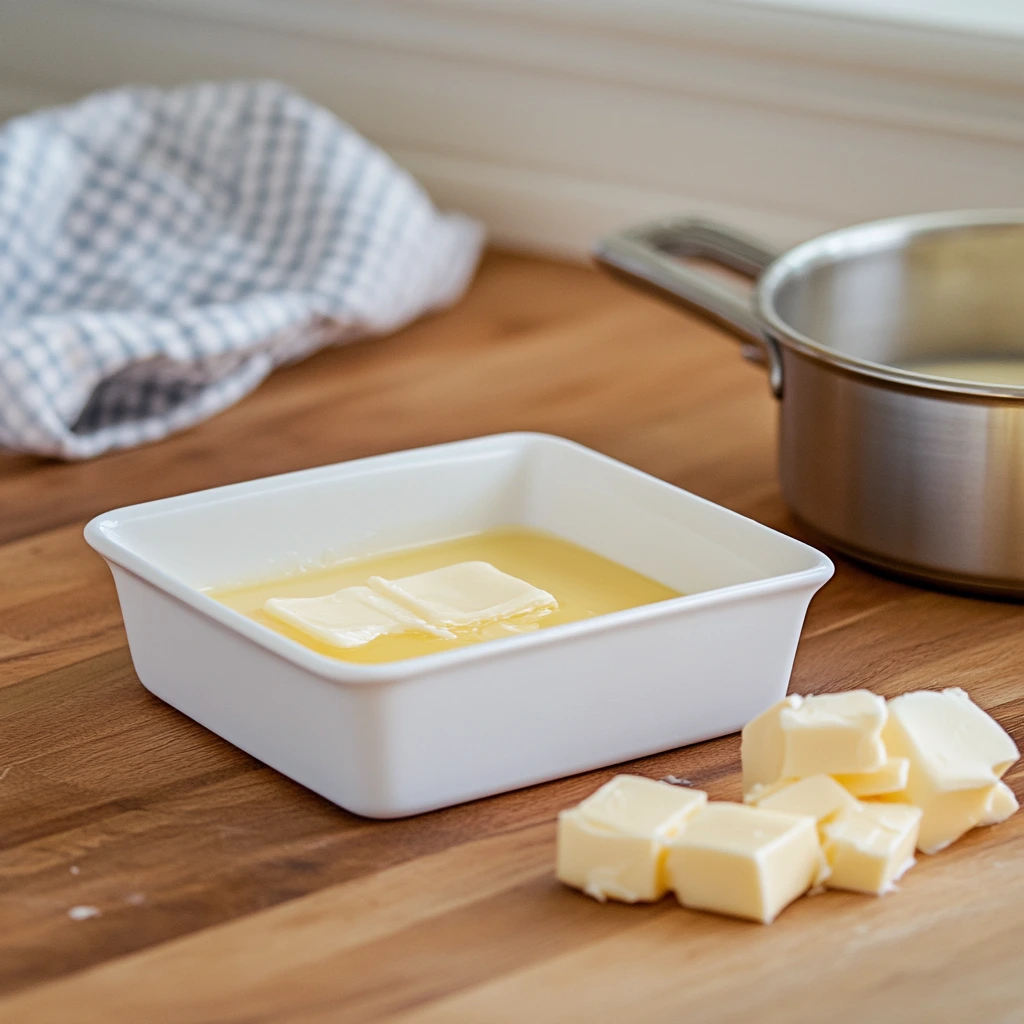
STEP 4: PREP YOUR BAKING DISH
Next, grab an 8×8 inch or 9×9 inch baking dish (both work perfectly). Pour the melted butter directly into the dish, tilting it gently to make sure the butter evenly coats the bottom. This pool of butter is what the dough will “swim” in, creating that rich, crisp bottom we all love.
STEP 5: TRANSFER THE DOUGH
Spoon the dough into the butter-filled dish. Use a spatula or the back of a spoon to gently spread it out to the edges. Don’t worry if the butter pools around the edges or even on top of the dough—that’s exactly what should happen. It’s part of the magic!
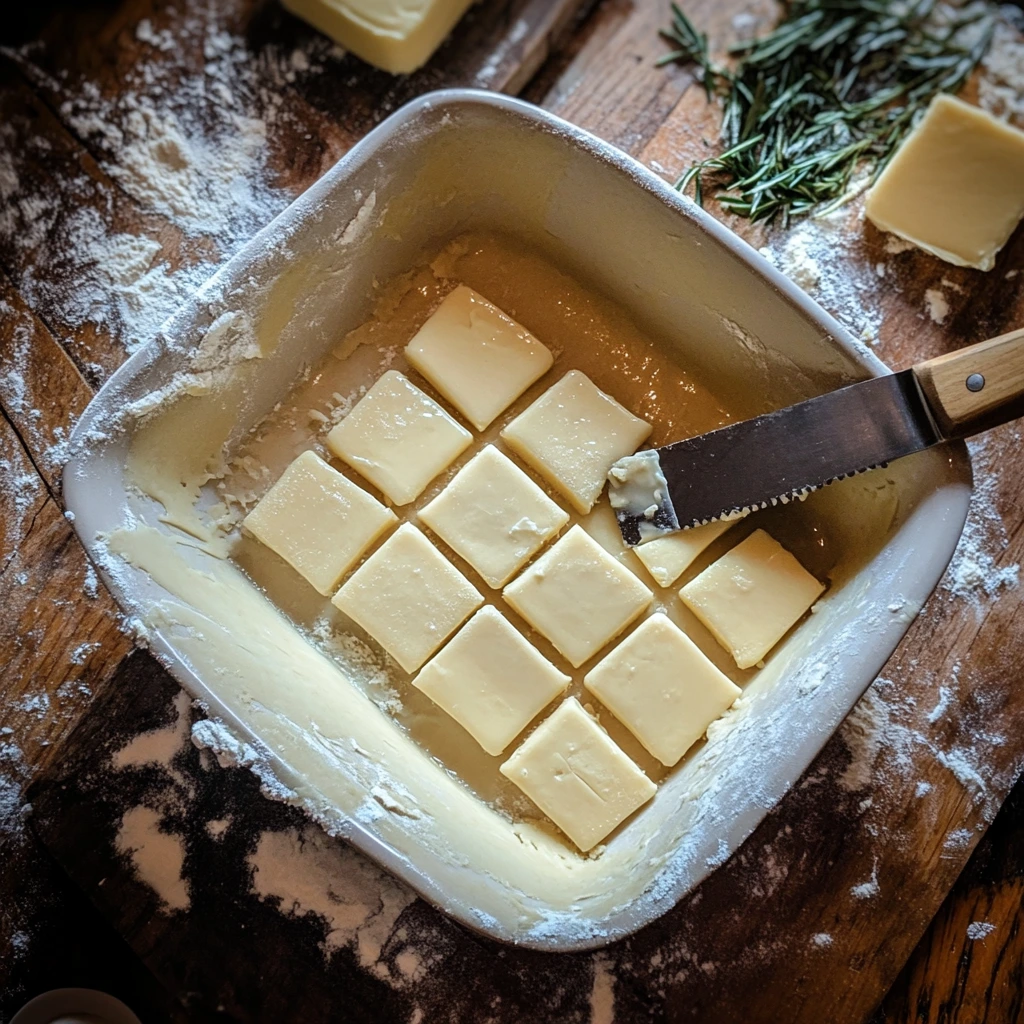
STEP 6: SCORE THE DOUGH
Before baking, use a sharp knife to cut the dough into 9 squares. This little trick helps the biscuits pull apart easily once they’re baked and also allows that delicious butter to seep into all the little crevices.
![]()
THE BEST BUTTER SWIM BISCUITS: FINISHING TOUCHES AND PRO TIPS
Alright, let’s pick up where we left off. By now, your Butter Swim Biscuit dough is resting comfortably in that buttery baking dish, scored into perfect squares, and ready for its golden transformation. The best part is just ahead—watching that butter bubble and brown in the oven as the biscuits rise into soft, fluffy perfection.
FINAL BAKING STEPS
STEP 7: BAKE THE BISCUITS
Now that your oven is fully preheated to 450°F (230°C), place the baking dish on the center rack. Bake the biscuits for 20 to 25 minutes. Keep an eye on them around the 20-minute mark; you’re looking for a beautiful golden-brown top and edges.
The high heat works its magic here, creating those crispy, buttery bottoms while the insides stay soft and fluffy. You’ll know they’re ready when the top has that irresistible golden hue and the center biscuits no longer look doughy.
STEP 8: COOL SLIGHTLY AND SERVE
Once baked, remove the biscuits from the oven and allow them to cool slightly in the pan. They’re best served warm, right from the dish. You can use a spatula to lift out each square, or just let everyone grab a square straight from the pan—family-style!
TIPS FOR THE BEST BUTTER SWIM BISCUITS
I’ve made these biscuits more times than I can count, and along the way, I’ve picked up a few tricks to make sure they come out perfect every single time. Here are my top tips:
Don’t skip the scoring.
Cutting the dough into squares before baking isn’t just for looks—it helps the biscuits bake more evenly and makes them easy to separate after baking.
Handle the dough gently.
As with most biscuit recipes, the less you handle the dough, the better. Overmixing develops the gluten too much and can make your biscuits dense.
Use real buttermilk.
If you can, use real buttermilk—it gives the biscuits a tangy flavor and extra tenderness. If you don’t have any on hand, you can easily make a substitute by mixing 1 tablespoon of lemon juice or vinegar into 1 3/4 cups of milk and letting it sit for about 5 minutes.
Use unsalted butter.
Since you’re adding salt to the dry ingredients, using unsalted butter gives you better control over the overall saltiness of the biscuits.
FUN VARIATIONS TO TRY
One of the best things about Butter Swim Biscuits is how easy they are to customize. Here are a few delicious variations you can experiment with:
Cheesy Garlic Biscuits:
Add 1 cup of shredded cheddar cheese and 1 teaspoon of garlic powder to the dry ingredients for a savory twist.
Herb Biscuits:
Mix in 2 tablespoons of finely chopped fresh herbs like rosemary, thyme, or chives to give your biscuits a fresh, aromatic flavor.
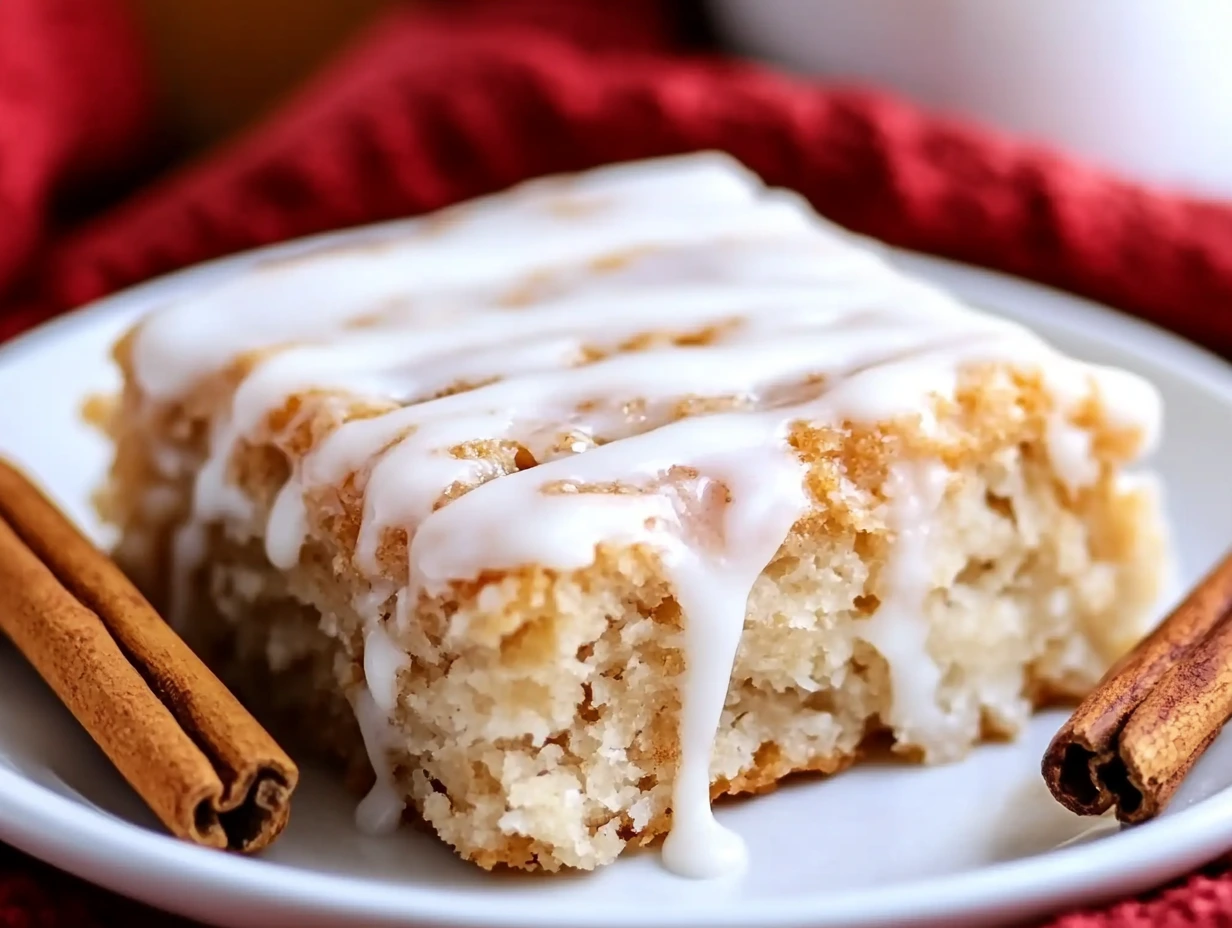
Sweet Cinnamon Biscuits:
For a breakfast treat, add 2 tablespoons of sugar and 1 teaspoon of cinnamon to the dry mix. Drizzle a simple glaze (powdered sugar + milk) over the warm biscuits after baking.
Spicy Jalapeño Cheddar Biscuits:
Stir in 1 cup of shredded cheddar and 1–2 finely diced jalapeños for a biscuit with a kick.
WHY YOU’LL LOVE THIS RECIPE
What I love most about Butter Swim Biscuits is that they’re completely fuss-free. You don’t need to cut out individual biscuits, chill any butter, or use a food processor. Everything comes together in one bowl, gets spread into one pan, and bakes to golden perfection. They’re rustic, homey, and always a hit no matter who I serve them to.
Coming up next in Part 3, we’ll dive into some of the most frequently asked questions about Butter Swim Biscuits, troubleshoot a few common issues, and wrap things up with some final thoughts. Stay with me—it’s going to be good!
BUTTER SWIM BISCUITS: FAQ & FINAL THOUGHTS
We’ve walked through all the steps, shared some handy tips, and even explored a few fun variations. But before we wrap up, let’s cover some of the most common questions I get about Butter Swim Biscuits. This way, you’ll head into your kitchen feeling totally confident and ready to bake up a perfect batch.
FREQUENTLY ASKED QUESTIONS
1. Can I make Butter Swim Biscuits ahead of time?
Yes! You can mix the dough a few hours ahead and refrigerate it right in the pan (cover it with plastic wrap). When you’re ready to bake, just take it out, let it sit at room temperature for about 20 minutes while the oven preheats, and bake as usual.
2. What if I don’t have buttermilk?
No buttermilk? No problem! Simply add 1 tablespoon of lemon juice or white vinegar to 1 3/4 cups of regular milk. Let it sit for 5 minutes, and you’ve got a great buttermilk substitute that works beautifully in this recipe.
3. Can I use self-rising flour instead of all-purpose flour?
You can, but you’ll need to adjust the recipe a bit. If using self-rising flour, omit the baking powder and salt, since self-rising flour already contains those ingredients. The texture will still be soft and fluffy.
4. Why did my biscuits turn out dense?
Dense biscuits are often the result of overmixing the dough. Remember to stir just until combined. The dough should be a little sticky and lumpy—that’s the secret to tender biscuits.
5. Can I double the recipe?
Absolutely! Just use a larger baking dish, such as a 9×13 inch pan, and keep an eye on your baking time. You may need to add a few extra minutes since a larger batch might take a bit longer to bake through.
6. How should I store leftovers?
These biscuits are best enjoyed warm, but if you do have leftovers, store them in an airtight container. They’ll stay fresh at room temperature for up to 2 days, or in the fridge for up to 5 days. You can reheat them in the microwave or oven before serving.
7. Can I freeze Butter Swim Biscuits?
Yes, you can freeze them! Let the biscuits cool completely, wrap them individually in plastic wrap, and store them in a freezer-safe bag. When you’re ready to enjoy, thaw them at room temperature and reheat in the oven for the best texture.
FINAL THOUGHTS
Butter Swim Biscuits are one of those recipes that you’ll find yourself coming back to again and again. They’re simple, versatile, and packed with that rich, buttery flavor we all crave. Whether you’re serving them at a family breakfast, bringing them to a potluck, or pairing them with a cozy dinner, they’re always a hit.
What I love most is how forgiving this recipe is. Even if you’re new to baking, these biscuits are incredibly easy to master. And once you do, you’ll be tempted to experiment with different flavors and add-ins to make them your own.
If you try this recipe, I’d love to hear how it turned out! Feel free to leave a comment with your favorite variations or tips. And if you’ve got a tried-and-true way to enjoy Butter Swim Biscuits, share it with the rest of us—because around here, there’s always room for one more great biscuit idea.
Happy baking!
Print
Butter Swim Biscuits
- Author: Sophia
Description
Butter Swim Biscuits are soft, fluffy, and incredibly buttery. The name comes from the unique method of baking the biscuits directly in a pool of melted butter, which creates a golden, crisp bottom and a tender, moist interior. These biscuits are perfect for breakfast, brunch, or served alongside your favorite comfort meals.
Ingredients
2 1/2 cups all-purpose flour
1 tablespoon granulated sugar
1 tablespoon baking powder
1 teaspoon salt
1 3/4 cups buttermilk
1/2 cup (1 stick) unsalted butter, melted
Instructions
Preheat the oven to 450°F (230°C).
In a large bowl, whisk together the flour, sugar, baking powder, and salt until well combined.
Pour in the buttermilk and stir until a soft dough forms. Do not overmix.
Pour the melted butter into an 8×8 inch or 9×9 inch baking dish, making sure it evenly coats the bottom.
Transfer the biscuit dough directly into the butter-filled dish. Gently spread the dough to the edges using a spatula or the back of a spoon. The butter will pool around and over the dough.
Use a sharp knife to cut the dough into 9 squares before baking. This will help the biscuits separate easily once baked.
Place the baking dish into the preheated oven and bake for 20 to 25 minutes, or until the top is golden brown and the biscuits are cooked through.
Remove from the oven and let cool slightly before serving. The biscuits can be served directly from the pan.
Notes
Using buttermilk is key for tender, flavorful biscuits; if you don’t have buttermilk, you can make a substitute by mixing 1 tablespoon of lemon juice or vinegar into 1 3/4 cups of milk and letting it sit for 5 minutes.
Don’t worry if the butter pools around the dough; this is what gives the biscuits their rich, buttery crust.
For extra flavor, you can sprinkle garlic powder, shredded cheese, or chopped herbs into the dough before baking.
These biscuits are best enjoyed warm but can be stored at room temperature in an airtight container for up to 2 days or refrigerated for up to 5 days.