There’s something undeniably comforting about a poke cake—the way those little holes soak up sweet fillings, turning a simple sheet cake into an ooey-gooey masterpiece. But when you combine a rich fudge marble base with a buttery caramel–sweetened condensed milk mixture and top it all off with clouds of whipped topping and crunchy Butterfinger bits, you’ve got a dessert that practically begs to be devoured at every gathering. I first discovered this Butterfinger Poke Cake at a summer potluck, where everyone practically fought over the last slice. From the first bite, I knew I’d be making it again and again—because life is too short to skip out on extra caramel.
In my kitchen adventures, I’ve learned that the beauty of a poke cake lies in its simplicity: a few pantry-staple ingredients, minimal hands-on time, and a showstopping result. Whether you’re hosting a backyard barbecue, celebrating a birthday, or simply craving an indulgent treat, this cake has your back. Plus, it stores beautifully in the fridge, so you can prep it a day ahead and rescue yourself from last-minute dessert panic.

Before we dive into the steps, let’s gather everything we need:
Ingredients
-
1 box fudge marble cake mix (plus eggs, oil, and water as listed on the box)
-
14 oz can sweetened condensed milk
-
12 oz jar caramel topping
-
8 oz tub whipped topping, thawed
-
1 large Butterfinger candy bar, crushed
-
Chocolate syrup for drizzling (optional)
With our ingredients at the ready, let’s get to the fun part—baking and transforming this humble cake mix into a caramel-soaked wonder.
STEPS
-
Preheat and Prep the Pan
Preheat your oven to 350 °F (175 °C). Generously grease a 9×13″ baking pan with nonstick spray or a thin layer of softened butter. This ensures your cake releases cleanly after baking and makes cleanup a breeze. -
Mix and Bake the Cake
In a large mixing bowl, prepare the fudge marble cake batter according to the package directions—usually that means whisking together the cake mix with eggs, oil, and water until just combined. Avoid over-mixing; a few streaks of flour are okay. Pour the batter into the prepared pan, smoothing the top with a spatula.
Slide the pan into the oven and bake for the time specified on the box, or until a toothpick inserted into the center comes out clean—typically around 25–30 minutes. You’ll know it’s done when the cake springs back slightly to the touch. -
Let It Rest
As tempting as warm cake is, give it a few minutes to cool in the pan—about 5–10 minutes. This brief rest allows the cake crumb to settle, making it easier to poke holes in without tearing the top layer. Use this time to whisk together our luscious caramel filling. -
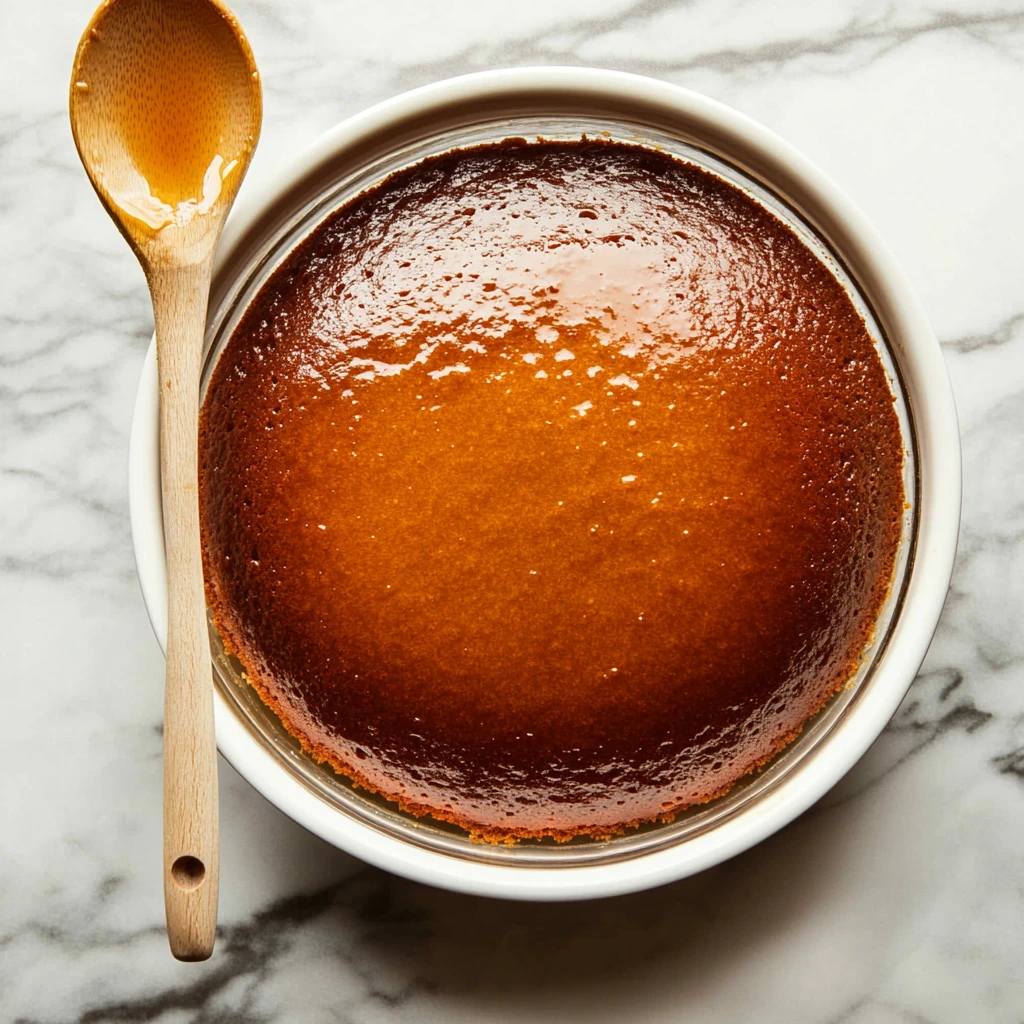
Whisk the Caramel Mixture
In a medium bowl, combine the 14 oz can of sweetened condensed milk with the entire 12 oz jar of caramel topping. Whisk vigorously until the mixture is silky-smooth and streak-free. This sweet, buttery sauce is what takes the cake from “yum” to “oh my goodness.” -
Poke and Pour
Grab the handle of a wooden spoon (or a sturdy fork) and poke holes evenly all over the warm cake—about 1–2 inches apart. These channels will welcome the caramel mixture, ensuring every bite is decadently moist. Slowly pour the caramel mixture over the cake, letting it drizzle into each hole. Don’t worry if it pools a bit on top; it will settle as you chill.
Finishing Touches and Expert Tips
By now, your cake has been chilling in the fridge, the caramel–sweetened condensed milk mixture fully absorbed into every pore, and the cake itself firmed up nicely. This is where the magic really comes together: we’re going to transform that glossy caramel layer into a light, cloud-like surface and crown it with Butterfinger crunch. Let’s dive into the final steps!
STEPS
-
Spread the Whipped Topping
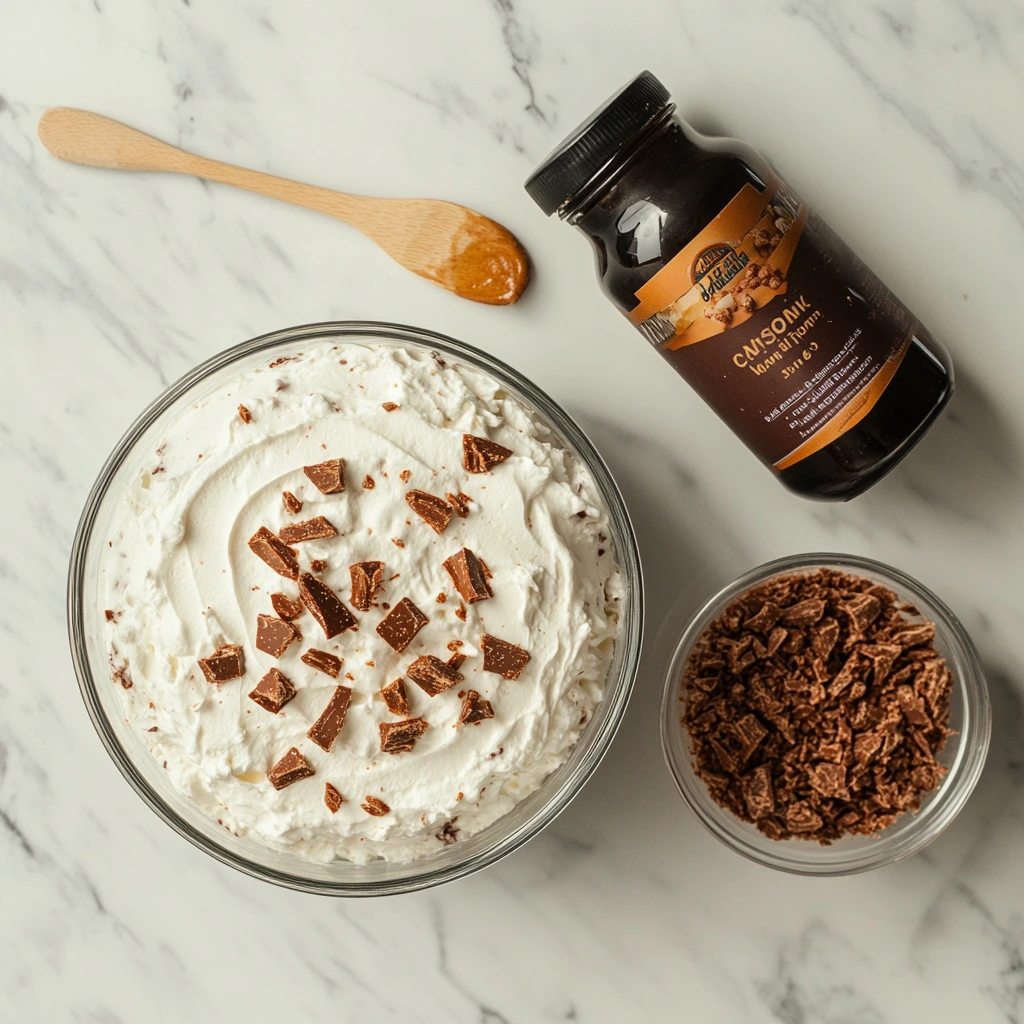
Remove the cake from the refrigerator. With a large offset spatula or the back of a spoon, gently spread the entire 8-oz tub of thawed whipped topping over the chilled caramel layer. Start in the center and work your way toward the edges, using sweeping strokes to create a smooth, even surface. If you’d like a little texture, you can leave soft peaks in the whipped topping for an artisan look. -
Top with Butterfinger Crunch
Take your crushed Butterfinger pieces and sprinkle them generously over the whipped topping. I like to hold back about a quarter of the candy to add just before serving, so the very top layer stays extra crisp. This layering trick ensures you get maximum crunch in every bite. -
Add Optional Drizzle
For a final flourish, drizzle chocolate syrup across the top in a zigzag or spiral pattern. This not only amps up the chocolate flavor but also makes your cake look professionally finished. If you prefer a more understated look, skip the drizzle and let the Butterfinger shine on its own. -
Chill Once More
Pop the cake back into the refrigerator for at least 30 minutes. This short chill firms up the whipped topping and helps everything set, making slicing much cleaner and preventing your layers from shifting. -
Slice and Serve
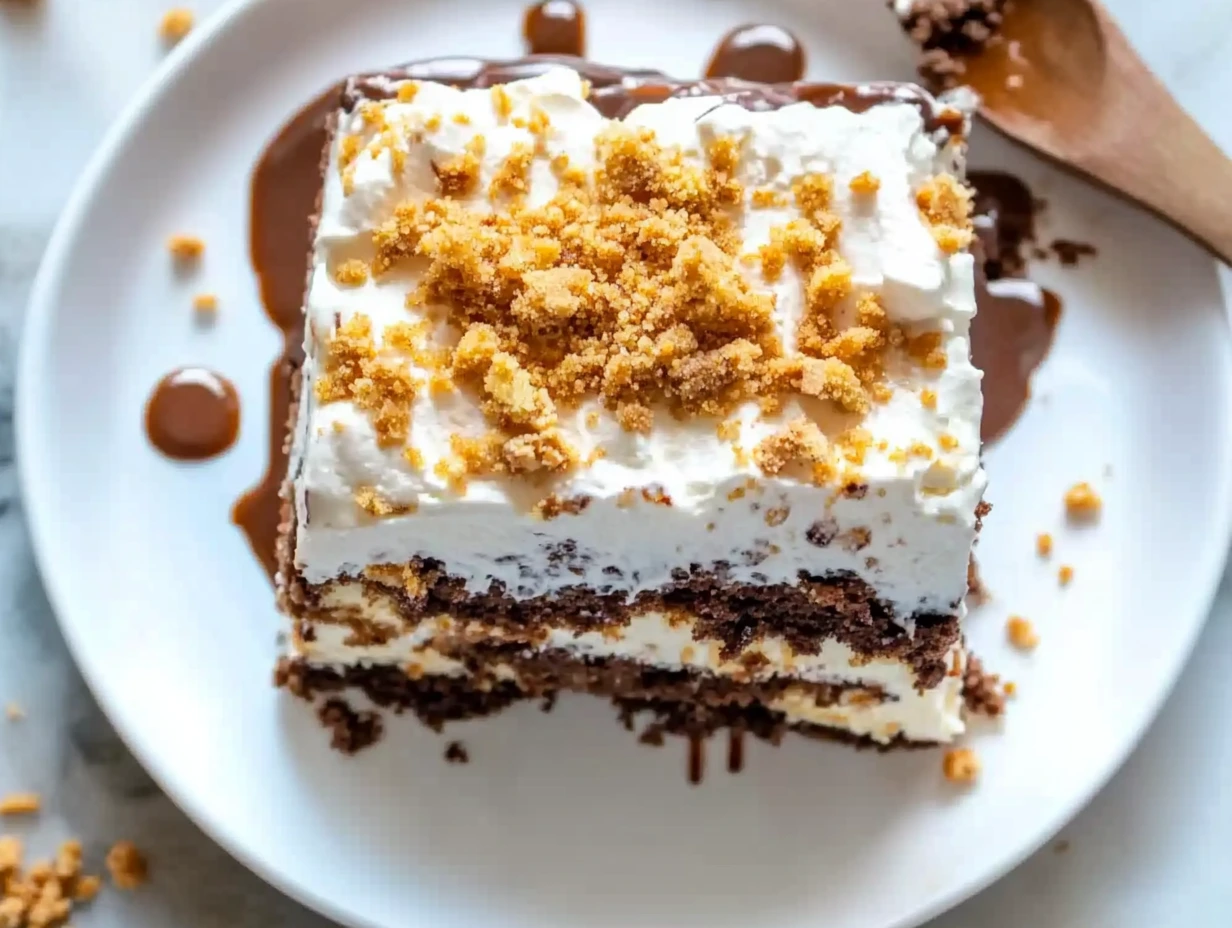
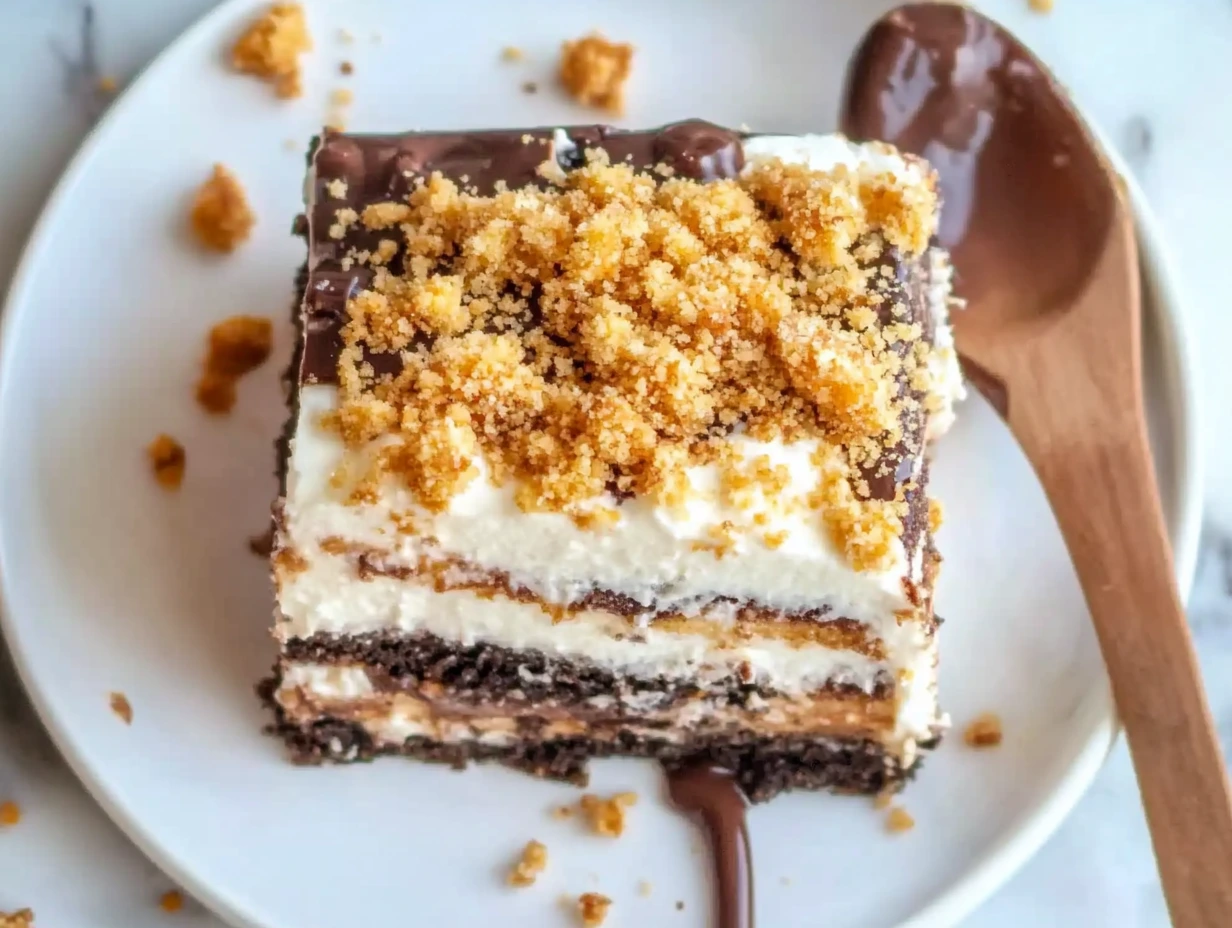
Using a sharp knife dipped briefly into hot water (then wiped dry), cut the cake into squares or rectangles. The warm blade glides through the layers without dragging the whipped topping. Transfer slices to dessert plates and watch your guests’ eyes light up at the gooey caramel, pillowy whipped topping, and Butterfinger crunch in every forkful.
Expert Tips & Variations
-
Perfect Candy Crush
To crush your Butterfinger bar cleanly, place the candy in a resealable plastic bag and use a rolling pin or the bottom of a heavy saucepan to break it into small, even pieces. For extra-fine bits, pulse briefly in a food processor—just be careful not to over-process into dust. -
Make-Ahead Magic
One of the best features of this poke cake is how well it stores. You can bake and assemble it a day ahead, then keep it covered in the fridge. The flavors meld overnight, and the whipped topping stays fresh. When you’re ready to serve, finish with the reserved Butterfinger pieces for that fresh-crunch sensation. -
Serving Size & Presentation
This 9×13″ pan yields about 12 generous pieces or 16 more modest squares. For a party, I like to slice smaller bites (about 2”x2”) and serve them on miniature dessert plates with a dollop of whipped cream on the side. -
Flavor Variations
-
Nutty Upgrade: Fold ½ cup toasted, chopped pecans into your caramel mixture before pouring it over the cake for an extra layer of texture and a hint of earthy nuttiness.
-
Candy Swap: If Butterfinger isn’t your favorite, swap in chopped Heath bar, Twix, or even Milky Way. Each candy brings its own flavor notes—Heath adds toffee crunch, Twix gives you cookie bits, and Milky Way offers nougat softness.
-
Salted Caramel Twist: For a sweet-and-salty edge, sprinkle a pinch of flaky sea salt over the caramel layer before topping with whipped cream. The salt brightens the sweetness and elevates the overall flavor profile.
-
-
Troubleshooting
-
Cake seems dry? Make sure you’re generous with your caramel mixture—those holes should be nearly bubbling with sauce before you chill.
-
Topping slides off? Ensure the whipped topping is completely thawed and very cold, and give it that extra 30-minute chill after assembly.
-
Frequently Asked Questions
1. Can I use a different cake mix flavor?
Absolutely! While the fudge marble mix gives a lovely chocolate–vanilla swirl, you can swap in yellow, chocolate, or even red velvet cake mix. Just keep in mind that the flavor profile will shift—yellow cake offers a more traditional vanilla base, while red velvet adds a subtle cocoa tang.
2. My caramel mixture is too thick—how can I thin it?
If your caramel topping seems overly stiff, whisk in 1–2 tablespoons of warm milk or heavy cream until it reaches a pourable consistency. This will help it flow into the cake holes more easily without watering down the sweetness.
3. What’s the best way to crush the Butterfinger without making a mess?
Place the candy bar pieces in a sealable plastic bag, press out excess air, then gently tap with a rolling pin or the bottom of a heavy skillet. Work in short bursts to control the size of the pieces. For a finer texture, pulse briefly in a food processor—but watch closely so you don’t pulverize into dust.
4. How long can I store the assembled cake?
Cover the pan tightly with plastic wrap or an airtight lid and refrigerate for up to 4 days. The whipped topping and caramel keep the cake moist, though the edges may firm up slightly. For the freshest texture, bring individual slices to room temperature for 10–15 minutes before serving.
5. Can I freeze Butterfinger poke cake?
Yes—you can freeze uncut slices for up to one month. Wrap each piece in plastic wrap and then in foil to prevent freezer burn. Thaw overnight in the refrigerator, then let come to room temperature briefly before serving.
6. Is there a dairy-free or vegan alternative?
To make a dairy-free version, look for nondairy whipped topping, a vegan caramel sauce (often made from coconut milk and sugar), and a plant-based cake mix. Be sure to check all ingredient labels for hidden dairy.
Conclusion
There you have it—your ultimate guide to creating the showstopping Butterfinger Poke Cake that’s guaranteed to disappear in record time. From the pillowy fudge marble base to the buttery caramel channels, whipped topping clouds, and crunchy candy bits, every layer comes together to deliver maximum indulgence with minimal fuss. Whether you’re serving it at your next celebration or sipping coffee over cake with close friends, I hope this recipe becomes a new favorite in your dessert rotation.
Print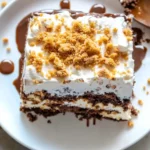
Butterfinger Poke Cake
- Author: Sophia
Description
A decadent twist on the classic poke cake, this dessert features a rich fudge marble base soaked in a buttery caramel–sweetened condensed milk mixture, topped with clouds of whipped topping and crunchy Butterfinger pieces. It’s an indulgent yet simple treat that’s perfect for potlucks, celebrations, or anytime you need a crowd-pleasing sweet fix.
Ingredients
1 box fudge marble cake mix and the eggs, oil, and water called for on the box
14 oz can sweetened condensed milk
12 oz jar caramel topping
8 oz tub whipped topping, thawed
1 large Butterfinger candy bar, crushed
Chocolate syrup for drizzling, optional
Instructions
Preheat the oven to 350 °F and grease a 9×13″ baking pan. Prepare the fudge marble cake batter according to the package directions, then pour into the pan and bake until a toothpick comes out clean. Let the cake rest for a few minutes once it’s out of the oven.
In a medium bowl whisk together the sweetened condensed milk and caramel topping until smooth. Using the handle of a wooden spoon or a fork, poke plenty of holes all over the warm cake to create channels for the caramel mixture. Pour the caramel mixture evenly over the cake, allowing it to sink into the holes, then refrigerate until the cake is completely cooled and the filling has set.
Once chilled, spread the thawed whipped topping in an even layer across the surface. Sprinkle the crushed Butterfinger bar over the top and, if desired, finish with a drizzle of chocolate syrup. Slice and serve straight from the pan.
Notes
Allowing the cake to chill at least 2 hours ensures the caramel mixture fully absorbs and the whipped topping firms up. For best flavor and texture, make the cake a day ahead and let it rest overnight.
Store leftovers covered in the refrigerator for up to 4 days. The edges may firm slightly; bring slices to room temperature for 10–15 minutes before serving if you prefer a softer bite.