There’s something magical about sliders. Maybe it’s because they’re the perfect excuse to eat more than one burger, or maybe it’s because they pack so much flavor into such a small package. Either way, these California Chili Cheeseburger Sliders are the kind of appetizer-turned-meal that instantly upgrades your game day spread or backyard gathering.
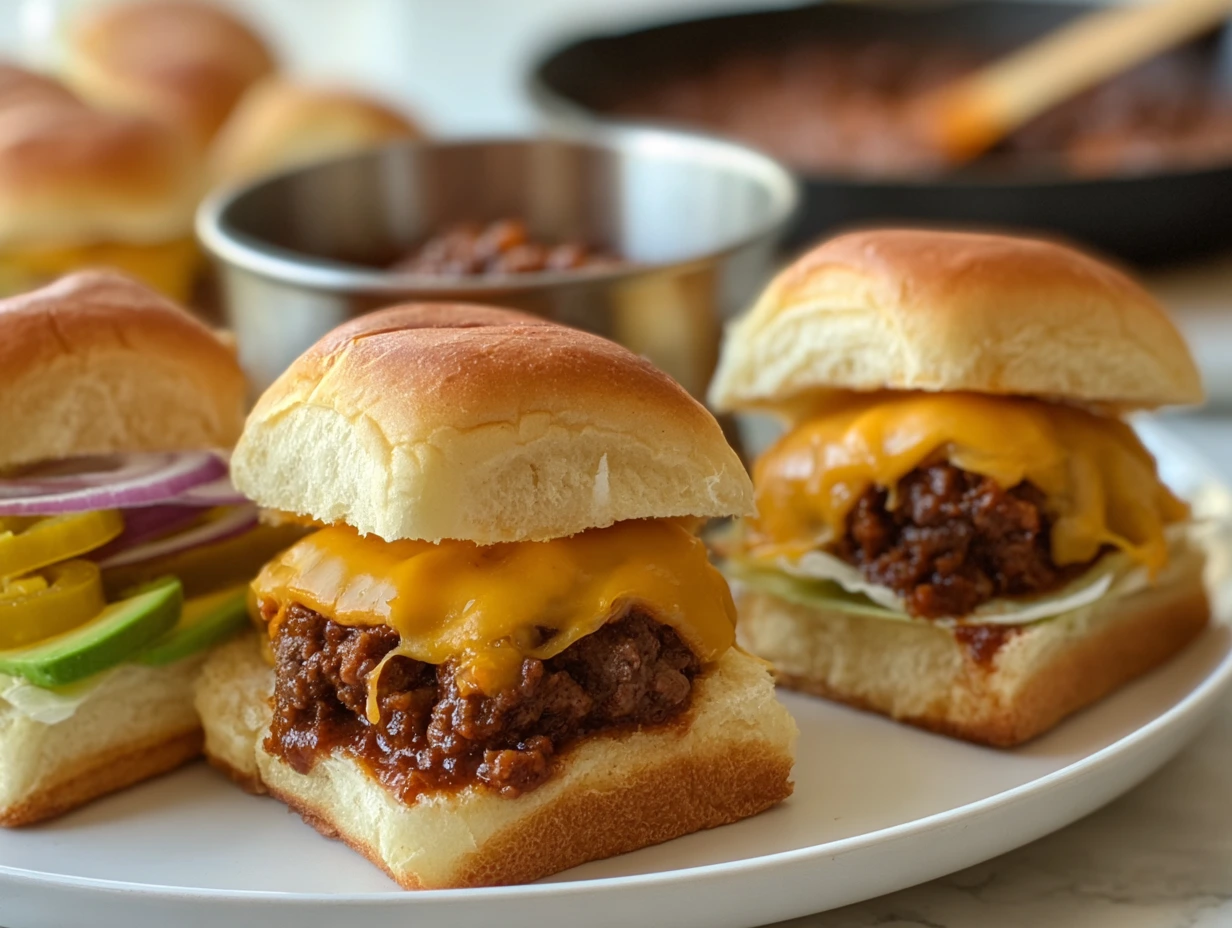
These mini burgers aren’t just your average sliders. We’re talking juicy, seasoned beef patties topped with sharp cheddar, a spoonful of homemade chili (yes, real chili!), creamy avocado, crisp red onion, and a little lettuce for crunch—all piled high on buttery toasted buns. It’s like a full-on backyard BBQ experience in every single bite.
And let me tell you—these are messy in the best way. But don’t worry, I’ve got tips to help you make them without a hitch. Whether you’re planning a party, looking for something fun for dinner, or just love a good burger twist, these sliders are a total win.
Let’s get into the first part of the recipe so you can see just how easy they are to put together.

Ingredients You’ll Need
For the Sliders:
-
1½ lbs ground beef
-
1 tsp garlic powder
-
1 tsp onion powder
-
Salt and black pepper to taste
-
1 tbsp Worcestershire sauce
For the Chili:
-
1 tbsp olive oil
-
½ lb ground beef
-
½ cup diced onion
-
1 garlic clove, minced
-
1 cup crushed tomatoes
-
1 tbsp chili powder
-
½ tsp cumin
-
Salt to taste
To Build the Sliders:
-
6 slider buns
-
6 slices sharp cheddar cheese
-
1 avocado, sliced
-
½ red onion, thinly sliced
-
Lettuce leaves
-
Pickled jalapeños (optional)
-
Butter (for toasting the buns)
STEP 1: Season and Shape the Patties
In a large bowl, mix together the 1½ lbs of ground beef with garlic powder, onion powder, Worcestershire sauce, salt, and black pepper. Try not to overmix here—just use your hands or a spoon to gently combine everything until it’s evenly seasoned.
Now divide the mixture into six equal portions and form them into small, slider-sized patties. I usually make them slightly wider than the buns since they’ll shrink a bit while cooking.
Quick Tip: Press a small dent in the center of each patty with your thumb—this helps them stay flat and cook evenly.
STEP 2: Cook the Patties
Heat a skillet or fire up your grill to medium-high. Once hot, add the patties and cook for about 3 to 4 minutes per side, depending on how well-done you like your burgers. When they’re nearly done, go ahead and add a slice of sharp cheddar cheese on top of each one. Cover the pan or close the grill lid for a minute to help that cheese get perfectly melty.
Pro Tip: Don’t press down on the patties with a spatula—that just squeezes out all those flavorful juices!

STEP 3: Make the Chili
While your patties are doing their thing, it’s time to whip up the chili. And don’t worry—it’s a small batch, quick-cooking chili that comes together fast.
In a separate skillet, heat 1 tablespoon of olive oil over medium heat. Add the diced onion and minced garlic and sauté for 2–3 minutes until the onion softens and gets fragrant. Toss in the ½ pound of ground beef and cook until it’s fully browned, breaking it apart with your spoon.
Once browned, stir in the crushed tomatoes, chili powder, cumin, and a pinch of salt. Let the mixture simmer for about 15 minutes, or until the chili has thickened slightly. It should still be saucy but not too runny—perfect for spooning on top of your sliders.
Make-Ahead Note: This chili is even better the next day. If you’re planning ahead, cook it the day before and simply warm it up when it’s time to build your sliders.
California Chili Cheeseburger Sliders: Toast, Stack, and Serve with Style
Now that we’ve got our patties grilled and chili simmered to perfection, it’s time for the fun part—putting everything together. This is where the magic really happens. Each layer adds something special, from the crisp freshness of the lettuce to the creamy avocado and that irresistible hint of heat from pickled jalapeños.
Whether you’re serving these up for a casual dinner or a backyard get-together, the build is what takes these sliders from good to unforgettable. Let’s keep it going!
STEP 4: Toast the Buns
Before we start stacking, don’t skip this step—it makes a world of difference. Lightly butter the insides of your slider buns and toast them in a skillet or in the oven until they’re golden and just crisp on the edges.
Not only does this add great flavor and texture, but it also helps the buns hold up under all those juicy, saucy toppings.
Tip: If you’re working with a big batch, toasting them on a sheet pan in the oven (about 350°F for 5–7 minutes) is the easiest way to get them done all at once.

STEP 5: Assemble the Sliders
Here comes the layering! Grab your toasted buns and start stacking:
-
Bottom bun – Start with a leaf of lettuce to help catch any juices.
-
Cheeseburger patty – Juicy, cheesy, and hot off the skillet.
-
A generous spoonful of warm chili – This is where things get deliciously messy (in the best way).
-
Sliced avocado – Creamy and cool, it balances the heat.
-
Thinly sliced red onion – For crunch and a pop of sharp flavor.
-
Pickled jalapeños (optional) – Add them if you love a spicy kick.
-
Top bun – Gently press it all down to hold everything together.
Serving Tip: Have plenty of napkins handy. These sliders are saucy, cheesy, and oh-so-worth-it.
Tips & Variations to Make These Your Own
These sliders are already packed with flavor, but if you’re anything like me, you love a little room to play. Here are a few easy ways to tweak the recipe and make it fit your crowd or cravings:
-
Make it Spicier – Add a spoonful of chipotle in adobo to the chili, or swap out cheddar for pepper jack cheese.
-
Go Mini Vegetarian – Swap the beef patty for a small black bean burger and make a hearty veggie chili.
-
Add Bacon – Because honestly, when has bacon ever made a burger worse?
-
Try a Brioche Bun – If you want to get fancy, brioche slider buns add a hint of sweetness that pairs perfectly with the savory chili and cheese.
Serving Suggestions
These sliders are hearty enough to stand on their own, but if you’re looking to build out a full spread, here are a few sides that pair perfectly:
-
Crispy French Fries – Classic and always a hit.
-
Simple Coleslaw – Adds crunch and a cool, tangy contrast.
-
Corn on the Cob – Grilled with a little chili-lime butter? Yes, please.
-
Sweet Potato Wedges – A slightly sweet and savory pairing.
If you’re entertaining, consider setting up a “slider bar” with toppings laid out buffet-style so guests can build their own. It’s a fun way to serve a crowd and lets everyone customize their bite.
California Chili Cheeseburger Sliders: FAQs and Final Thoughts
By now, you’re probably already planning when to make these irresistible California Chili Cheeseburger Sliders. And trust me, once you try them, they’ll quickly become a go-to favorite. But before you grab that spatula and start building your grocery list, let’s cover some of the most frequently asked questions to help make your slider experience even smoother.
Frequently Asked Questions
1. Can I make the chili ahead of time?
Absolutely! In fact, I highly recommend it. Making the chili a day in advance allows the flavors to develop even more. Just store it in an airtight container in the fridge and reheat it gently before assembling your sliders.
2. What type of ground beef is best for the patties?
I like to use ground beef that’s 80/20 (80% lean, 20% fat). It gives you the perfect balance of juiciness and flavor without being too greasy. If you go leaner, like 90/10, the patties might turn out a little dry.
3. Can I use store-bought chili instead of homemade?
You can, especially if you’re short on time. Just choose a thicker chili that won’t make your sliders soggy. That said, the homemade version in this recipe is quick and worth the effort for the flavor boost.
4. How can I make these sliders spicier?
There are a few easy ways to turn up the heat:
-
Add chipotle in adobo to the chili
-
Use pepper jack or jalapeño cheddar cheese
-
Layer in extra pickled jalapeños
-
Add a spicy aioli or hot sauce drizzle before serving
5. What can I use instead of avocado?
If you’re not a fan of avocado or it’s not in season, try:
-
A slice of tomato for a juicy bite
-
Guacamole for a spreadable version of avocado
-
A creamy slaw to add richness and texture
6. Can I make these sliders ahead of time for a party?
You can cook the patties and chili in advance, but I recommend assembling them just before serving to keep everything fresh and the buns from getting soggy. If needed, you can keep the sliders warm in the oven (wrapped loosely in foil) for 10–15 minutes before serving.
7. Do these work with other types of cheese?
Definitely. Sharp cheddar gives that classic burger flavor, but feel free to swap in Swiss, provolone, American, or even a smoky gouda for something a little different.
Final Thoughts: Why These Sliders Are Always a Hit
What I love most about these California Chili Cheeseburger Sliders is that they combine everything we crave in comfort food—rich, hearty beef, melty cheese, a little spice, and fresh toppings—all in a handheld, party-ready form.
They’re fun, flavorful, and easy to customize for different tastes or dietary needs. You can go mild or spicy, traditional or creative. You can even turn it into a slider bar where everyone builds their own.
And let’s be real—no one can resist a good slider. They’re the perfect size to eat one… or three.
So whether you’re hosting a crowd, spicing up a weekday dinner, or just want something a little indulgent and a lot delicious, give these California Chili Cheeseburger Sliders a try. If you do, I’d love to hear how they turn out! Leave a comment, share your own twist, or tell me what you served them with. There’s always room for new ideas in the kitchen.
Print
California Chili Cheeseburger Sliders
- Author: Sophia
Description
These California Chili Cheeseburger Sliders pack bold flavor into a small package. Juicy mini beef patties are layered with melty cheese, spicy chili, fresh avocado, and crisp toppings, all nestled in soft slider buns. Perfect for game day, parties, or a flavorful family dinner.
Ingredients
For the sliders:
1½ lbs ground beef
1 tsp garlic powder
1 tsp onion powder
Salt and black pepper to taste
1 tbsp Worcestershire sauce
For the chili:
1 tbsp olive oil
½ lb ground beef
½ cup diced onion
1 garlic clove, minced
1 cup crushed tomatoes
1 tbsp chili powder
½ tsp cumin
Salt to taste
Slider build:
6 slider buns
6 slices sharp cheddar cheese
1 avocado, sliced
½ red onion, thinly sliced
Lettuce leaves
Pickled jalapeños (optional)
Butter for toasting buns
Instructions
1 In a bowl, combine ground beef with garlic powder, onion powder, Worcestershire sauce, salt, and pepper. Mix gently and shape into 6 small slider-sized patties.
2 Heat a skillet or grill over medium-high heat and cook the patties for 3 to 4 minutes per side, or until they reach your desired doneness. In the last minute of cooking, top each patty with a slice of cheddar cheese and cover to melt.
3 In a separate pan, heat olive oil over medium heat. Add diced onion and garlic and sauté until soft. Add the ground beef and cook until browned. Stir in crushed tomatoes, chili powder, cumin, and salt. Let the chili simmer for 15 minutes until slightly thickened.
4 Lightly butter the slider buns and toast them in a pan or oven until golden.
5 Assemble the sliders by placing lettuce on the bottom bun, followed by the cheeseburger patty. Spoon warm chili over the top, then add avocado slices, red onion, and jalapeños if using. Cover with the top bun.
6 Serve immediately with napkins handy—these sliders are deliciously messy.
Notes
You can make the chili a day in advance to save time and intensify the flavors. For a spicier kick, add chipotle in adobo to the chili or use pepper jack cheese. These sliders pair perfectly with crispy fries or a simple slaw.