
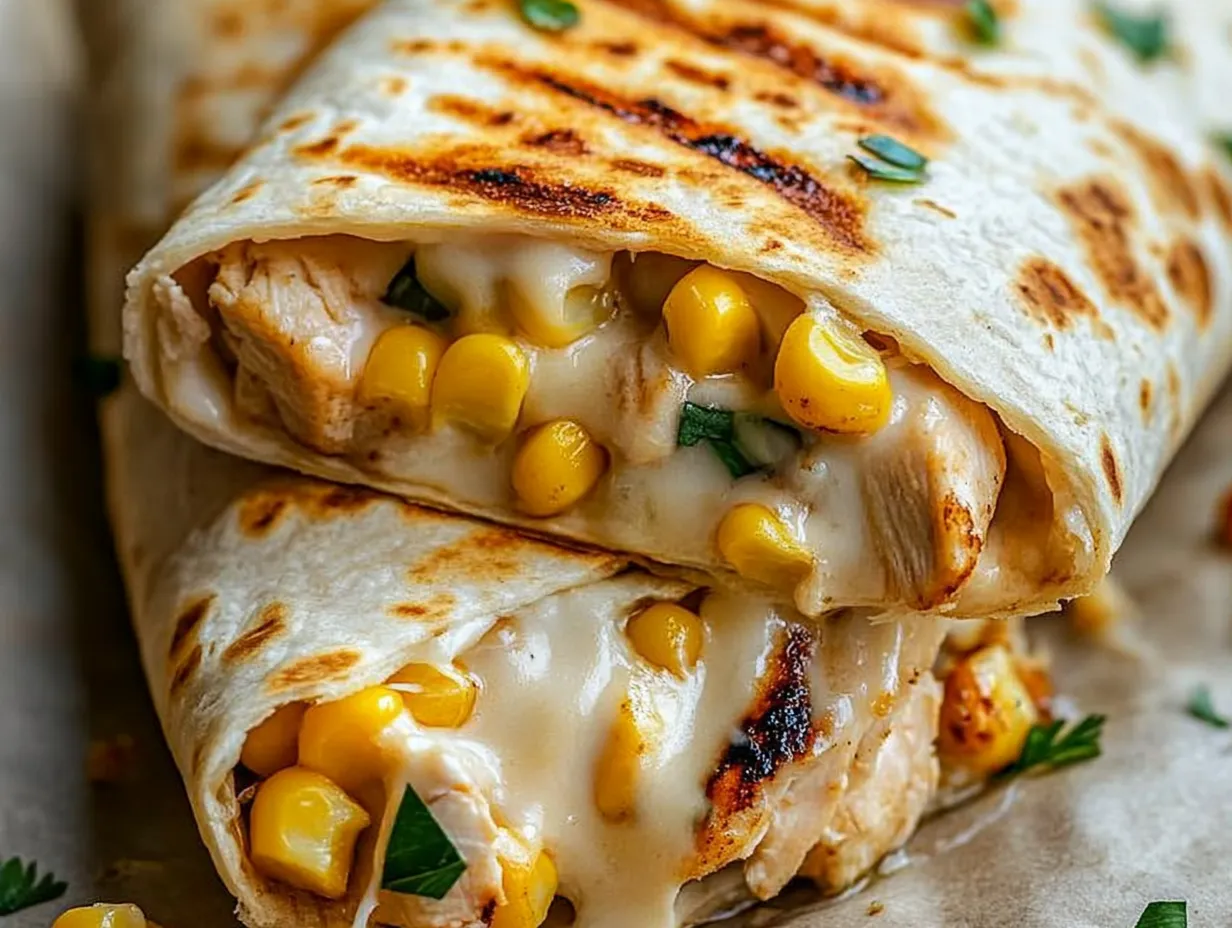
Cheesy Garlic Chicken Wraps are a delicious and easy-to-make meal that combines tender, shredded chicken with a rich blend of cheeses and flavorful garlic, all wrapped in a warm tortilla. These wraps are not only bursting with savory flavors, but they also offer a satisfying and comforting meal that’s quick to prepare. Whether you’re looking for a speedy lunch, a simple dinner, or a crowd-pleasing snack, these wraps deliver on all fronts. The combination of melted cheese, creamy filling, and a crisp, toasted exterior makes them irresistible for both kids and adults alike.
These wraps are perfect for any occasion. Whether you’re throwing together a weeknight meal in a hurry or preparing finger food for a casual gathering, Cheesy Garlic Chicken Wraps offer versatility and convenience. Plus, you can easily customize them with different ingredients to suit your taste or dietary preferences, making them a go-to option for busy days.

Essential Ingredients Breakdown
- Shredded Chicken: Using pre-cooked or leftover chicken is not only a great time-saver but also helps prevent food waste. You can easily use rotisserie chicken, leftover grilled chicken, or any cooked chicken breast. Shredding it creates a tender, juicy texture that mixes well with other ingredients.
- Cheese (Mozzarella and Cheddar): The combination of mozzarella and cheddar brings the best of both worlds—mozzarella offers a creamy, stretchy melt, while cheddar adds a sharp, tangy flavor. This duo creates a rich, gooey filling that satisfies cheese lovers.
- Garlic: Fresh garlic, when sautéed, releases an aromatic and slightly sweet flavor that elevates the whole dish. It adds depth to the chicken filling and complements the cheeses beautifully.
- Butter: Used to sauté the garlic, butter adds richness to the dish, enhancing the overall flavor of the filling.
- Sour Cream and Mayonnaise: These creamy ingredients work together to bind the chicken and cheese mixture, making the filling smooth and flavorful. They also add a slight tang, balancing out the richness of the cheese.
- Tortillas: Whether you choose flour, whole wheat, or gluten-free tortillas, they serve as the perfect vessel for holding the cheesy chicken filling. The tortillas become crispy when toasted, adding a satisfying crunch.
- Seasoning: Salt and pepper are essential for bringing out the flavors in the chicken mixture, while fresh parsley provides a pop of color and a hint of herbal freshness as a garnish.
Step-by-Step Cooking Process
Step 1: Sautéing the Garlic
Sautéing garlic properly is key to unlocking its deep, aromatic flavor without burning it. Start by melting 2 tablespoons of butter in a skillet over medium heat. Once the butter has melted and is slightly bubbling, add 2 minced garlic cloves to the pan. Stir constantly to ensure the garlic cooks evenly. Sauté the garlic for about 1 minute, or until it becomes fragrant and slightly golden.
Be cautious not to let the garlic brown too much, as it can quickly turn bitter if overcooked. To avoid burning, keep the heat at medium or medium-low and stir frequently. You’ll know the garlic is ready when its aroma fills the kitchen, signaling that it has released its essential oils, which infuse the butter with a rich garlic flavor. This step is crucial because the sautéed garlic will serve as the base flavor that ties the entire filling together, enhancing the taste of both the chicken and the cheeses.
Step 2: Mixing the Chicken and Cheese Filling
Once your garlic is sautéed, it’s time to move on to the filling. In a large mixing bowl, combine 2 cups of shredded cooked chicken, ½ cup of shredded mozzarella cheese, ½ cup of shredded cheddar cheese, ¼ cup of sour cream, ¼ cup of mayonnaise, and the sautéed garlic. The key to creating a well-balanced filling is to mix everything thoroughly, ensuring the ingredients are evenly distributed throughout.
Using a large bowl for mixing allows enough space for all the ingredients to come together without spilling. Stir the mixture gently with a large spoon or spatula until the chicken is coated in the creamy, cheesy mixture. This ensures that every bite will have a perfect blend of chicken, cheese, and garlic.
After mixing, it’s important to taste the filling and adjust the seasoning. Add salt and pepper to taste, starting with a pinch and gradually adding more if needed. Remember that the cheeses and mayonnaise already contain some salt, so it’s better to season gradually.
To give your wraps a personal twist, you can add other ingredients at this stage. For a bit of heat, toss in some jalapeños or chili flakes. Want to add a fresh element? Try mixing in diced tomatoes or baby spinach for extra texture and nutrition. Other additions could include chopped green onions, avocados, or even a sprinkle of paprika for a smoky flavor.
Step 3: Assembling the Wraps
With your filling ready, it’s time to assemble the wraps. Lay out 4 large tortillas on a clean, flat surface. Divide the chicken and cheese filling evenly among the tortillas, placing the mixture in the center of each one. Depending on how much filling you like, you can adjust the portion size, but aim for about ½ cup of filling per wrap.
To fold the tortillas, first fold in the sides to keep the filling secure. Then, roll the tortilla tightly from the bottom up, tucking in the sides as you go to prevent the filling from spilling out. A good wrap should be snug enough to hold together without squeezing out the filling.
If you’re planning to make these wraps in advance, you can store them in the fridge before toasting. Wrap each tortilla tightly in foil or plastic wrap and refrigerate for up to 24 hours. When you’re ready to serve, you can simply toast them in a skillet.
Step 4: Toasting the Wraps
To finish, you’ll want to toast the wraps until they are golden brown and the cheese inside has melted. Heat a clean skillet or non-stick pan over medium heat. You don’t need to add any additional oil or butter to the pan, as the tortillas will crisp up nicely on their own.
Place each wrap seam-side down in the skillet. Toast for 2-3 minutes on each side, or until the tortilla is crisp and golden, and the cheese inside has fully melted. You’ll know it’s done when the wrap has a light golden color and feels firm to the touch.
For an even toast, gently press down on the wraps with a spatula as they cook. This ensures the wraps come out evenly crispy and helps melt the cheese inside more efficiently. Keep a close eye on them to prevent burning, adjusting the heat if necessary.
Once they’re toasted, remove the wraps from the skillet and allow them to cool slightly before serving.
Serving and Customization Options
Garnishing and Serving
To add a fresh touch and elevate the presentation, garnish your Cheesy Garlic Chicken Wraps with freshly chopped parsley. The bright green color contrasts beautifully with the golden-brown wraps and adds a subtle hint of herbaceous flavor.
These wraps pair wonderfully with a side salad or dipping sauces like ranch dressing, salsa, or even a tangy garlic aioli for extra flavor. If you’re serving them as a meal, consider a light Caesar salad or a simple tomato and cucumber salad to balance the richness of the wraps.
Customization Options
One of the best things about these wraps is how easy they are to customize according to your preferences or dietary needs:
- Spice it up: For those who love a little heat, consider adding chili flakes, sliced jalapeños, or a dash of hot sauce to the chicken mixture. You can also sprinkle cayenne pepper or drizzle sriracha over the finished wraps.
- Add more vegetables: Incorporating extra veggies not only adds color and texture but also boosts the nutritional value. Try adding sliced bell peppers, diced onions, or baby spinach to the filling. You can sauté these vegetables with the garlic for a richer flavor or mix them in raw for a fresh crunch.
- Vegetarian option: If you want a meatless version, simply substitute the chicken with tofu, black beans, or even grilled vegetables like zucchini and mushrooms. For a more substantial vegetarian option, add cooked quinoa or lentils.
- Gluten-free wraps: For those avoiding gluten, opt for gluten-free tortillas, which are widely available in grocery stores. These wraps taste just as great and cater to various dietary restrictions.
Storage and Reheating
If you have leftover wraps, store them in an airtight container or tightly wrapped in foil or plastic wrap. They can be kept in the refrigerator for up to 3 days. For longer storage, freeze them for up to 1 month.
To reheat, the best method is to toast them in a skillet over medium heat until warmed through and crisp. Alternatively, you can reheat in the oven at 350°F (175°C) for 10-12 minutes. If you’re in a rush, the microwave works too—just heat for about 1 minute per wrap, though this may make the tortillas less crispy.
FAQs and Conclusion
Frequntly Asked Questions
Can I use a different type of cheese?
Yes, you can easily swap out the cheeses based on your preferences or what you have on hand. Colby Jack is a great option if you prefer a milder flavor, while pepper jack adds a spicy kick. If you want a richer taste, consider using gouda or even Monterey Jack. The key is to choose cheeses that melt well, ensuring a creamy texture inside the wraps.
Can I bake the wraps instead of toasting them in a skillet?
Absolutely! If you prefer baking, preheat your oven to 375°F (190°C). Place the assembled wraps on a baking sheet lined with parchment paper, and bake for 10-12 minutes, or until the tortillas are golden and crispy, and the cheese has melted. Baking is a hands-off method that works well for larger batches.
How can I make the filling creamier?
To achieve a creamier filling, you can increase the amounts of mayonnaise and sour cream slightly. Another option is to add a couple of tablespoons of cream cheese, which will add richness and a velvety texture to the filling. Adjust the ratio based on your desired creaminess.
Can I make these wraps ahead of time?
Yes! These wraps are great for meal prep. Simply assemble them, wrap each one tightly in foil or plastic wrap, and store them in the refrigerator for up to 24 hours. When you’re ready to serve, toast or bake them until heated through.
What can I serve on the side?
These wraps pair wonderfully with a variety of sides. For something light, try a green salad or Caesar salad. If you’re looking for something more filling, serve them with a cup of tomato soup, a side of fries, or a light vegetable stir-fry. For dipping, ranch, salsa, or garlic aioli are all great options.
Can I use a different type of cheese?
Yes, you can easily substitute other types of cheese depending on your taste or what you have available. Colby Jack is a popular option for a milder flavor, while pepper jack will add a spicy kick. If you’re after a richer, more luxurious taste, try gouda or Monterey Jack. The key is to choose cheeses that melt smoothly to keep the filling creamy and satisfying.
Can I bake the wraps instead of toasting them in a skillet?
Absolutely! If you prefer baking, preheat your oven to 375°F (190°C). Place the assembled wraps on a baking sheet lined with parchment paper, and bake for 10-12 minutes, or until the tortillas are golden and the cheese is melted. Baking is an excellent option if you’re making multiple wraps at once and want a hands-free method.
How can I make the filling creamier?
If you want the filling to be even creamier, increase the amount of sour cream or mayonnaise. Alternatively, you can add cream cheese (about 2-3 tablespoons), which will give the filling a richer, more velvety texture. Mix until smooth, ensuring the filling is evenly coated.
Can I make these wraps ahead of time?
Yes, these wraps are ideal for meal prep! Simply assemble the wraps, then wrap each one tightly in foil or plastic wrap. Store them in the fridge for up to 24 hours. When you’re ready to serve, toast or bake them until heated through. They’re perfect for busy weeknights or packing lunch the next day.
What can I serve on the side?
Cheesy Garlic Chicken Wraps pair well with a variety of sides. Serve them alongside a fresh green salad, Caesar salad, or with a side of tomato soup for a complete meal. For something heartier, try fries or a light vegetable stir-fry. You can also offer dipping sauces such as ranch, salsa, or garlic aioli.
Can I freeze these wraps?
Yes, these wraps can be frozen. To freeze, assemble the wraps but don’t toast them. Wrap them tightly in foil or plastic wrap and place them in an airtight container or freezer-safe bag. They can be frozen for up to 1 month. When you’re ready to eat, let them thaw in the fridge overnight, then toast or bake as instructed.
Can I use a different type of meat?
Definitely! You can substitute the shredded chicken with other cooked meats such as shredded turkey, pulled pork, or even ground beef. The recipe is versatile, so feel free to experiment with what you have on hand.
Can I make this recipe vegetarian or vegan?
Yes, to make a vegetarian version, you can replace the chicken with tofu, black beans, or chickpeas. For a vegan option, use vegan cheeses, dairy-free mayonnaise, and plant-based sour cream. Ensure the tortillas are also vegan-friendly.
What type of tortillas should I use?
You can use any type of tortilla for this recipe, including flour tortillas, whole wheat tortillas, or gluten-free tortillas for dietary restrictions. The texture and crispiness might vary slightly depending on the type, but all will work well for this recipe.
Can I add more flavor to the chicken mixture?
Absolutely! You can season the chicken with additional spices such as paprika, cumin, coriander, or even a little curry powder for a different flavor profile. A squeeze of lemon or lime juice can also add a tangy note to balance the richness of the cheese.
Conclusion and Final Thoughts
Cheesy Garlic Chicken Wraps are a simple yet delicious meal that’s perfect for any occasion. Their quick preparation, comforting flavor, and customizable options make them a go-to recipe for busy days, family meals, or casual gatherings. With endless possibilities for customization, from the type of cheese to the level of spice, there’s a version of this recipe for everyone.
Try out this recipe today, and enjoy a warm, cheesy, and satisfying meal that’s sure to become a household favorite! Don’t forget to get creative with your own variations!
Print
Cheesy Garlic Chicken Wraps
- Author: Munil
Description
These delicious, cheesy garlic chicken wraps are quick, flavorful, and perfect for lunch or dinner. The combination of shredded chicken, two kinds of cheese, and a garlicky filling makes these wraps irresistible. Toasting them to a golden crisp adds the perfect finishing touch.
Ingredients
- 2 cups cooked chicken, shredded
- 1/2 cup shredded mozzarella cheese
- 1/2 cup shredded cheddar cheese
- 2 garlic cloves, minced
- 2 tbsp butter
- 1/4 cup sour cream
- 1/4 cup mayonnaise
- 4 large tortillas
- Salt and pepper, to taste
- Fresh parsley, chopped (for garnish)
Instructions
1️⃣ Sauté the garlic: Melt the butter in a pan over medium heat. Add the minced garlic and sauté for about 1 minute, until fragrant.
2️⃣ Mix the filling: In a large bowl, combine the shredded chicken, mozzarella cheese, cheddar cheese, sour cream, mayonnaise, and the sautéed garlic. Season with salt and pepper to taste.
3️⃣ Assemble the wraps: Divide the chicken mixture evenly among the tortillas. Wrap each tortilla tightly, folding in the sides as you roll them up.
4️⃣ Toast the wraps: Heat a clean skillet over medium heat. Toast each wrap for 2-3 minutes on each side, until golden brown and the cheese has melted inside.
5️⃣ Garnish and serve: Garnish the wraps with chopped fresh parsley and serve them warm.
Notes
- Variations: You can add extra fillings like sautéed onions, bell peppers, or spinach for added flavor and texture.
- Sauce options: Serve with a dipping sauce like ranch or marinara for extra flavor.


