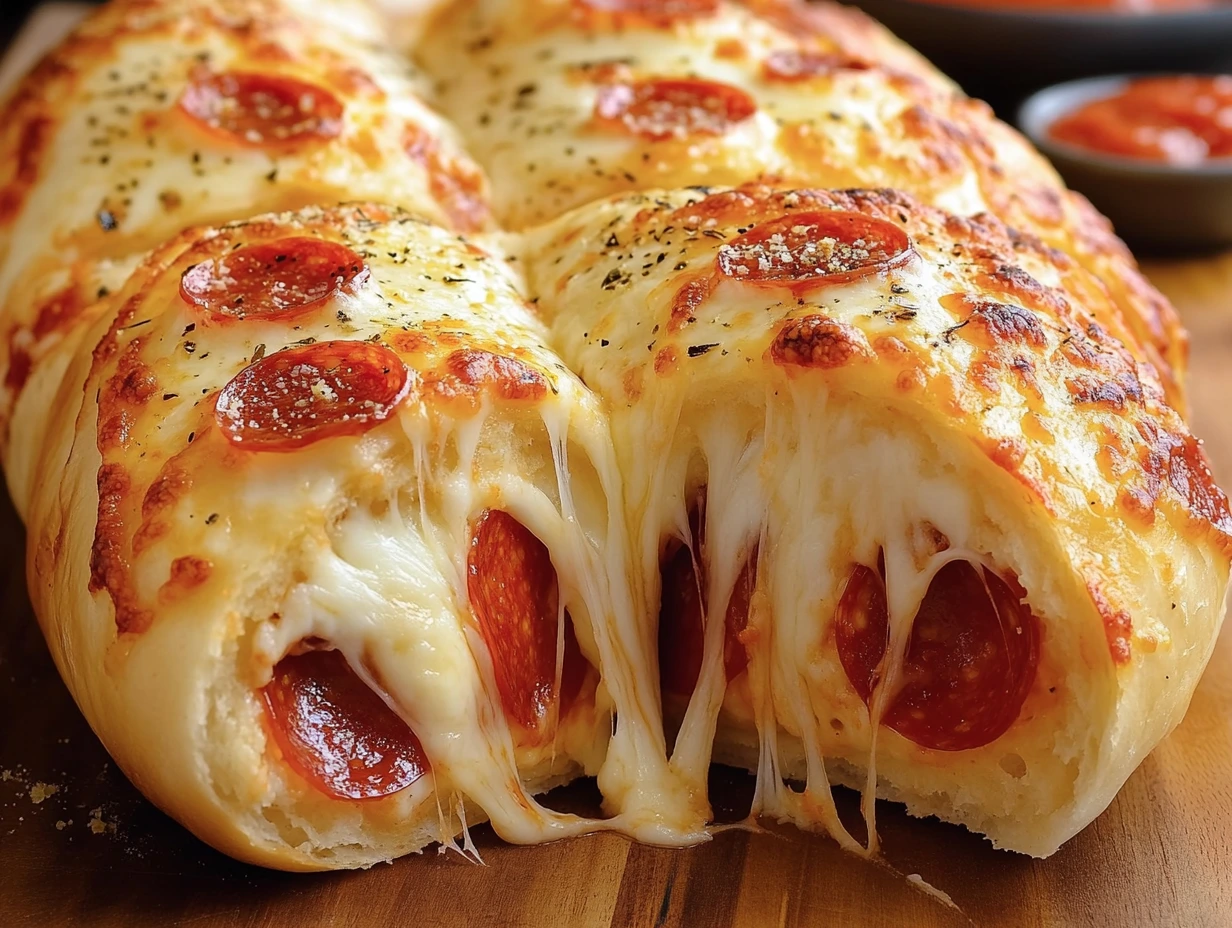
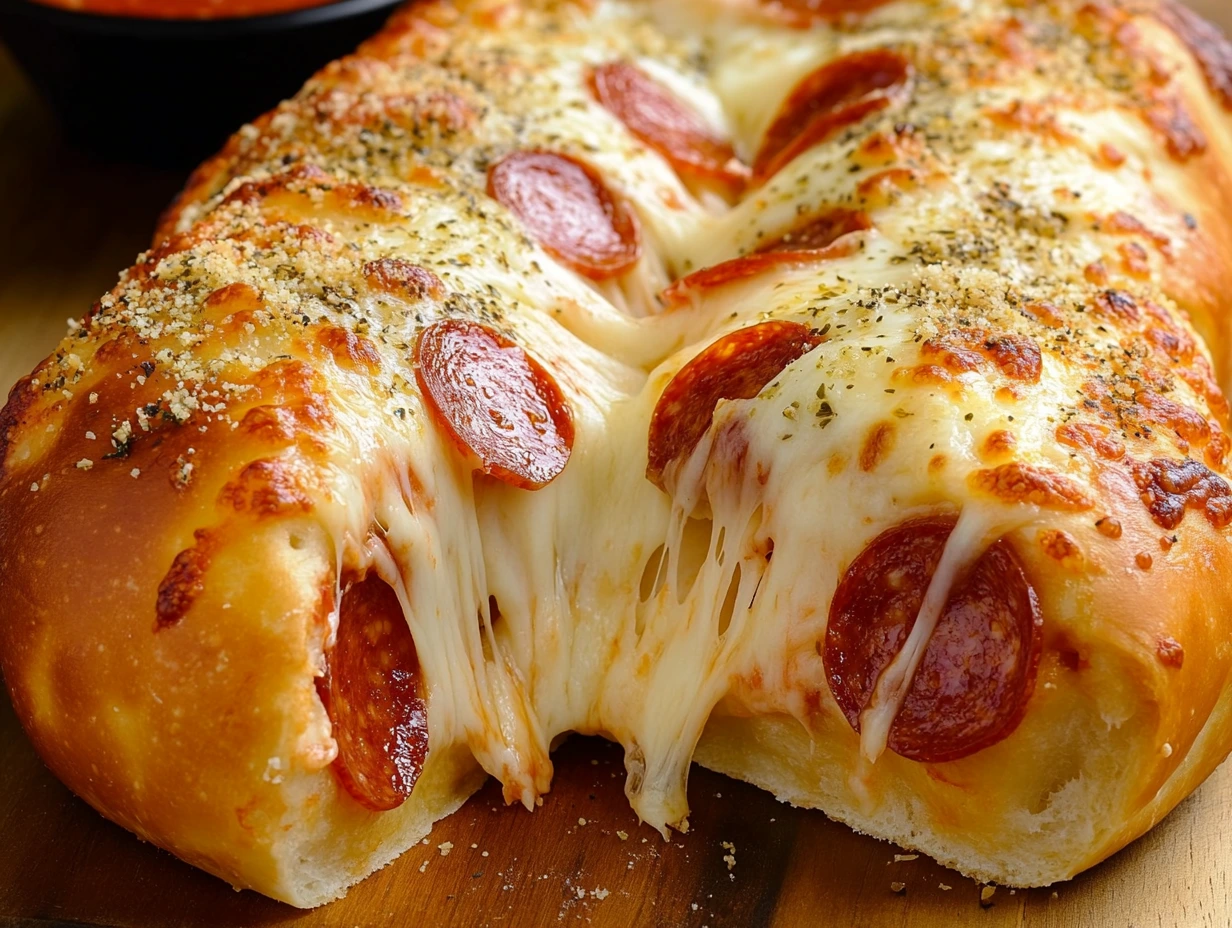
Cheesy Pepperoni Rolls—just saying the name gets my mouth watering! These delightful little rolls are packed with ooey-gooey cheese, zesty beef pepperoni, and wrapped in a soft, golden crust. Whether you’re planning a family movie night, a game-day spread, or just a comforting snack, these rolls will hit the spot. They’re so easy to make that they might just become your new favorite go-to recipe for any occasion.
Why You’ll Love This Recipe
One of my favorite things about these Cheesy Pepperoni Rolls is how versatile they are. Need a quick snack? They’ve got you covered. Want to impress guests with minimal effort? These rolls are your secret weapon. Plus, they’re perfect for picky eaters—who can resist the classic combo of cheese, beef pepperoni, and pizza dough?
But before we dive in, here’s a little story. The first time I made these, I was looking for something easy but impressive to bring to a potluck. I had some leftover pizza dough in the freezer and decided to get creative. Let me tell you—the tray was wiped clean in minutes! People were raving about them, and I knew I had stumbled upon a winner.
Now, let’s get you started on your own batch of cheesy, savory perfection.
Step 1: Thawing the Dough
The magic of this recipe starts with a simple frozen pizza dough log. If you’ve got one tucked away in your freezer, now’s the time to pull it out. Place it on a flat surface and loosely cover it with plastic wrap. Quick tip: Spray one side of the plastic wrap with cooking oil to prevent sticking—it’s a lifesaver!
Leave the dough at room temperature for a few hours to thaw and rise. You’ll know it’s ready when it feels soft and slightly puffed. Trust me, this step is worth the wait. Rushing it will only make the dough harder to work with.
Step 2: Rolling Out the Dough
Once your dough is thawed and ready, it’s time to roll it out. Lightly flour your work surface to prevent sticking. Roll the dough into an 11×11-inch square. It doesn’t have to be perfect—just aim for a mostly even shape.
Pro Tip: If the dough is too sticky or elastic, let it rest for another 5–10 minutes. This allows the gluten to relax, making it easier to handle.

Step 3: Adding the First Layer of Flavor
Here’s where things get exciting! Using a pastry brush, coat the surface of the dough with olive oil. This step isn’t just about flavor; it also helps keep the toppings in place and prevents the dough from drying out in the oven.

Step 4: Layering the Good Stuff
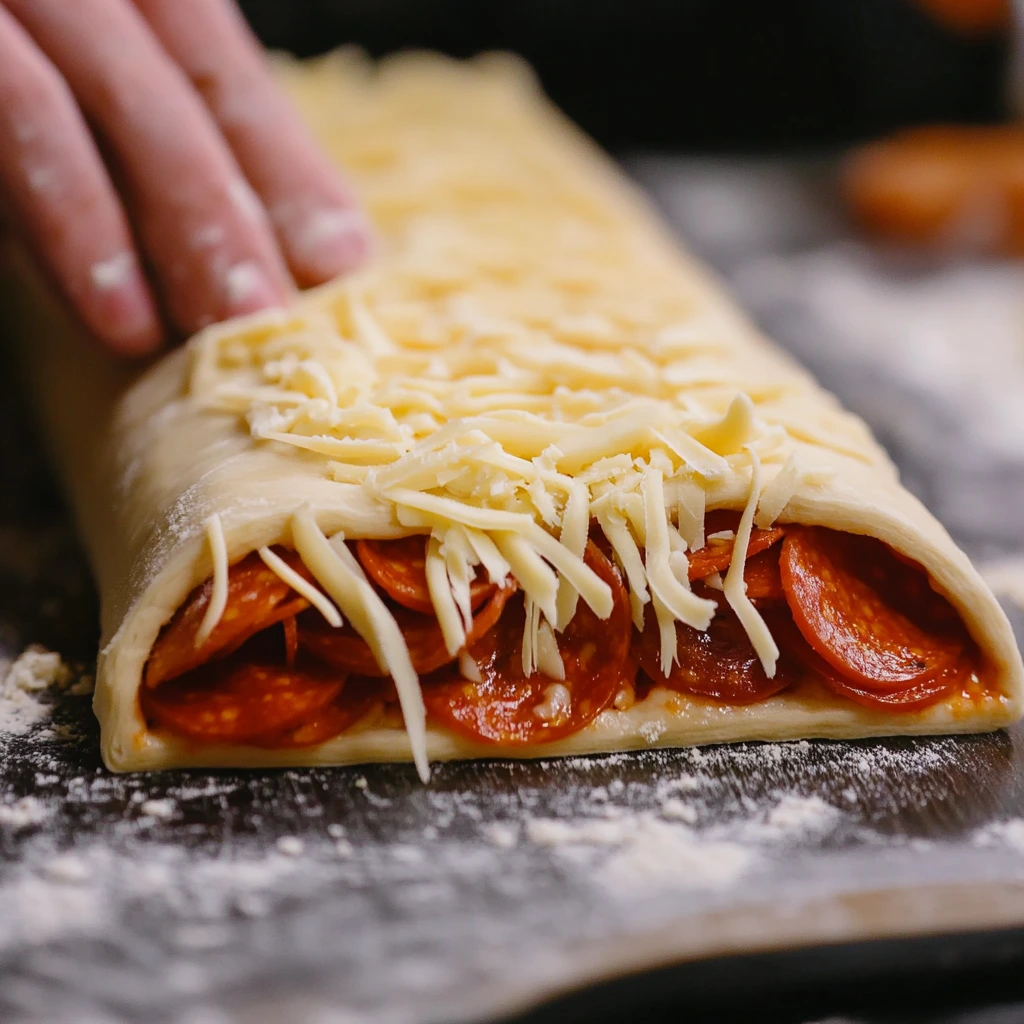
Now for the fun part—layering your toppings. Start with a generous layer of beef pepperoni slices. Arrange them evenly across the dough, leaving about a ½-inch border along the edges. This border helps seal the roll when it’s time to wrap things up.
Next, sprinkle grated mozzarella cheese over the beef pepperoni. Be generous! This is the cheesy heart of the recipe. For an extra layer of flavor, add some Parmesan cheese. Trust me, this combination is what makes these rolls so irresistible.

Step 5: A Sprinkle of Seasoning
Before rolling up your dough, add a dash of Italian seasoning over the cheese. If you’re a garlic lover (like me), don’t skip the garlic salt—it’s the perfect finishing touch to enhance the flavors.
Rolling, Baking, and Pro Tips
We’ve got our dough all prepped and packed with beef pepperoni and cheesy goodness. Now comes the part where everything comes together. Let’s get rolling—literally—and turn this flavorful masterpiece into the irresistible Cheesy Pepperoni Rolls you’ll be proud to serve!

Step 6: Rolling the Dough
Rolling the dough is where it all starts to feel real. Starting from one edge of your dough square, tightly roll it into a log. Think of it like rolling up a cinnamon roll but with savory perfection inside.
Pro Tip: Keep the roll as tight as possible to avoid gaps where the cheese could leak out while baking. As you roll, gently pinch the dough to help seal it. When you reach the end, pinch the seam to close it up completely. Don’t forget to pinch the ends too—this step ensures all that cheesy goodness stays inside!
Step 7: Preparing for Baking
Carefully place your rolled dough seam-side down on a parchment-lined baking sheet. If you’re making multiple rolls, give each one some space to spread during baking. A little breathing room will keep them from sticking together as they puff up and turn golden.
Step 8: The Butter Finish
Now it’s time to add that golden, buttery touch. Using a pastry brush, coat the top of the roll with melted butter. Not only will this give the crust a gorgeous sheen, but it’ll also add a rich flavor that complements the cheesy filling.
Optional Extra: If you want to take it up a notch, sprinkle a little more Parmesan or a pinch of Italian seasoning on top of the buttered roll. It’ll create a beautiful, flavorful crust that’s hard to resist.

Step 9: Baking Time
Preheat your oven to 375°F (190°C). Once it’s hot, slide the baking sheet into the oven and let the rolls bake for 15–25 minutes. You’ll know they’re ready when the crust turns a deep golden brown and gives a hollow sound when tapped lightly.
Pro Tip: Keep an eye on your rolls as they bake—ovens can vary, and you don’t want to miss that perfect moment when they’re just right. If the tops start to brown too quickly, cover them loosely with foil to prevent overbrowning.
Step 10: Cool and Slice
Patience is key here! Let your baked roll cool completely before slicing. I know it’s hard to wait with that heavenly smell wafting through your kitchen, but cooling allows the cheese to set, making slicing much cleaner and easier.
Using a sharp knife, slice the roll into rounds about 1–1.5 inches thick. Each slice will reveal the gorgeous spiral of beef pepperoni, cheese, and perfectly baked dough—a feast for the eyes and the taste buds!
Tips for the Best Cheesy Pepperoni Rolls
- Customize Your Fillings: While beef pepperoni is a classic, don’t be afraid to mix things up. Try cooked sausage, diced ham, or even a veggie version with spinach and mushrooms.
- Use High-Quality Cheese: For the best results, opt for freshly grated mozzarella and Parmesan. Pre-shredded cheese often contains anti-caking agents that can affect melting.
- Make Ahead: You can assemble the rolls ahead of time, wrap them tightly, and store them in the fridge until you’re ready to bake. Just add a few extra minutes to the baking time if they’re chilled.
- Dipping Sauce Bonus: Warm tomato sauce is the perfect companion for these rolls, but you can also try garlic butter, ranch dressing, or even a spicy marinara for a fun twist.
FAQs and Conclusion
Congratulations! By now, you’ve created a batch of golden, cheesy, and utterly irresistible Cheesy Pepperoni Rolls. But before you dive in, let’s answer some common questions to help you perfect this recipe and give you some ideas for creative variations. Whether you’re making these for the first time or looking to level up your beef pepperoni roll game, this section has you covered.
Frequently Asked Questions (FAQ)
1. Can I use store-bought pizza dough?
Absolutely! Store-bought pizza dough is a huge time-saver and works perfectly for this recipe. Just be sure to let it thaw and rise as described in Step 1 to ensure it’s soft and easy to roll.
2. What other fillings can I try?
Get creative! Swap out beef pepperoni for cooked sausage, crumbled bacon, or grilled chicken. Vegetarians can opt for spinach, mushrooms, or even a pesto base with sun-dried tomatoes. The options are endless!
3. How do I store leftovers?
If you have leftovers (though it’s rare!), store them in an airtight container in the fridge for up to 3 days. Reheat in the oven at 350°F for 5–7 minutes or in the microwave for 20–30 seconds.
4. Can I freeze the rolls?
Yes! These rolls freeze beautifully. After baking, let them cool completely, then wrap each slice individually in plastic wrap and store in a freezer-safe bag for up to 3 months. To reheat, thaw in the fridge overnight and warm in the oven.
5. How do I prevent the cheese from leaking out?
Make sure to roll the dough tightly and seal the edges well. Pinching the seam and ends securely will help keep all that melty goodness inside.
6. Can I use a different type of cheese?
Of course! While mozzarella and Parmesan are classic choices, feel free to experiment with cheddar, provolone, or even a spicy pepper jack for an extra kick.
7. Can I make these rolls gluten-free?
Yes, just substitute the pizza dough with a gluten-free version. Keep in mind that gluten-free dough can be stickier and harder to roll, so use extra flour on your work surface.
Conclusion
There you have it—Cheesy Pepperoni Rolls that are guaranteed to wow your family, friends, and even yourself. These rolls are the perfect mix of cheesy, savory, and crispy, and they’re ridiculously easy to make. Whether you’re serving them at a party, a casual get-together, or just as a snack to enjoy while binge-watching your favorite show, they’ll disappear in no time.
Print
Cheesy Pepperoni Rolls
- Total Time: 35 minutes
Description
These cheesy pepperoni rolls are the perfect snack or party treat, combining gooey mozzarella, tangy beef pepperoni, and a golden crust. They’re easy to prepare with frozen pizza dough and can be customized with your favorite toppings.
Ingredients
- For the Rolls:
- 1 frozen pizza dough log (thawed)
- Beef Pepperoni slices (as needed)
- 1 ½ cups mozzarella cheese, grated
- ½ cup Parmesan cheese, grated
- For Brushing and Seasoning:
- 2 tbsp olive oil
- 1 tsp Italian seasoning
- ½ tsp garlic salt (optional)
- 2 tbsp butter, melted
- For Serving:
- ¼ cup tomato sauce (for dipping)
Instructions
1️⃣ Thaw the Dough
Place the frozen pizza dough on a flat surface. Loosely cover it with plastic wrap sprayed with cooking oil (oiled side down) to prevent sticking. Let it thaw and rise at room temperature for a few hours until soft and slightly puffed.
2️⃣ Roll Out the Dough
On a lightly floured surface, roll the thawed dough into an 11×11-inch square. This size works well for a single beef pepperoni roll.
3️⃣ Brush with Olive Oil
Using a pastry brush, lightly coat the surface of the dough with olive oil to enhance the flavor and prevent the toppings from sliding.
4️⃣ Layer the Pepperoni and Cheese
Spread a single layer of beef pepperoni slices evenly across the dough, leaving a ½-inch border along the edges.
Sprinkle shredded mozzarella cheese generously over the beef pepperoni.
Add a layer of Parmesan cheese for an extra cheesy kick.
5️⃣ Season the Roll
Lightly sprinkle Italian seasoning over the cheese and, if desired, a pinch of garlic salt for additional flavor.
6️⃣ Roll the Dough
Starting from one edge, tightly roll the dough into a log. Pinch the seam and ends to seal the roll securely.
7️⃣ Prepare for Baking
Place the rolled dough seam-side down on a parchment-lined baking sheet. If making multiple rolls, space them apart to allow for expansion.
8️⃣ Brush with Butter
Brush the top of the roll with melted butter to give it a golden, shiny finish as it bakes.
9️⃣ Bake
Preheat your oven to 375°F (190°C). Bake the roll(s) for 15-25 minutes, or until the crust is golden brown and sounds hollow when tapped.
🔟 Cool and Serve
Allow the beef pepperoni roll to cool completely before slicing into rounds. Serve with warm tomato sauce on the side for dipping.
Notes
- Add-ins: Try adding cooked sausage, mushrooms, or sliced jalapeños for variety.
- Storage: Store leftovers in an airtight container in the fridge for up to 3 days. Reheat in the oven for a crisp crust.
- Dough Tip: Thaw the dough overnight in the fridge for convenience.
- Prep Time: 10 minutes
- Cook Time: 25 minutes
Nutrition
- Serving Size: 6-8 slices


