
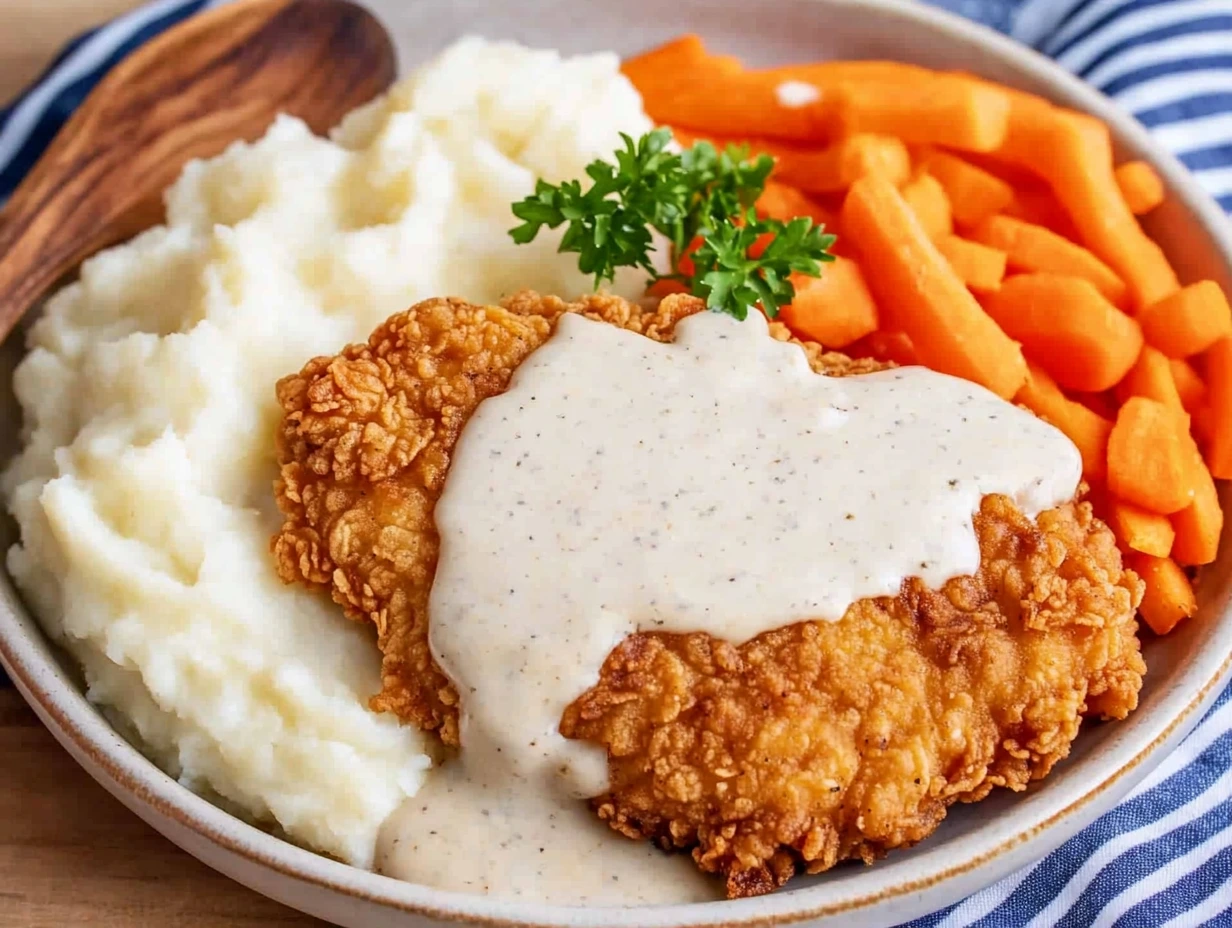
There’s just something about a good ol’ plate of Chicken Fried Chicken that hits the spot like nothing else. It’s one of those down-home comfort meals that instantly makes you feel cozy and taken care of. Crispy on the outside, juicy on the inside, and smothered in creamy, peppery gravy—it’s pure Southern soul food at its finest. Whether you grew up with this on your Sunday dinner table or you’re trying it for the first time, this recipe delivers all the flavor and comfort you could ever want.
This version is made with tenderized chicken breasts that are soaked in tangy buttermilk, dredged in a seasoned flour mixture, and pan-fried until golden brown and ultra-crispy. And the gravy? Oh, the gravy. It’s made right in the same skillet with those flavorful pan drippings, and it’s rich, creamy, and the perfect finishing touch. I love serving this over a big pile of mashed potatoes, but it’s just as dreamy over buttered rice or tucked next to a flaky biscuit.
Let me tell you a little backstory: the first time I made this, I was aiming to recreate the chicken fried chicken I remembered eating at a small mom-and-pop diner during a road trip through Texas. It came to the table sizzling hot, with steam rising off the gravy and a biscuit the size of my hand on the side. After that meal, I knew I had to crack the code and bring that flavor home. This recipe is the result of a lot of trial (and a few delicious errors), but I can say with confidence—it’s a keeper.
Let’s get into how to make it!

Ingredients You’ll Need
For the Chicken:
-
4 boneless, skinless chicken breasts (pounded to ½-inch thickness)
-
1 cup buttermilk
-
1 teaspoon hot sauce (optional, but adds great flavor)
-
1 cup all-purpose flour
-
½ cup cornstarch
-
1 teaspoon paprika
-
1 teaspoon garlic powder
-
1 teaspoon onion powder
-
½ teaspoon cayenne pepper (optional for heat)
-
Salt and freshly ground black pepper
-
Vegetable oil or lard (for frying)
For the Gravy:
-
2 tablespoons pan drippings or butter
-
2 tablespoons all-purpose flour
-
1½ cups whole or 2% milk
-
Salt and lots of freshly ground black pepper
STEP 1: TENDERIZE THE CHICKEN
Start by placing each chicken breast between two sheets of plastic wrap or parchment paper. Use a meat mallet (or a rolling pin in a pinch) to pound them out to an even ½-inch thickness. This helps the chicken cook evenly and makes it super tender.
STEP 2: SOAK IN BUTTERMILK MARINADE
In a shallow bowl, whisk together the buttermilk and hot sauce. Season the pounded chicken on both sides with salt and pepper, then fully submerge each piece in the buttermilk mixture. Cover and refrigerate for at least 30 minutes—though if you have the time, up to 4 hours really allows the flavors to soak in. The buttermilk tenderizes the chicken and gives it that signature Southern tang.
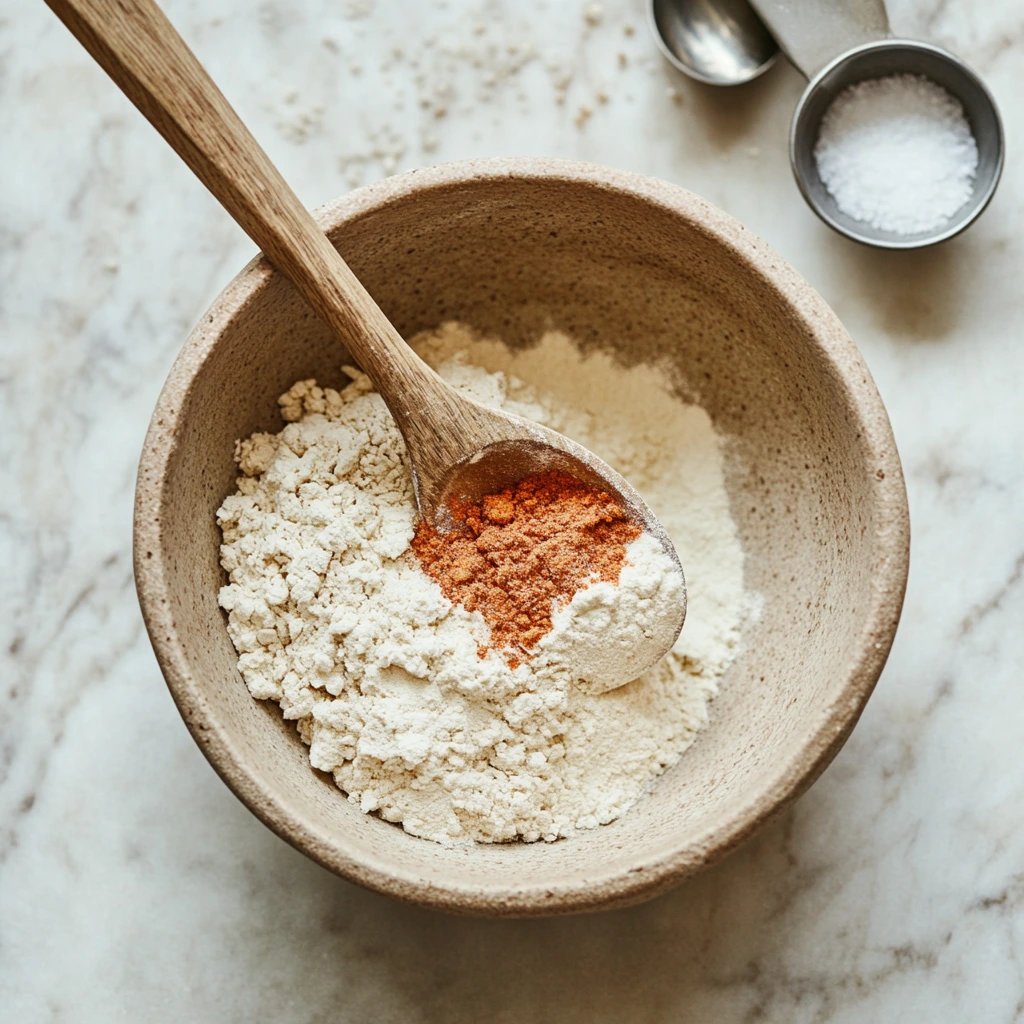
STEP 3: MIX THE BREADING
While the chicken is marinating, go ahead and prepare your seasoned flour. In another shallow bowl, whisk together the flour, cornstarch, paprika, garlic powder, onion powder, cayenne (if using), and a good pinch of salt and pepper. The cornstarch is key here—it helps create a lighter, crispier crust.
STEP 4: DREDGE THE CHICKEN
Take each piece of chicken out of the buttermilk (let the excess drip off), and coat it thoroughly in the flour mixture. Press the coating onto the chicken so it sticks well. Set the dredged pieces on a wire rack and let them rest for about 10 minutes—this step helps the coating set so it doesn’t fall off during frying.
STEP 5: HEAT THE OIL
Pour enough vegetable oil (or lard, for extra flavor) into a large cast iron skillet or heavy-bottomed pan to come halfway up the sides. Heat over medium-high until the oil shimmers and a pinch of flour sizzles when dropped in. You’re aiming for a temperature between 350°F and 365°F.
Golden-Crispy Chicken and the Creamiest Country Gravy
Now that we’ve got our chicken perfectly prepped and that coating all set, it’s time to move on to the part that makes this dish truly unforgettable—frying it up until it’s gorgeously golden and making that rich, homemade gravy. This is where the kitchen starts to smell like heaven, and if your family is anything like mine, you’ll suddenly have some curious helpers poking around asking, “Is it ready yet?”
Don’t worry—this part is simpler than you might think. With just a little attention to detail, you’ll get that crispy, crunchy crust and juicy center every single time. Let’s finish this off strong!
STEP 6: FRY THE CHICKEN
Working in batches (you don’t want to overcrowd the skillet), carefully place two cutlets in the hot oil. Fry them for about 4 minutes per side, adjusting the heat as needed so the crust gets evenly golden and doesn’t burn. You want a deep, rich brown color with that telltale sizzle.
Once done, transfer the fried chicken to a clean wire rack or a paper towel–lined plate to drain off any excess oil. If you’re cooking in batches, you can keep the cooked pieces warm in a 200°F oven while the others finish frying.
Tip: Keeping an eye on your oil temperature is crucial here. If the oil gets too hot, the crust will burn before the chicken is cooked through. If it’s too cool, your chicken will soak up the oil and turn greasy. A kitchen thermometer helps, but even if you don’t have one, keep that oil gently bubbling and adjust the burner as needed.
STEP 7: MAKE THE GRAVY
Once all your chicken is fried and resting, it’s time for the gravy—and trust me, this is what takes the whole dish over the top.
Pour off all but 2 tablespoons of oil from the skillet, but don’t clean it out—those browned bits stuck to the bottom are full of flavor. If you don’t have enough drippings, you can supplement with butter.
Reduce the heat to medium, then whisk in 2 tablespoons of flour. Cook this mixture (called a roux) for about a minute, stirring constantly, until it’s golden and smells nutty.
Slowly whisk in 1½ cups of milk, scraping up all the good stuff from the bottom of the pan as you go. Keep whisking until the gravy thickens, which should take about 3–4 minutes. It should be smooth and just thick enough to coat the back of a spoon.
Generously season with salt and plenty of freshly ground black pepper. That peppery bite is what really makes country gravy sing.
STEP 8: SERVE IT UP
Now comes the best part—putting it all together. You’ve got two options here, and both are equally delicious:
-
Spoon the warm gravy directly over the chicken pieces on a platter.
-
Or return the chicken to the skillet and ladle the gravy right over each piece, letting them soak up all that creamy goodness before serving.
Garnish with a little chopped parsley if you like, but honestly, this dish doesn’t need much dressing up. The flavor speaks for itself.
Serving Suggestions
Chicken Fried Chicken is one of those meals that just begs for a few comforting sides. Here are some of my favorite pairings:
-
Mashed Potatoes: Classic and always a hit. Spoon the gravy over both the chicken and the potatoes.
-
Buttered White Rice: A great option if you’re looking to change things up.
-
Flaky Biscuits: Perfect for soaking up every last bit of gravy.
-
Southern-style Collard Greens or Coleslaw: For a little freshness and bite to balance all that creamy richness.
Tips and Variations
-
No Buttermilk? You can make a quick substitute by adding 1 tablespoon of lemon juice or vinegar to 1 cup of milk. Let it sit for 5 minutes, and voilà—instant buttermilk.
-
Extra Crunch? Want that ultra-crispy coating? Try double dredging. After the first round of flour, dip the chicken back into the buttermilk, then coat it again with the flour mixture.
-
Spice It Up: The cayenne and hot sauce are optional, but they do add a nice little kick without overwhelming the dish. Adjust to your taste.
-
Leftovers: Store leftovers in the fridge for up to 2 days. To reheat and keep the crust crispy, use a low oven (around 300°F) instead of the microwave.
Chicken Fried Chicken FAQ and Final Thoughts
Before we wrap things up, let’s talk through a few of the most common questions people have when making Chicken Fried Chicken at home. Whether you’re frying for the first time or just want to level up your technique, these tips should help you feel even more confident heading into the kitchen.
FAQ: Common Questions About Chicken Fried Chicken
1. Why does my breading fall off when I fry the chicken?
This usually happens when the coating hasn’t had time to properly adhere. After dredging your chicken in the seasoned flour, let it rest on a wire rack for about 10 minutes. This helps the crust “set” so it stays in place during frying. Also, make sure to shake off any excess buttermilk before dredging—too much liquid can make the coating slide right off.
2. What oil is best for frying Chicken Fried Chicken?
Go with a neutral oil that has a high smoke point, like vegetable oil, canola oil, or even peanut oil if there are no allergy concerns. Some folks like to use lard for a richer flavor, which is traditional and incredibly tasty.
3. Can I use chicken thighs instead of breasts?
Absolutely. Boneless, skinless chicken thighs work beautifully in this recipe and stay incredibly juicy. You might need to adjust the frying time slightly since they’re thicker, but the method stays the same.
4. How do I make sure the chicken is cooked through without burning the crust?
This is all about controlling your oil temperature. Aim to keep the oil between 350°F and 365°F. If the oil is too hot, the outside will brown before the inside is done. Not hot enough, and the crust gets soggy. A meat thermometer can help—your chicken should hit 165°F internally.
5. Can I make the gravy ahead of time?
You can, but it’s best fresh. If needed, you can make it earlier in the day and store it in the fridge. Reheat gently on the stove, whisking in a little milk if it’s too thick. Be sure to taste and adjust seasoning again before serving.
6. What’s the difference between Chicken Fried Chicken and Chicken Fried Steak?
Great question! While the method and gravy are nearly identical, Chicken Fried Chicken uses pounded chicken breasts, whereas Chicken Fried Steak is made with tenderized beef steak (often cube steak). Both are delicious and comforting, but the textures and flavors are a bit different.
7. Can I freeze Chicken Fried Chicken?
Yes, you can freeze the fried chicken (without the gravy) once it’s cooled. Store in an airtight container for up to 2 months. To reheat, bake in a 350°F oven until hot and crispy. The gravy doesn’t freeze as well, so it’s better made fresh or stored in the fridge for just a couple of days.
Final Thoughts: A Southern Classic Worth Making Again and Again
Chicken Fried Chicken with country gravy is one of those dishes that makes everyone feel like they’re home—even if you didn’t grow up eating it. It’s cozy, satisfying, and just the kind of meal you want to serve when you’re feeding people you care about.
Whether you’re serving it for a Sunday supper, bringing it out as the star of a casual get-together, or just craving some comfort food on a weeknight, this recipe delivers every single time. And the best part? You don’t need a deep fryer or fancy tools—just a good skillet, a few pantry staples, and a little bit of love.
Print
Chicken Fried Chicken
- Author: Sophia
Description
Juicy chicken cutlets coated in a crisp, seasoned crust and pan-fried until golden brown, then smothered in a creamy country gravy. This Southern-inspired comfort dish is perfect over mashed potatoes, rice, or served with flaky biscuits to soak up every last drop of gravy.
Ingredients
4 boneless, skinless chicken breasts, pounded to ½-inch thickness
1 cup buttermilk
1 teaspoon hot sauce (optional)
1 cup all-purpose flour
½ cup cornstarch
1 teaspoon paprika
1 teaspoon garlic powder
1 teaspoon onion powder
½ teaspoon cayenne pepper (optional)
Salt and freshly ground black pepper, to taste
Vegetable oil or lard, for frying
For the gravy
2 tablespoons pan drippings or butter
2 tablespoons all-purpose flour
1½ cups milk (whole or 2%)
Salt and plenty of freshly ground black pepper
Instructions
Place the pounded chicken between layers of plastic wrap and gently tap to an even ½-inch thickness. In a shallow dish whisk together the buttermilk and hot sauce. Season the chicken with salt and pepper, then submerge in the buttermilk mixture. Cover and refrigerate for at least 30 minutes or up to 4 hours.
In a wide, shallow bowl combine the flour, cornstarch, paprika, garlic powder, onion powder, cayenne (if using), and a generous pinch of salt and pepper. Remove each piece of chicken from the buttermilk, allowing excess to drip off, and dredge thoroughly in the flour mixture, pressing to adhere. Transfer to a wire rack and let rest for 10 minutes so the coating sets.
Pour enough oil into a large skillet to come halfway up the sides and heat over medium-high until shimmering and a pinch of flour sizzles on contact. Fry two cutlets at a time, without overcrowding, until deep golden and crisp, about 4 minutes per side. Adjust the heat as needed so the crust browns evenly without burning. Transfer cooked chicken to a clean wire rack or paper-lined plate while you make the gravy.
Pour off all but two tablespoons of fat from the skillet, reduce heat to medium, and whisk in the flour. Cook, stirring constantly, for about 1 minute. Gradually whisk in the milk, scraping up any browned bits from the pan bottom. Simmer until the gravy thickens enough to coat a spoon, about 3 to 4 minutes. Season generously with salt and black pepper.
Return the chicken to the skillet, spooning gravy over each piece, or serve the chicken on a platter and ladle the gravy on top. Garnish with chopped parsley if desired and serve immediately while hot.
Notes
Buttermilk tenderizes and adds tang; if you don’t have buttermilk, stir 1 tablespoon vinegar or lemon juice into 1 cup milk and let stand 5 minutes before using. For extra-crispy crust, double-dredge the chicken by returning it to the egg mixture (or buttermilk) and then flour a second time. Monitor oil temperature so it stays between 350°F and 365°F—too hot will burn the coating, too cool will make it soggy. Leftover chicken and gravy keep in the refrigerator for up to two days; reheat gently in a low oven to maintain crispness. Serve with collard greens or coleslaw for a classic Southern-style meal.


