

There are few things more comforting than a warm, cheesy bowl of Chili Mac—especially on a busy weeknight when all you want is something simple, satisfying, and absolutely delicious. This recipe takes everything we love about classic chili—hearty ground beef, tender beans, and bold spices—and combines it with creamy, cheesy macaroni for a dish that’s practically begging to be on your dinner rotation.
And the best part? It all comes together in just one pot. Less cleanup, more comfort—what’s not to love?
I first made this recipe on a rainy Tuesday evening when my fridge was looking pretty sparse, and I needed to feed a hungry family fast. I had ground beef, a can of beans, some leftover elbow macaroni, and a small block of cheddar cheese. That night, Chili Mac was born in my kitchen, and it’s been a go-to meal ever since. Over time, I’ve tweaked and perfected it to strike that ideal balance between bold chili flavor and creamy, cheesy goodness—and now I’m so excited to share it with you!
Whether you’re meal-prepping for the week, cooking for a crowd, or just craving something cozy, this Chili Mac hits the spot every single time.

Ingredients You’ll Need
For the Chili:
-
1 lb ground beef
-
1 tbsp olive oil
-
1 small onion, diced
-
2 garlic cloves, minced
-
1 can (15 oz) kidney beans, drained and rinsed
-
1 can (14.5 oz) diced tomatoes
-
1 can (8 oz) tomato sauce
-
2 tbsp chili powder
-
1 tsp ground cumin
-
Salt and pepper to taste
For the Pasta:
-
2 cups elbow macaroni
-
Water for boiling
-
Salt for pasta water
For the Cheese Sauce:
-
1 ½ cups shredded cheddar cheese
-
1 cup milk
-
½ cup sour cream
STEP 1: Cook the Pasta
Let’s start with the basics—getting the pasta ready. You’ll want to bring a large pot of salted water to a boil. Add your elbow macaroni and cook it according to the package directions until it’s just al dente. That means tender but still with a slight bite—remember, it’ll cook a bit more once everything comes together later. Once it’s done, drain it and set it aside.
Tip: Don’t overcook the pasta—it needs to hold its shape when mixed with the chili and cheese sauce.
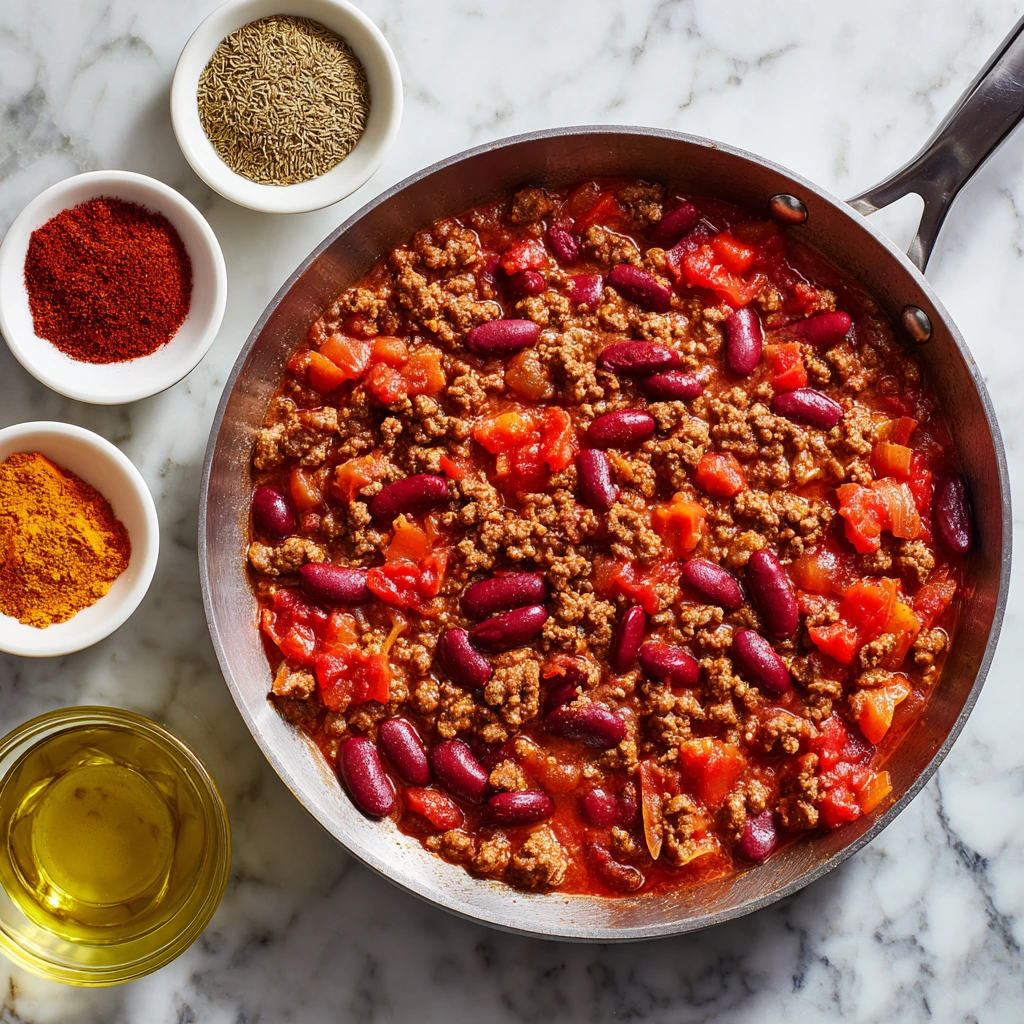
STEP 2: Make the Chili Base
Now, it’s time to build those rich, savory chili flavors.
In a large pot or deep skillet, heat 1 tablespoon of olive oil over medium heat. Toss in the diced onion and let it cook for about 3-4 minutes until it becomes soft and fragrant. Then add in the minced garlic and give it another quick minute.
Next up: ground beef. Add it straight into the pan with the onions and garlic. Use a spoon or spatula to break it up as it browns. You’re looking for a nice even crumble with no pink remaining. If you have a lot of grease in the pan, go ahead and drain the excess.
Once the beef is cooked through, it’s time to really bring in that chili goodness. Stir in your kidney beans, diced tomatoes, tomato sauce, chili powder, cumin, salt, and pepper. Let everything simmer together for about 10-15 minutes so those flavors can blend and thicken up just a bit. The aroma is going to be incredible—it’s that classic chili scent with just the right amount of spice.

Creamy, Cheesy Chili Mac: Bringing It All Together
Now that we’ve built that hearty chili base and cooked up the macaroni, it’s time for my favorite part—the cheese sauce! This is where everything really comes together, and the dish transforms from simple chili and pasta into something rich, creamy, and utterly irresistible.
I’ve tried shortcuts in the past—like tossing in shredded cheese straight into the pot—but making a quick homemade cheese sauce adds a whole other level of flavor and texture. It’s smooth, velvety, and coats every piece of pasta perfectly. Plus, the combination of cheddar, sour cream, and milk brings a delicious tang that balances the spice of the chili just right.
Let’s dive back into the kitchen and finish up this one-pot wonder.
STEP 3: Make the Cheese Sauce
Grab a small saucepan and set it over low heat. Pour in the milk, then add the sour cream and shredded cheddar cheese. Keep stirring gently but constantly until everything melts down into a smooth, creamy sauce.
You’ll know it’s ready when the mixture is glossy, thick enough to coat the back of a spoon, and has that rich cheddar aroma we all know and love.
Tip: Don’t let the heat get too high—cheese sauces can break if they get too hot too fast. Low and slow is the way to go.
If you’re feeling creative, this is also a great place to mix things up. You could use a blend of cheeses like Monterey Jack, pepper jack (for a spicy kick), or even a bit of cream cheese for extra richness.
STEP 4: Combine the Pasta, Chili, and Cheese
Now comes the fun part—mixing everything together!
Pour your drained macaroni right into the pot with the chili mixture and give it a good stir to combine. Then, slowly add your cheese sauce and mix until every bite is coated in that creamy, cheesy goodness.
At this point, your Chili Mac should be thick, hearty, and absolutely packed with flavor. It should look saucy but not soupy—if it seems a bit thick, you can loosen it up with a splash of milk or even a bit of the pasta cooking water if you saved some.
Let everything heat through for just a couple of minutes on low, stirring gently so nothing sticks to the bottom of the pot.
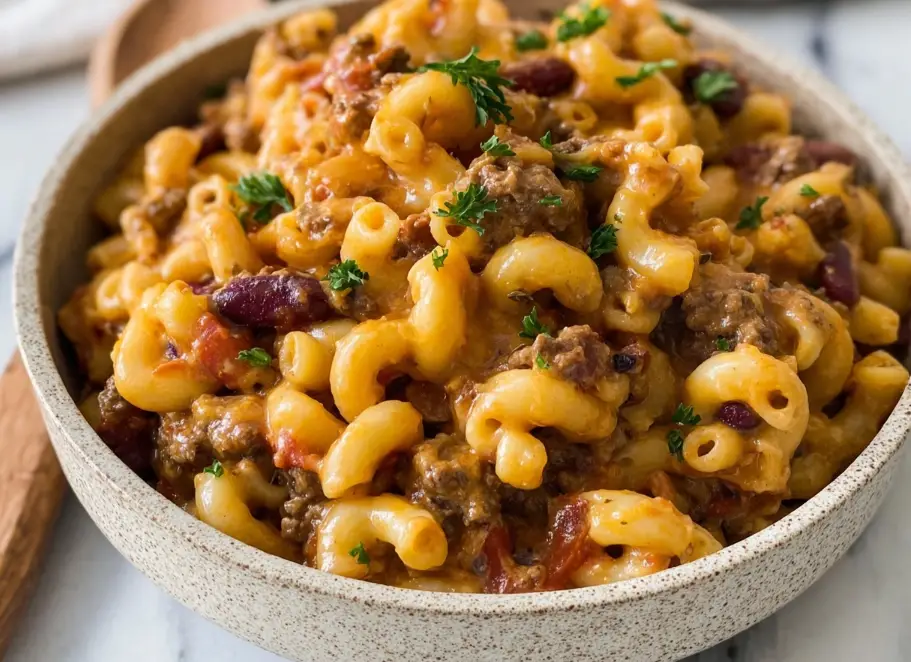
STEP 5: Serve and Enjoy
Spoon generous portions into bowls and serve while it’s still hot and melty. This dish is delicious all on its own, but if you want to level things up, here are a few topping ideas:
-
Extra shredded cheese on top
-
A dollop of sour cream
-
Sliced green onions or chives
-
Crushed tortilla chips for a little crunch
-
A drizzle of hot sauce if you love heat
No matter how you serve it, this Chili Mac is the kind of meal that brings everyone running to the table.
Make-Ahead and Storage Tips
This recipe isn’t just great for dinner—it’s also perfect for leftovers. In fact, some say it tastes even better the next day once all the flavors have had more time to meld.
To store:
Let it cool completely, then transfer to an airtight container. It’ll keep well in the fridge for up to 4 days.
To reheat:
Warm it on the stovetop over low heat or in the microwave. Add a splash of milk or water if needed to loosen the sauce.
To freeze:
You can freeze it, though keep in mind the texture of the pasta may soften a bit. Freeze in airtight containers for up to 2 months. Thaw in the fridge overnight and reheat as usual.
Optional Variations to Try
One of the things I love most about Chili Mac is how easy it is to customize. Here are a few swaps and add-ins you can try based on what you have on hand:
-
Swap the meat: Use ground turkey, chicken, or even plant-based meat for a different spin.
-
Switch up the beans: Don’t have kidney beans? Black beans, pinto beans, or even chili-style baked beans work great.
-
Go veggie: Omit the meat and add chopped bell peppers, corn, or zucchini for a vegetarian version.
-
Add spice: Toss in diced jalapeños, crushed red pepper, or a splash of hot sauce to heat things up.
-
Make it extra cheesy: Stir in some cream cheese or add more cheddar for an even creamier sauce.
Chili Mac FAQ + Final Thoughts
By now, you’ve got a warm pot of hearty, cheesy Chili Mac ready to serve, and your kitchen probably smells amazing. This recipe is a crowd-pleaser through and through—comfort food that’s filling, flavorful, and full of those cozy, nostalgic vibes we all crave (especially on busy weeknights).
Before we wrap things up, let’s go over some frequently asked questions to help you feel even more confident in the kitchen. Whether it’s your first time making Chili Mac or you’re just looking to troubleshoot or experiment, this section should cover all the basics.
FAQ: Your Chili Mac Questions Answered
1. Can I make this recipe ahead of time?
Absolutely. Chili Mac stores well in the fridge for up to 4 days. Just let it cool completely before transferring it to an airtight container. Reheat on the stovetop or in the microwave, and add a splash of milk if it needs loosening up.
2. Is this dish freezer-friendly?
Yes! You can freeze Chili Mac for up to 2 months. Keep it in a freezer-safe container, and when you’re ready to eat it, thaw it overnight in the fridge and reheat gently. Keep in mind the pasta texture may soften slightly after freezing.
3. Can I make it spicier?
Definitely. Add diced jalapeños, crushed red pepper flakes, or your favorite hot sauce to the chili mixture while it simmers. Pepper jack cheese is another great option for a spicy twist on the cheese sauce.
4. What if I don’t have sour cream?
No problem. You can use Greek yogurt for a similar tang and creamy texture, or skip it entirely if you’re okay with a more straightforward cheese sauce.
5. Can I use different pasta shapes?
Yes! Elbow macaroni works great, but shells, rotini, or penne also hold up well in this dish. Just make sure not to overcook the pasta before combining it with the chili and cheese sauce.
6. What kind of cheese works best?
Sharp cheddar gives the most classic flavor, but you can get creative with Monterey Jack, Colby, mozzarella, or even a bit of cream cheese for extra richness. Just be sure to use cheese that melts well.
7. How can I make this recipe vegetarian?
It’s simple—skip the ground beef and add more beans or some sautéed veggies like bell peppers, corn, or zucchini. You’ll still get that hearty, satisfying bite without the meat.
Final Thoughts: Why Chili Mac Belongs in Your Recipe Rotation
Chili Mac is the kind of dish that delivers every time—whether you’re cooking for picky eaters, meal prepping for the week, or just craving something warm and satisfying. It’s bold, cheesy, and comforting in all the right ways.
I love how easy it is to throw together with pantry staples, and how versatile it is for whatever you’ve got in the fridge. Plus, clean-up is a breeze when it all comes together in one pot.
If you’ve never made Chili Mac before, I hope this guide inspires you to give it a try. And if it’s already one of your go-to meals, maybe you picked up a new tip or variation to test out next time.
Once you make it, don’t forget to share how it turned out! I’d love to hear your favorite tweaks—maybe you added extra spice, used a different cheese combo, or made it vegetarian. Leave a comment and let’s keep the Chili Mac conversation going.
Print
Chili Mac
- Author: Sophia
Description
Chili Mac is the perfect comfort food that combines the hearty flavor of chili with the creamy, satisfying texture of macaroni and cheese. It’s a one-pot dish that’s bold, cheesy, and incredibly easy to make, making it ideal for weeknight dinners or casual gatherings.
Ingredients
For the chili:
1 lb ground beef
1 tbsp olive oil
1 small onion, diced
2 garlic cloves, minced
1 can (15 oz) kidney beans, drained and rinsed
1 can (14.5 oz) diced tomatoes
1 can (8 oz) tomato sauce
2 tbsp chili powder
1 tsp ground cumin
Salt and pepper to taste
For the pasta:
2 cups elbow macaroni
Water for boiling
Salt for pasta water
For the cheese sauce:
1 ½ cups shredded cheddar cheese
1 cup milk
½ cup sour cream
Instructions
1️⃣ Cook the pasta: In a large pot, bring salted water to a boil. Add the elbow macaroni and cook according to package directions until al dente. Drain and set aside.
2️⃣ Prepare the chili: In a large skillet or pot, heat olive oil over medium heat. Add the diced onion and sauté for 3-4 minutes until softened. Add the minced garlic and cook for another minute. Add the ground beef and cook until browned, breaking it up with a spoon as it cooks. Drain excess grease if needed.
3️⃣ Add beans and tomatoes: Stir in the kidney beans, diced tomatoes, tomato sauce, chili powder, cumin, salt, and pepper. Simmer for 10-15 minutes, allowing the flavors to blend and the mixture to thicken slightly.
4️⃣ Make the cheese sauce: In a separate saucepan over low heat, combine the milk, sour cream, and shredded cheddar cheese. Stir constantly until the cheese is melted and the sauce is smooth and creamy.
5️⃣ Combine everything: Add the cooked pasta to the chili mixture and stir to combine. Pour in the cheese sauce and mix until everything is well coated and heated through.
6️⃣ Serve hot: Spoon into bowls and serve immediately. Optional toppings include chopped green onions, extra shredded cheese, or a dollop of sour cream.
Notes
This recipe is flexible—feel free to substitute ground turkey or use black beans instead of kidney beans. If you prefer a spicier version, add chopped jalapeños or a dash of hot sauce. Leftovers store well in the fridge and can be reheated the next day.


