
Chocolate Peanut Butter Rice Krispie Cups are the perfect blend of indulgence and simplicity. This easy, no-bake treat is beloved for its rich combination of flavors—creamy peanut butter, decadent chocolate, and the irresistible crunch of rice krispies. These cups cater to a wide range of tastes and preferences, making them a popular choice for both kids and adults. Whether you’re looking for a quick snack or a dessert that feels more substantial, this recipe delivers with minimal effort and maximum flavor.
For those looking to make healthier choices, this recipe can easily be adapted. By using dark chocolate or natural peanut butter, you can create a more nutritious version without compromising on taste. These substitutions provide not only a lower sugar content but also added nutritional benefits like antioxidants from dark chocolate and healthy fats from natural peanut butter.
Whether it’s for a casual snack, a party treat, or a dessert after dinner, Chocolate Peanut Butter Rice Krispie Cups are incredibly versatile. They’re quick to make and can be stored for several days, making them ideal for last-minute gatherings or weekly meal prep. In this article, we’ll break down everything you need to know to create these delectable cups with ease.
Why Chocolate and Peanut Butter is a Perfect Match
The combination of chocolate and peanut butter is a time-tested classic that’s loved by many. But why does this duo work so well together? The answer lies in the balance of flavors: chocolate’s deep, rich sweetness pairs perfectly with the salty, creamy taste of peanut butter. This contrast creates a satisfying flavor experience that hits multiple taste sensations at once—sweet, salty, and slightly bitter if using dark chocolate.
From candies like Reese’s to baked goods, this flavor pairing has become a staple in desserts across the world. The chemistry between chocolate and peanut butter isn’t just about taste; their textures also complement each other beautifully, with the smoothness of peanut butter balancing the crisp snap of chocolate. Together, they create a sensory experience that is hard to beat, and this magic is at the core of our Chocolate Peanut Butter Rice Krispie Cups.
What Makes Rice Krispie Cups Unique?
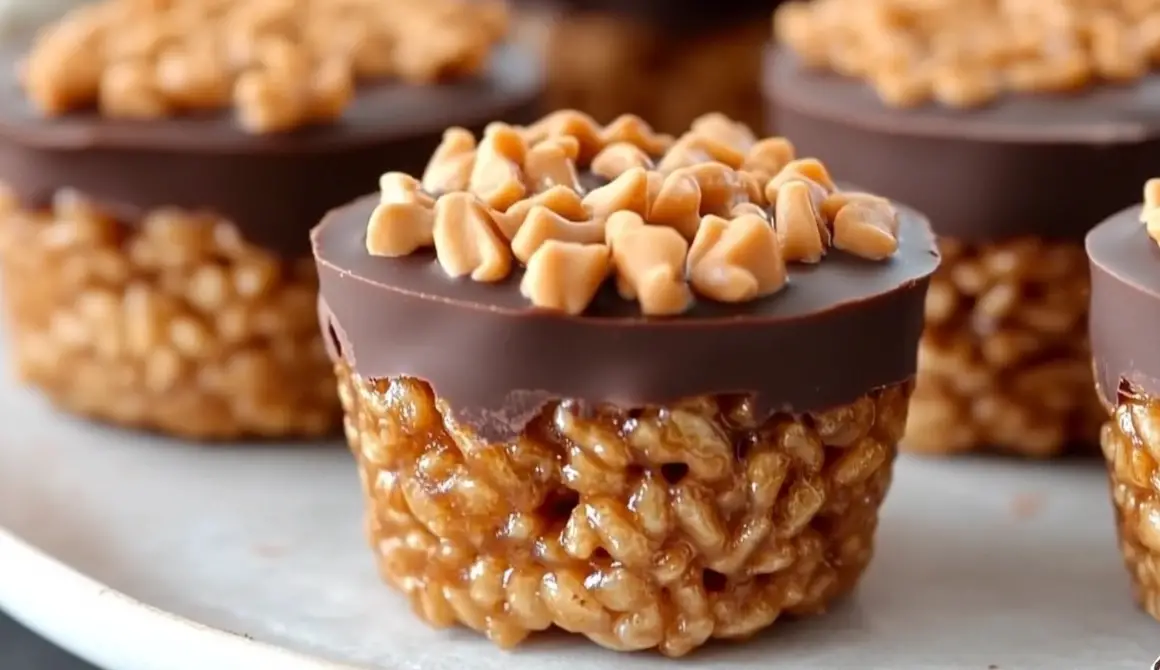
While there are many chocolate and peanut butter treats out there, what sets Chocolate Peanut Butter Rice Krispie Cups apart is their unique textural contrast. Most peanut butter and chocolate desserts are soft and rich, but the addition of rice krispies gives these cups a delightful crunch. This creates a more exciting and satisfying bite, where each mouthful has a mix of creamy and crispy elements.
In addition, making these treats in individual cup form offers several benefits. First, it allows for easy portion control—each cup is a self-contained serving, making them perfect for parties or packing in lunches. Second, their no-bake nature makes them incredibly easy and quick to prepare. Unlike baked desserts, these cups only require some simple mixing and chilling, so you can have a delicious treat ready in no time, without ever turning on the oven.
Recipe Breakdown
Ingredients Overview
The ingredients for Chocolate Peanut Butter Rice Krispie Cups are simple yet flavorful. Here’s what you’ll need:
- Peanut Butter: Smooth peanut butter works best for an even texture, though you can use crunchy if you prefer a bit of added texture.
- Chocolate: Semi-sweet or dark chocolate is ideal for balancing the sweetness, but milk chocolate can be used for a sweeter option.
- Rice Krispies Cereal: The key to that crispy texture, Rice Krispies add the perfect crunch.
- Optional Add-ins: You can customize your cups with ingredients like a sprinkle of sea salt for extra flavor, vanilla extract for added depth, or even coconut oil to help the chocolate mixture set smoothly.
Variations:
- Vegan alternatives: Use dairy-free chocolate and a plant-based butter substitute to make the recipe vegan-friendly.
- Gluten-free options: Most rice cereals are gluten-free, but double-check to ensure no cross-contamination if gluten is a concern.
- Healthier versions: Opt for dark chocolate with at least 70% cocoa and natural peanut butter with no added sugar for a healthier twist.
Using high-quality ingredients is key to getting the most out of this recipe. Good-quality chocolate and peanut butter will greatly enhance the final flavor of your treats.
Step-by-Step Instructions
Follow these steps to create perfect Chocolate Peanut Butter Rice Krispie Cups:
- Melt the Chocolate and Peanut Butter:
In a microwave-safe bowl, combine the chocolate and peanut butter. Microwave in 30-second intervals, stirring in between, until the mixture is smooth and fully melted. Alternatively, you can use a double boiler on the stovetop to melt the ingredients gently. - Combine with Rice Krispies:
Once the chocolate-peanut butter mixture is smooth, fold in the Rice Krispies until they are fully coated. Make sure the cereal is evenly distributed for consistent crunch in every bite. - Portion into Cups:
Line a muffin tin with paper liners. Spoon the mixture into each cup, filling them about three-quarters full. Gently press the mixture down to pack it slightly for better shape. - Chill to Set:
Place the muffin tin in the refrigerator for at least 30 minutes to allow the cups to firm up. Once they’re fully set, you can remove them from the liners and enjoy!
Tips:
- Avoid overheating the chocolate: Overheating can cause the chocolate to seize. Always melt it slowly.
- Don’t overmix the cereal: Overmixing can cause the rice krispies to lose their crunch.
Tips for Perfect Rice Krispie Cups
To ensure your Chocolate Peanut Butter Rice Krispie Cups turn out perfectly every time, here are some useful tips:
- Consistency of the Peanut Butter-Chocolate Mixture: The melted peanut butter and chocolate should be smooth and fluid. If it’s too thick, add a small amount of coconut oil to thin it out.
- Keep the Rice Krispies Crunchy: To maintain their crispness, fold the cereal into the mixture gently and quickly. The faster you work, the less the cereal will absorb moisture and soften.
- Avoid Stickiness: Use slightly oiled or buttered hands when pressing the mixture into the muffin tins to avoid it sticking to your fingers.
- Chilling Methods: Use the refrigerator for a slightly softer, chewy texture, or the freezer if you prefer a firmer bite.
Variations and Add-Ins
There are plenty of ways to get creative with this recipe. Here are some fun variations and add-ins to try:
- Swap out the chocolate: Use white or milk chocolate for a sweeter twist, or try a mix of dark and milk for a balanced flavor.
- Add a caramel layer: Before pouring the mixture into the cups, add a thin layer of caramel for extra indulgence.
- Health-focused Add-ins: Boost the nutritional value by mixing in chia seeds, protein powder, or flaxseeds.
- Holiday-Themed Variations: For a festive touch, add crushed peppermint candies at Christmas or pastel sprinkles for Easter.
Nutritional Breakdown
Each Chocolate Peanut Butter Rice Krispie Cup offers a balanced blend of fats, carbohydrates, and protein, making them a satisfying treat. A typical cup (using standard ingredients like semi-sweet chocolate and creamy peanut butter) contains approximately:
- Calories: 200-250 kcal
- Fat: 15g (from peanut butter and chocolate)
- Carbohydrates: 20-25g (from rice krispies, chocolate, and peanut butter)
- Protein: 4-5g (from peanut butter)
Substitutions and Their Impact:
- Low-sugar chocolate: Reduces the sugar content and overall carbohydrates while providing more fiber and antioxidants.
- Natural peanut butter: Typically contains less sugar and fewer processed oils, lowering the calorie count and adding healthier fats.
- Dark chocolate: A higher cocoa percentage can reduce the overall sugar content and add health benefits, such as increased antioxidants and less fat compared to milk chocolate.
Healthier Alternatives:
- Use dark chocolate (70% cocoa or higher) to cut back on added sugar while adding a rich flavor.
- Opt for unsweetened or lightly sweetened peanut butter to reduce sugar intake and boost healthy fat content.
By making these substitutions, you can enjoy the same delicious treat while being mindful of your dietary preferences.
How to Store and Serve
Proper storage is key to maintaining the texture and flavor of your Chocolate Peanut Butter Rice Krispie Cups. Here’s how to store them for optimal freshness:
- Airtight Container: Store the cups in an airtight container to prevent them from becoming stale or absorbing moisture.
- Refrigerator: For a slightly chewier texture, keep them in the fridge for up to one week.
- Freezer: These cups can also be frozen for up to two months. Simply allow them to thaw at room temperature before serving for the best taste.
Serving Suggestions:
- These treats can be served chilled straight from the fridge for a firmer bite.
- If you prefer them softer, allow them to sit at room temperature for a few minutes before serving.
- Pair them with coffee, milk, or even a scoop of ice cream for an indulgent dessert experience.
Making Ahead and Freezing Tips
Making these cups in advance is a great way to save time for future events or snacks. Here’s how to plan ahead and freeze them effectively:
- Prepare in Advance: You can prepare these cups a few days ahead of time and store them in the fridge until ready to serve.
- Freezing Tips: Once the cups are fully set, place them in a single layer on a baking sheet and freeze until solid. Afterward, transfer them to an airtight container or freezer bag for long-term storage. This prevents them from sticking together.
- Reheating or Serving from Frozen: When ready to enjoy, remove the cups from the freezer and allow them to thaw at room temperature for 10-15 minutes to regain their optimal texture. If you prefer them firm, you can eat them straight from the freezer.
FAQs and Conclusion
Frequently Asked Questions (FAQs)
- Can I use crunchy peanut butter instead of smooth?
Absolutely! Crunchy peanut butter adds an extra layer of texture to the cups. The small peanut pieces will complement the crispiness of the rice krispies, though the cups might be slightly more crumbly. - How do I make them vegan?
To make these cups vegan, use dairy-free chocolate and a plant-based butter substitute. Many brands offer vegan-friendly peanut butter that doesn’t contain honey or other animal products, so be sure to check the labels. You can also substitute regular rice krispies with a certified vegan cereal if needed. - Can I use another type of cereal instead of Rice Krispies?
Yes, you can experiment with other cereals! Cornflakes or puffed quinoa work well as alternatives and provide a different kind of crunch. Puffed rice or whole grain cereals can also be used for a heartier texture. - How long do they need to set in the fridge?
Ideally, the cups should set in the fridge for at least 30 minutes to one hour. This will ensure that the chocolate and peanut butter mixture firms up properly and holds its shape. - Can I add toppings like sea salt or sprinkles?
Definitely! A sprinkle of sea salt can enhance the flavor by balancing the sweetness of the chocolate. Sprinkles, shredded coconut, or chopped nuts can add visual appeal and extra flavor.

Chocolate Peanut Butter Rice Krispie Cups
Description
These Chocolate Peanut Butter Rice Krispie Cups are the perfect no-bake treat that combines the rich flavors of chocolate and creamy peanut butter with the delightful crunch of Rice Krispies cereal. This quick and easy recipe takes just minutes to prepare and requires no baking, making it an ideal dessert for busy days, casual gatherings, or even holiday parties. With a few simple ingredients, you can whip up a batch of these indulgent, portion-controlled cups that are perfect for both kids and adults. Plus, the recipe is highly adaptable, allowing for substitutions and variations to suit your dietary preferences, whether you’re aiming for a healthier version or a fun, festive twist.
Ingredients
- 3 cups Rice Krispies cereal
- 1 ½ cups chocolate chips vegan chocolate chips also work
- 1 cup chunky peanut butter
- 6 tablespoons honey
- ⅛ teaspoon salt
Instructions
-
Prepare Your Muffin Tin: Line a muffin tin with paper or silicone liners for easy removal of the cups.
-
Melt the Peanut Butter Mixture: In a medium saucepan over low heat, melt 1 cup of chunky peanut butter, 6 tablespoons of honey, and ⅛ teaspoon of salt. Stir continuously until smooth and well combined, about 3-5 minutes.
-
Combine with Rice Krispies: Remove the saucepan from heat and stir in 3 cups of Rice Krispies cereal. Mix thoroughly until all cereal is coated with the peanut butter mixture.
-
Form the Cups: Spoon the peanut butter and Rice Krispies mixture into the prepared muffin tin, pressing down gently to form cup shapes. Ensure the mixture is packed firmly to hold its shape.
-
Melt the Chocolate: In a separate saucepan, melt 1 ½ cups of chocolate chips over low heat, stirring continuously until smooth. Alternatively, melt the chocolate in the microwave in 30-second intervals, stirring between each interval.
-
Fill the Cups with Chocolate: Spoon the melted chocolate over each Rice Krispie base in the muffin tin, filling to the top.
-
Chill to Set: Place the muffin tin in the refrigerator and chill for at least 1 hour, or in the freezer for 30 minutes, until the chocolate is set and the cups are firm.
-
Serve and Enjoy: Once set, remove the cups from the muffin tin and peel off the liners. Store any leftovers in an airtight container in the refrigerator.
Notes
- Ingredient Substitutions:
- For a healthier option, use dark chocolate (70% cocoa or higher) and natural peanut butter with no added sugar or oils.
- To make the recipe vegan, substitute regular chocolate with dairy-free chocolate and ensure your Rice Krispies or similar cereal is free from any animal-derived ingredients.
- Texture Tips:
- Using smooth peanut butter gives the cups a more even texture, but feel free to use crunchy peanut butter for added texture and a heartier bite.
- Ensure you don’t overmix the Rice Krispies into the melted peanut butter and chocolate to retain the signature crunch.
- Variations:
- Add a layer of caramel or top the cups with a sprinkle of sea salt for an extra flavor boost.
- For a festive variation, try incorporating crushed peppermint candies during the holidays or colorful sprinkles for special occasions.
- Storage Tips:
- Store in an airtight container in the fridge for up to a week to keep them fresh and chewy.
- You can also freeze the cups for up to 2 months. Simply thaw at room temperature before serving or enjoy them chilled for a firmer texture.
- Serving Suggestions:
- Serve these cups chilled or at room temperature, depending on your texture preference. Pair them with a cup of coffee or a cold glass of milk for the ultimate indulgence!


