
There’s something undeniably cheerful about a bright, tangy lemon bar. From the moment I first tasted one at a springtime potluck years ago, I was smitten—one bite felt like sunshine on a plate. Today, I’m excited to share my go-to recipe for classic lemon bars, the kind that balance a melt-in-your-mouth shortbread crust with a luscious, zingy lemon custard. Whether you’re planning a picnic, hosting friends for afternoon tea, or simply craving a light dessert after dinner, these bars deliver every time.
I’ll be honest: at first, I was intimidated by the idea of layering a custard atop a buttery crust without ending up with a gap or a soggy bottom. But after a few test runs—tweaking bake times, playing with zest quantities, and learning to pour the filling while the crust is still hot—I nailed the technique for a seamless, perfectly set slice every time. Now, it’s my go-to treat whenever I want to impress without stress.
In this first part, we’ll gather our ingredients, build that irresistible shortbread foundation, and get ready to whisk together the bright lemon filling. By the time you’re done, your kitchen will smell like a citrus orchard, and you’ll be well on your way to slicing into bars that taste like spring itself.

Steps
-
Preheat and Prep Your Pan
Set your oven to 350 °F (175 °C). While it warms up, line an 8×8-inch baking pan with parchment paper, making sure to leave a couple of inches of overhang on two opposite sides. This little trick makes lifting the bars out a breeze once they’re chilled. -
Make the Shortbread Crust
In a medium bowl, whisk together 1½ cups (190 g) of all-purpose flour and ½ cup (65 g) of powdered sugar. Add ⅔ cup (150 g) of cold, cubed unsalted butter. Using a pastry cutter—or your clean fingertips if you’re like me and don’t mind a little butter under your nails—work the butter into the flour mixture until it resembles coarse crumbs. -
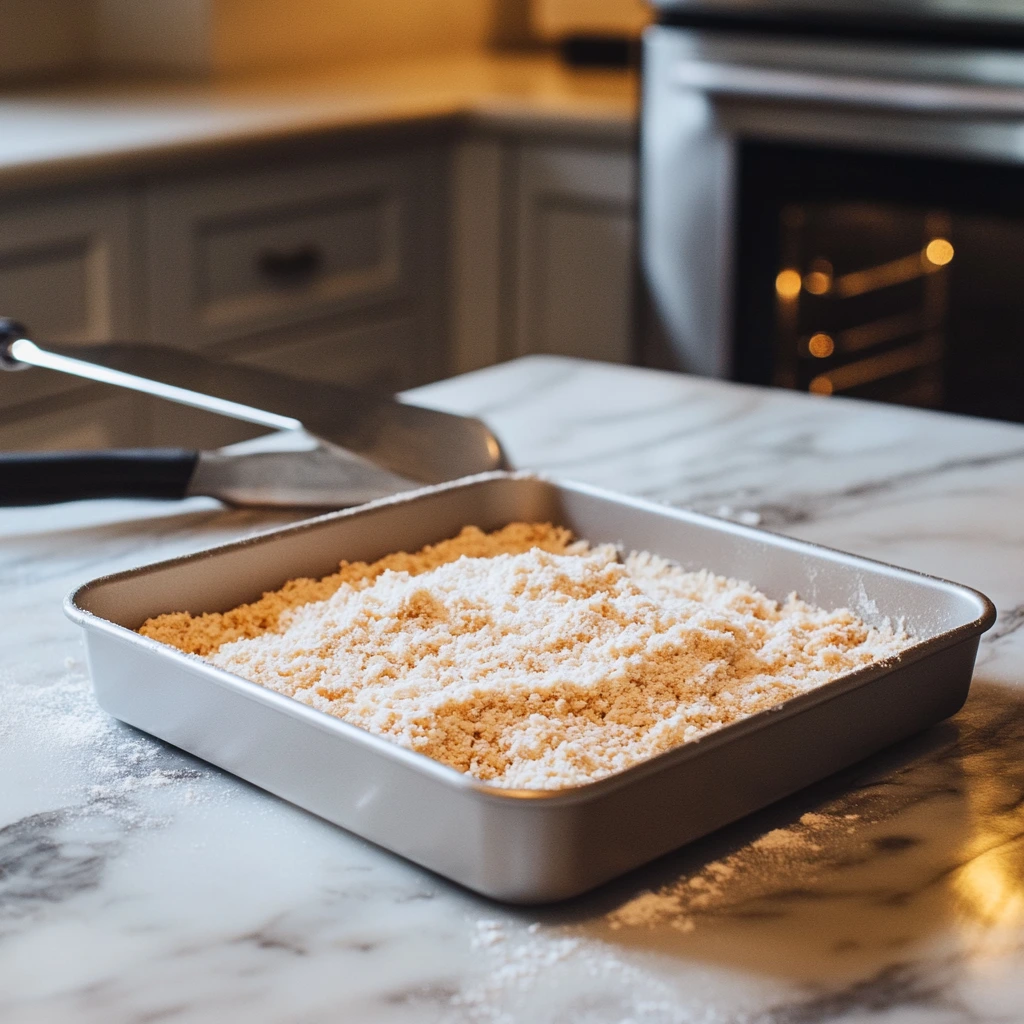
Bake the Crust
Press those crumbs firmly and evenly into the bottom of your prepared pan. I find it helpful to use the bottom of a measuring cup to really compact the dough; this ensures an even, sturdy base. Slide it into the oven and bake until the edges just start to turn golden—about 18–20 minutes. You’ll know it’s ready when the smell of toasty butter fills the kitchen. -
Prepare to Whisk the Filling
While the crust is baking, grab a separate bowl and let’s prep the filling. You’ll need 3 room-temperature eggs, 1 cup (200 g) granulated sugar, 2 tablespoons of all-purpose flour, a pinch of salt, plus the real stars: the zest and juice of fresh lemons. I always opt for at least two lemons’ worth of zest—finely grated, of course—to heighten that citrus punch. For juice, plan on about ½ cup (120 ml), which usually takes 3–4 lemons. Having everything measured out before the crust comes out guarantees a smooth pour and seamless layering.
Whisking, Baking, and Pro Tips
I can practically hear that oven timer ticking and smell the buttery crust coming back to life as we slip the pan back in. In Part 2, we’ll transform those measured ingredients into a silky-smooth lemon custard, bake until just set, and then tackle the all-important cooling phase. This is where patience really pays off: your bars need time to firm up so that each square slices cleanly and holds that perfect custard-to-crust ratio. I’ve also sprinkled in a few of my favorite tweaks—nothing too wild, just small ideas to personalize these bars and make them your own.
STEPS
-
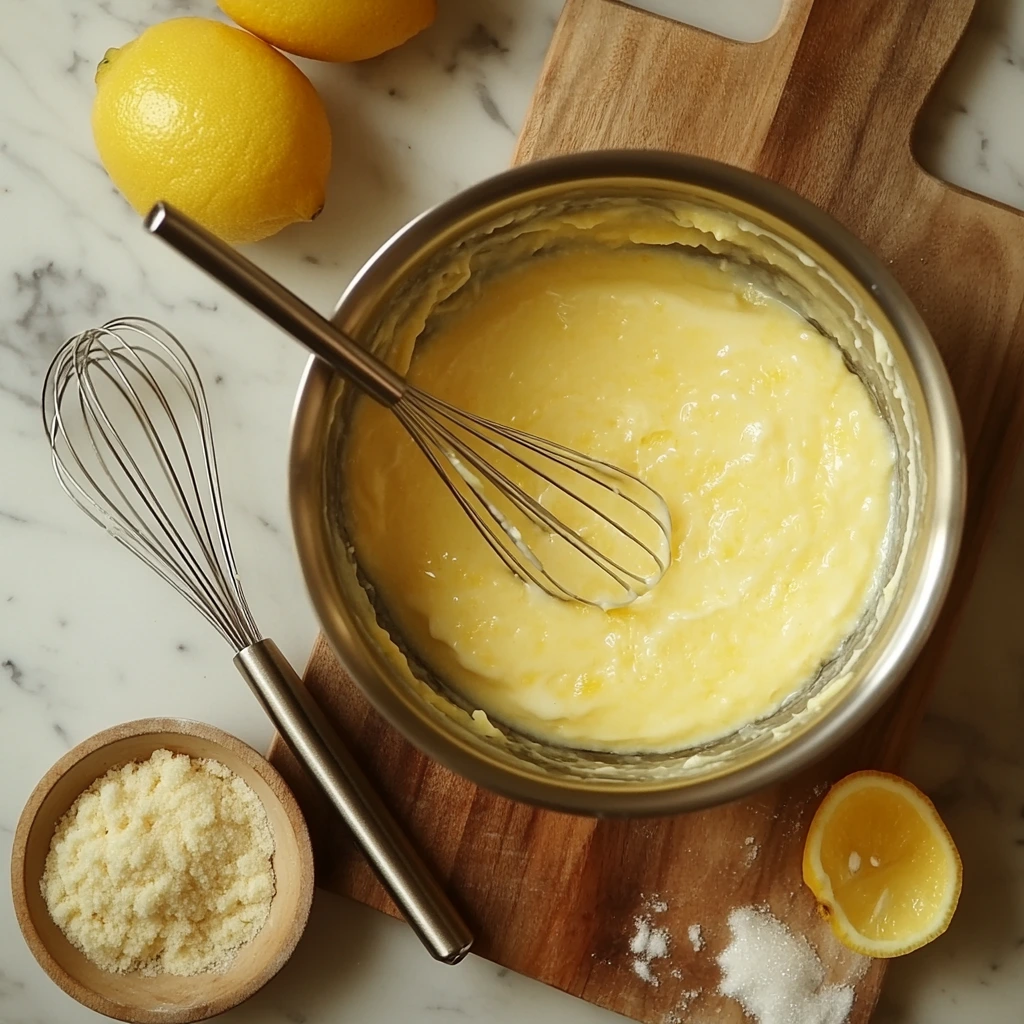
Whisk the Lemon Filling
In your pre-measured bowl, combine the 3 room-temperature eggs, 1 cup (200 g) granulated sugar, 2 tablespoons all-purpose flour, and a pinch of salt. Add the 2 tablespoons finely grated lemon zest and ½ cup (120 ml) fresh lemon juice. Using a whisk (or an electric mixer on low speed), beat until the mixture is uniformly pale and slightly thickened—about 1–2 minutes. For extra silky bars, you can strain the filling through a fine-mesh sieve to catch any stray bits of zest or coagulated egg white. -
Layer and Bake
Carefully remove your warm crust from the oven (leave the oven on). Pour the lemon filling evenly over the hot shortbread. This warmth helps the layers bond, preventing a gap between crust and custard. Gently tap the pan on the counter once or twice to release any air bubbles. Slide the pan back into the oven and bake until the edges are just set and the center jiggles slightly when nudged—about 18–22 minutes. The goal is a custard that’s firm around the perimeter but still has a bit of movement in the middle; it will finish setting as it cools. -
Cool in Two Stages
Transfer the pan to a wire rack and let it cool undisturbed for at least 1 hour. This rest allows the custard to firm up gradually, minimizing cracks. Then, cover the pan lightly with plastic wrap and chill in the refrigerator for at least 2 hours—or even overnight if you can wait that long. The longer chill time ensures tidy slices and a custard texture that’s creamy rather than runny. -
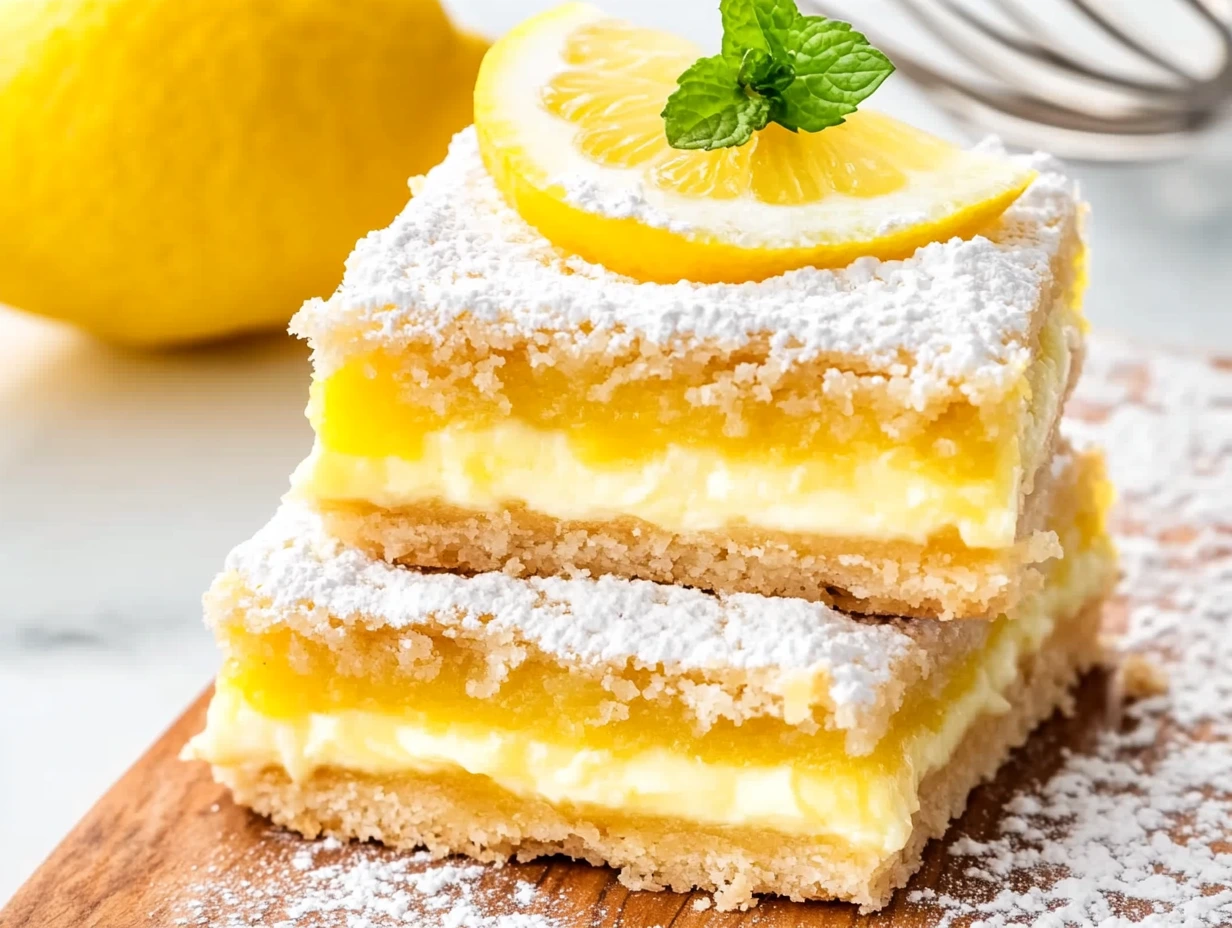
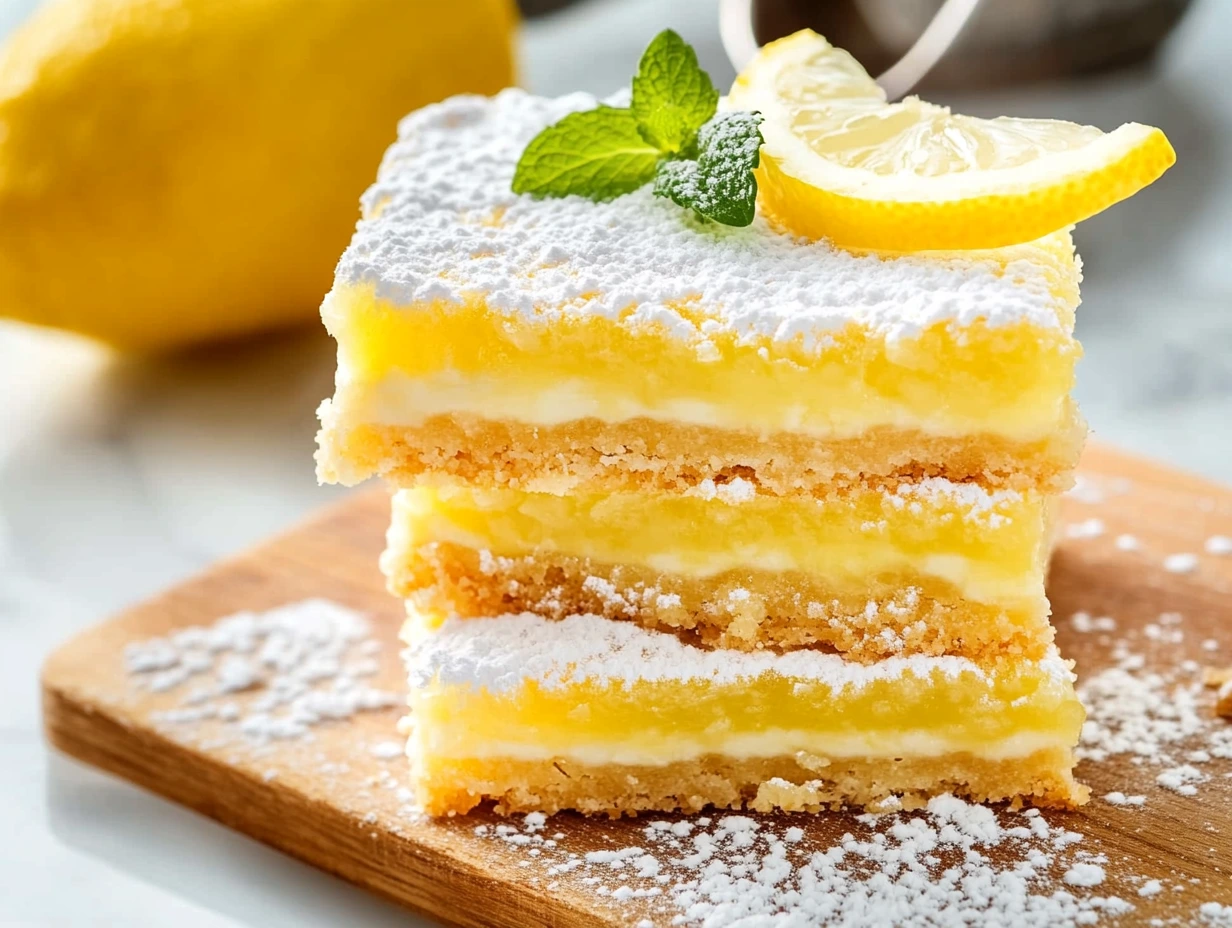
Unmold and Dust
Using the parchment-paper overhang, carefully lift the chilled slab from the pan. Place it on a cutting board and, with a sharp knife wiped clean between cuts, slice into 12 even squares. For that postcard-perfect finish, dust generously with powdered sugar just before serving. If you’re feeling fancy, drizzle a thin zigzag of melted white chocolate across the tops—or sprinkle a few micro basil leaves for a sophisticated twist.
Pro Tips & Variations
-
Maximize Zest Flavor: Always use a microplane grater for the finest zest—coarser bits can sink to the bottom of the filling or create pockets of concentrated tang.
-
Prevent Cracks: Avoid overbaking by starting to check at the 18-minute mark. The center should still wobble like gelatin.
-
Citrus Swaps: Swap half the lemon juice for lime or blood orange juice for a colorful flavor variation.
-
Add-Ins: Stir a tablespoon of finely chopped fresh thyme or basil into the filling for an herbaceous note. Alternatively, fold in a teaspoon of poppy seeds for texture.
-
Storage: Store bars in an airtight container in the refrigerator for up to 4 days. Let them sit at room temperature for 10–15 minutes before serving to soften the custard.
FAQ
1. Can I use a different pan size?
You can—but adjust bake times and thickness accordingly. A 9×9-inch pan will yield slightly thinner bars that may bake a few minutes faster, while a 7×7-inch pan gives thicker bars that need extra oven time. Keep an eye on color and jiggle to know when they’re done.
2. Why didn’t my filling set properly?
Underbaked filling is usually the culprit. Make sure you bake until the edges are firm and only the center wiggles like gelatin. If your center is still very liquid after 22 minutes, give it an extra 2–3 minutes in the oven, then allow a full chill—custard continues to set as it cools.
3. How far in advance can I make these bars?
You can bake, cool, and refrigerate them up to 2 days ahead of serving. Store in an airtight container, and just before guests arrive, dust with powdered sugar so they look freshly made.
4. Can I freeze lemon bars?
Yes! Freeze individual squares on a parchment-lined tray until solid (about 1 hour), then transfer to a freezer bag. They’ll keep for up to 2 months. Thaw in the refrigerator overnight, then bring to room temperature before serving.
5. My bars cracked—what went wrong?
Cracking usually happens when the oven runs too hot or the custard is overbaked. Double-check your oven temperature with an oven thermometer, and remove the bars as soon as the center jiggles. Gentle cooling helps prevent sudden temperature changes that cause cracks.
6. Any tips for super-clean slices?
Use a long, sharp knife wiped clean between each cut. Run the blade under hot water, dry it, and slice; repeat this process for every cut. The heat helps the blade glide through the custard and crust without tugging.
7. Can I add flavor variations?
Absolutely! Stir a teaspoon of lavender buds into the crust for a floral note, or swirl in raspberry puree before baking for a fruity twist. Just be mindful that extra liquid can affect bake time and custard texture—reduce other liquids slightly to compensate.
Conclusion
There you have it—your step-by-step guide to making show-stopping Lemon Bars that balance buttery richness with a bright, tangy custard. From the first golden bake of the shortbread to that final dusting of powdered sugar, each stage brings its own little triumph. The real reward, of course, is watching friends and family light up at the first bite.
Print
classic Lemon Bars
- Author: Sophia
Description
These classic Lemon Bars feature a buttery, tender shortbread crust topped with a bright, tangy lemon custard. They’re irresistibly zesty and sweet—in every bite you get just the right balance of citrus punch and buttery richness. Perfect for spring gatherings, potlucks, or a light dessert any time of year.
Ingredients
1½ cups (190 g) all-purpose flour
½ cup (65 g) powdered sugar, plus extra for dusting
⅔ cup (150 g) unsalted butter, cold and cut into cubes
3 large eggs, room temperature
1 cup (200 g) granulated sugar
2 tablespoons finely grated lemon zest (from 2–3 lemons)
½ cup (120 ml) fresh lemon juice (from 3–4 lemons)
2 tablespoons all-purpose flour
Pinch of salt
Instructions
1️⃣ Preheat the oven to 350 °F (175 °C). Line an 8×8-inch baking pan with parchment paper, leaving an overhang on two sides to lift the bars out easily.
2️⃣ In a medium bowl, combine 1½ cups flour and ½ cup powdered sugar. Add the cubed butter and, using a pastry cutter or your fingertips, work it into the dry ingredients until the mixture resembles coarse crumbs.
3️⃣ Press the crumb mixture firmly and evenly into the bottom of the prepared pan. Bake until the edges are just turning golden, about 18–20 minutes. Remove from the oven but leave the oven on.
4️⃣ While the crust bakes, whisk together the eggs, granulated sugar, lemon zest, lemon juice, 2 tablespoons flour, and a pinch of salt in a separate bowl until smooth and pale.
5️⃣ Pour the lemon filling over the hot crust and return to the oven. Bake until the filling is set but still slightly jiggly in the center, about 18–22 minutes.
6️⃣ Let the bars cool in the pan on a wire rack for at least 1 hour, then refrigerate until fully chilled, about 2 hours more.
7️⃣ Once firm, use the parchment overhang to lift the bars from the pan. Dust with powdered sugar and slice into squares.
Notes
For the sharpest lemon flavor, use fresh lemons and include the finely grated zest.
Ensure the crust is warm when you pour on the filling—this helps the layers fuse and prevents a gap.
Bars store covered in the refrigerator for up to 4 days; bring to room temperature before serving for the creamiest texture.
To add a decorative touch, pipe a thin zigzag of melted white chocolate over each bar after dusting.


