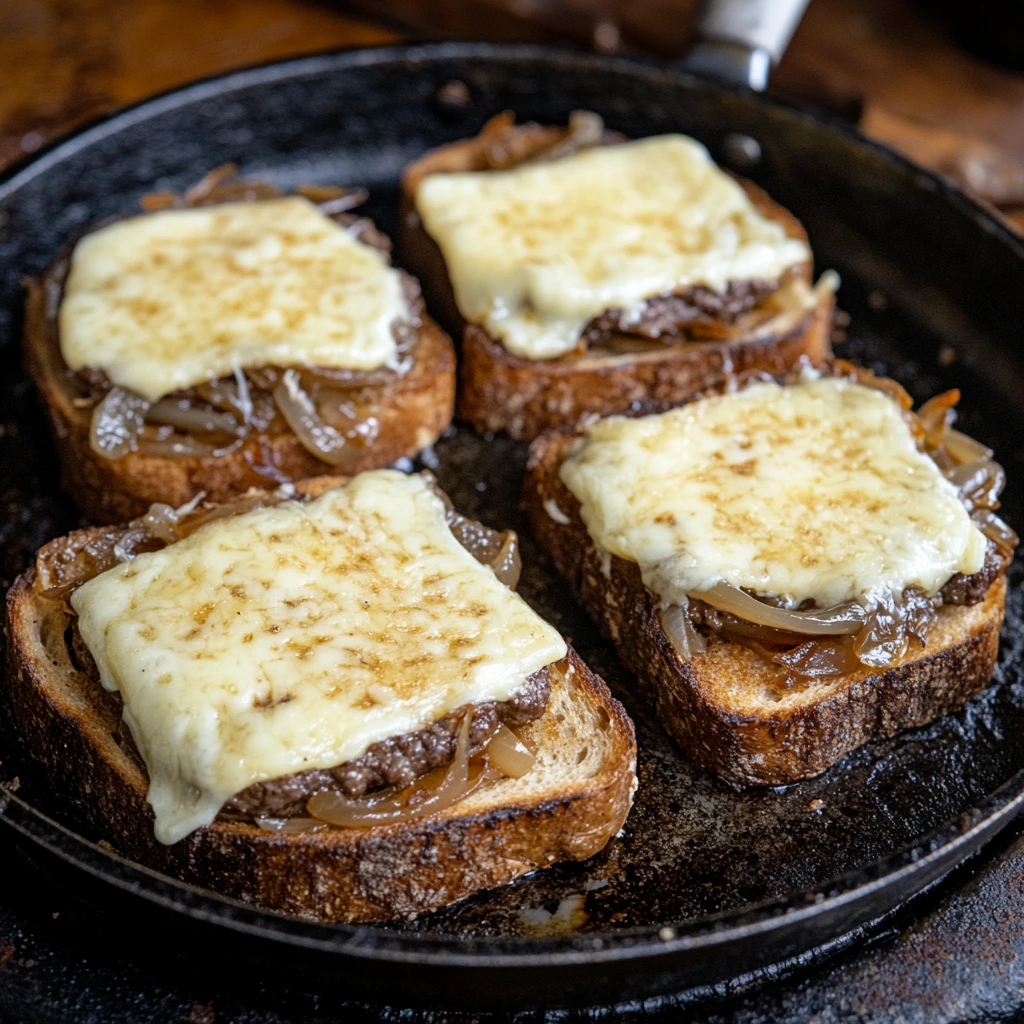
There’s something magical about a patty melt. It’s not just a sandwich; it’s a beautiful marriage between a juicy burger and a gooey grilled cheese. Every bite takes you straight to your favorite diner booth, complete with the sizzle of the griddle in the background. With perfectly caramelized onions, melty cheese, and a secret sauce that takes it over the top, this Classic Patty Melt recipe is everything you love about diner food, but made right in your kitchen.
When I think of patty melts, I’m reminded of late-night cravings and the comfort of something warm and savory. This recipe captures that same cozy, indulgent feeling. Trust me, once you make this at home, there’s no going back. Let’s dive into it!
The Secret Sauce: A Flavorful Kick
Before we get into the main event, let’s talk about the sauce. This secret sauce is what separates a good patty melt from a truly unforgettable one. It’s creamy, tangy, and just sweet enough to complement the savory flavors of the melt.
Here’s how you make it:
- Grab a small bowl and mix ½ cup mayonnaise, 2 tablespoons ketchup, 1 tablespoon sweet pickle relish, and 1 teaspoon Worcestershire sauce.
- Stir everything until it’s perfectly smooth.
- Cover and refrigerate it while you work on the rest of the patty melts. This little resting period lets the flavors meld together beautifully.
This sauce is so good, you might find yourself using it as a dip for fries, veggies, or even spreading it on other sandwiches.
The Secret to Perfect Caramelized Onions
Caramelized onions are the unsung hero of the patty melt. Their rich, sweet flavor balances the saltiness of the cheese and the heartiness of the beef patty. While they take a bit of time, the effort is absolutely worth it.
Here’s the step-by-step:
- Heat Up Your Pan: Place a large skillet over medium heat and melt about 1 tablespoon of butter.
- Add the Onions: Toss in one large onion, thinly sliced, and give it a good stir to coat all the pieces in butter.
- Slow and Steady: Let the onions cook, stirring occasionally, for 15–20 minutes. They’ll transform from sharp and crisp to soft, golden-brown, and sweet.
- Set Aside: Once the onions are caramelized to perfection, remove them from the skillet and set them aside.
Pro tip: Don’t rush this step by turning up the heat. High heat can burn the onions, leaving you with bitter bits instead of that deep, sweet flavor we’re after.

Shaping and Seasoning the Patties
Now for the star of the show: the beef patties. The trick to a great patty melt is making sure the patties fit the bread perfectly. That’s why you’ll shape them to be slightly larger than the bread slices—they’ll shrink a bit as they cook.
Here’s what to do:
- Divide 1 pound of ground beef into 4 equal portions.
- Shape each portion into a thin patty, about the size of your bread slices (but slightly larger to account for shrinkage).
- Season generously with salt and pepper on both sides.
At this point, you’re halfway to patty melt greatness. Stay tuned, because Part 2 will cover cooking the patties, assembling the sandwiches, and grilling them to golden perfection. Plus, I’ll share some tips to make your patty melts truly shine!

Building and Grilling the Perfect Patty Melt
Welcome back! By now, your secret sauce is chilling in the fridge, your onions are caramelized to golden perfection, and your beef patties are seasoned and ready to sizzle. In this section, we’re putting it all together to create the ultimate diner-style patty melt. From cooking the patties to layering the melty cheeses and grilling the sandwiches to crispy, golden-brown perfection, let’s turn these components into the sandwich of your dreams.

Cooking the Beef Patties: Juicy and Flavorful
Time to bring out the skillet again! Cooking the patties is straightforward, but a few key tips will help you get that juicy, tender bite every time.
- Heat Things Up: Using the same skillet you used for the onions (because, hello, flavor!), heat it over medium-high heat. If there’s a little leftover butter from the onions, leave it—it’ll only add to the richness of the patties.
- Sear the Patties: Place the patties in the hot skillet and cook for about 3-4 minutes per side. You’re looking for a deep, golden-brown crust. This not only locks in the juices but also adds incredible flavor.
- Rest the Patties: Once cooked through, transfer the patties to a plate and let them rest for a couple of minutes. This helps redistribute the juices, ensuring every bite is mouthwatering.
Pro tip: Avoid pressing down on the patties while they cook. It might be tempting to hear that sizzle, but it’ll squeeze out all those delicious juices we worked so hard to keep in.
Assembling the Patty Melts: The Layering Game
The magic of a patty melt lies in the layering—getting the perfect balance of cheese, beef, and onions in every bite. Here’s how to build them like a pro:
- Butter the Bread: Start by buttering one side of each slice of rye bread. The buttered side will hit the griddle, giving you that crispy, golden crust.
- Layer it Up: On the unbuttered side of 4 slices of bread, layer the ingredients in this order:
- Swiss cheese: This creamy, nutty cheese is a classic choice for patty melts.
- Beef patty: Center the patty so it covers as much of the bread as possible.
- Caramelized onions: Spoon a generous amount on top of the patty. Don’t skimp—this is where the sweet-savory magic happens.
- Cheddar cheese: This adds a sharp, tangy contrast to the Swiss and ties all the flavors together.
- Top it Off: Finish each sandwich with another slice of bread, buttered side up.

Grilling the Sandwiches: Golden and Gooey
Now comes the moment of truth—grilling your patty melts to golden perfection. Here’s how to do it right:
- Preheat the Skillet: Heat a clean skillet or griddle over medium heat. Give it a minute or two to get evenly hot.
- Grill the Sandwiches: Place your assembled sandwiches on the skillet. Press gently with a spatula to help everything stick together. Cook for 2-3 minutes per side, or until the bread is golden brown and crispy, and the cheese is fully melted.
- Flip with Care: When flipping, use a wide spatula to avoid losing any of that precious filling. Patience is key here—let the sandwich crisp up before flipping.
Pro tip: If your cheese isn’t melting as quickly as the bread is browning, reduce the heat slightly and cover the skillet with a lid. This traps the heat, melting the cheese without over-toasting the bread.
Serve It Up: The Final Touch
Once your patty melts are perfectly grilled, transfer them to a cutting board and let them rest for about a minute. This brief pause allows everything to settle, making it easier to slice and serve.
- Slice and Serve: Cut each patty melt in half diagonally for that classic diner look. This also makes it easier to handle and enjoy.
- The Secret Sauce Finale: Don’t forget your secret sauce! Drizzle it over the top of the sandwich or serve it on the side for dipping. Trust me, this sauce takes each bite to the next level.

Tips for Customizing Your Patty Melts
Want to make your patty melts uniquely yours? Here are a few ideas to switch things up:
- Add Bacon: Because, let’s be real, bacon makes everything better. Add a crispy slice or two during the layering process.
- Swap the Cheese: Not a fan of Swiss or cheddar? Try provolone for a mild flavor or pepper jack for a spicy kick.
- Go Veggie: Substitute the beef patty with a plant-based burger or a thick portobello mushroom cap for a vegetarian-friendly version.
- Extra Crunch: Add a handful of crispy fried onions or pickles for some extra texture and zing.
Your Patty Melt Questions Answered and Final Tips
Congratulations! You’re just about ready to enjoy your perfectly grilled patty melts. But before we wrap up, let’s address a few common questions about patty melts, from serving suggestions to storage tips. Afterward, I’ll leave you with a final thought to inspire your next kitchen adventure.
FAQ: All About Patty Melts
1. What are the best sides to serve with patty melts?
Patty melts pair wonderfully with classic diner-style sides. Here are a few ideas to complete your meal:
- French fries: Crispy and golden, they’re the ultimate comfort food companion.
- Sweet potato fries: For a slightly sweeter, healthier twist.
- Coleslaw: Adds a refreshing crunch to balance the richness of the melt.
- Pickles: A tangy, acidic bite that cuts through the buttery sandwich.
- Potato chips: An easy, no-cook option that brings a delightful crunch.
2. Can I make patty melts ahead of time?
While patty melts are best enjoyed fresh off the griddle, you can prepare the components in advance. Here’s how:
- Caramelized onions: Make these up to three days ahead and store them in an airtight container in the fridge.
- Beef patties: Shape and season the patties in advance. Keep them refrigerated and cook when ready to assemble the melts.
- When it’s time to serve, simply grill the sandwiches fresh for that signature crispy texture.
3. How do I store and reheat leftovers?
To store leftover patty melts:
- Wrap each sandwich in foil or plastic wrap and refrigerate for up to two days. To reheat:
- Warm them in a skillet over low heat, pressing gently with a spatula, until the bread is crispy and the cheese is melted. Avoid microwaving—it can make the bread soggy.
4. Can I substitute the bread in this recipe?
Absolutely! While rye bread is the traditional choice, feel free to experiment with:
- Sourdough: For a tangy flavor and sturdy texture.
- Texas toast: Thick slices that hold up well to the juicy fillings.
- Whole wheat bread: A healthier option with a nutty flavor. The key is to use a bread that crisps up well and can handle the hearty fillings.
5. What type of cheese works best for patty melts?
Swiss and cheddar are classic choices for their contrasting flavors—Swiss is creamy and nutty, while cheddar adds a sharp bite. That said, feel free to mix it up! Try:
- Provolone for a mild, melty option.
- Gouda for a rich, smoky flavor.
- Pepper jack if you like a little spice.
6. Can I make a gluten-free version of this recipe?
Yes! Simply swap the rye bread for your favorite gluten-free bread. Many brands offer sturdy, gluten-free sandwich bread that works beautifully for patty melts.
7. What’s the secret to perfectly melted cheese?
If your cheese isn’t melting fast enough, cover the skillet briefly with a lid or a sheet of foil while grilling. This traps heat and helps the cheese melt evenly without over-toasting the bread.
Final Thoughts: Why You’ll Love This Recipe
There’s a reason the patty melt has stood the test of time. It’s everything we crave in comfort food—crispy, buttery bread; savory, juicy beef; melty cheese; and sweet, caramelized onions, all brought together by a tangy secret sauce. It’s the kind of meal that feels indulgent yet approachable, making it perfect for family dinners, game nights, or even a solo treat-yourself moment.
What I love most about this recipe is its versatility. Whether you stick to the classic version or experiment with your own twists, the patty melt never disappoints. Plus, it’s a fantastic way to bring that nostalgic diner vibe into your own kitchen.
Your Turn to Cook!
I hope you’re as excited to try this recipe as I was to share it! When you do, let me know how it turns out. Did you stick to the traditional version, or did you put your own spin on it? Leave a comment with your favorite variations or share a photo of your masterpiece—I can’t wait to see what you create.
Print
Classic Patty Melts
- Total Time: 40 minutes
Description
Patty melts are the ultimate comfort food—a juicy burger patty, melted cheese, caramelized onions, and toasted rye bread all come together for a hearty, flavorful sandwich. Pair it with a homemade secret sauce, and you’ve got a diner classic in your own kitchen!
Ingredients
For the Patty Melts:
- 1 lb ground beef
- 1 large onion, thinly sliced
- 8 slices rye bread
- 4 slices Swiss cheese
- 4 slices cheddar cheese
- Butter (for grilling)
- Salt and pepper (to taste)
For the Secret Sauce:
- ½ cup mayonnaise
- 2 tbsp ketchup
- 1 tbsp sweet pickle relish
- 1 tsp Worcestershire sauce
Instructions
1️⃣ Prepare the Secret Sauce
In a small bowl, combine mayonnaise, ketchup, sweet pickle relish, and Worcestershire sauce. Stir until smooth. Cover and refrigerate while preparing the patty melts.
2️⃣ Caramelize the Onions
Heat 1 tbsp of butter in a large skillet over medium heat.
Add the sliced onions and cook, stirring occasionally, for 15-20 minutes, or until golden brown and caramelized.
Remove the onions from the skillet and set them aside.
3️⃣ Shape and Season the Patties
Divide the ground beef into 4 equal portions and shape each into a thin patty, slightly larger than the size of the bread slices (they’ll shrink while cooking).
Season both sides of each patty with salt and pepper.
4️⃣ Cook the Patties
Using the same skillet, cook the patties over medium-high heat for about 3-4 minutes per side, or until cooked through.
Remove the patties from the skillet and set them aside.
5️⃣ Assemble the Patty Melts
Butter one side of each slice of rye bread.
On a clean skillet or griddle over medium heat, place 4 slices of bread butter-side down.
Layer the ingredients as follows: Swiss cheese, a cooked beef patty, caramelized onions, cheddar cheese, and top with another slice of bread (butter-side up).
6️⃣ Grill the Sandwiches
Cook the patty melts for 2-3 minutes per side, pressing gently with a spatula, until the bread is golden brown and crispy, and the cheese is fully melted.
7️⃣ Serve
Remove the patty melts from the skillet and let them rest for 1 minute. Slice each sandwich in half.
Serve immediately with the secret sauce drizzled on top or on the side for dipping.
Notes
- Bread Options: Traditional rye bread gives the classic patty melt flavor, but sourdough or Texas toast can be substituted.
- Cheese Choices: Feel free to experiment with your favorite cheese combinations, such as provolone or pepper jack.
- Make Ahead: The caramelized onions and secret sauce can be made ahead of time and stored in the refrigerator for up to 3 days.
- Prep Time: 15 minutes
- Cook Time: 25 minutes
Nutrition
- Serving Size: 4 sandwiches


