
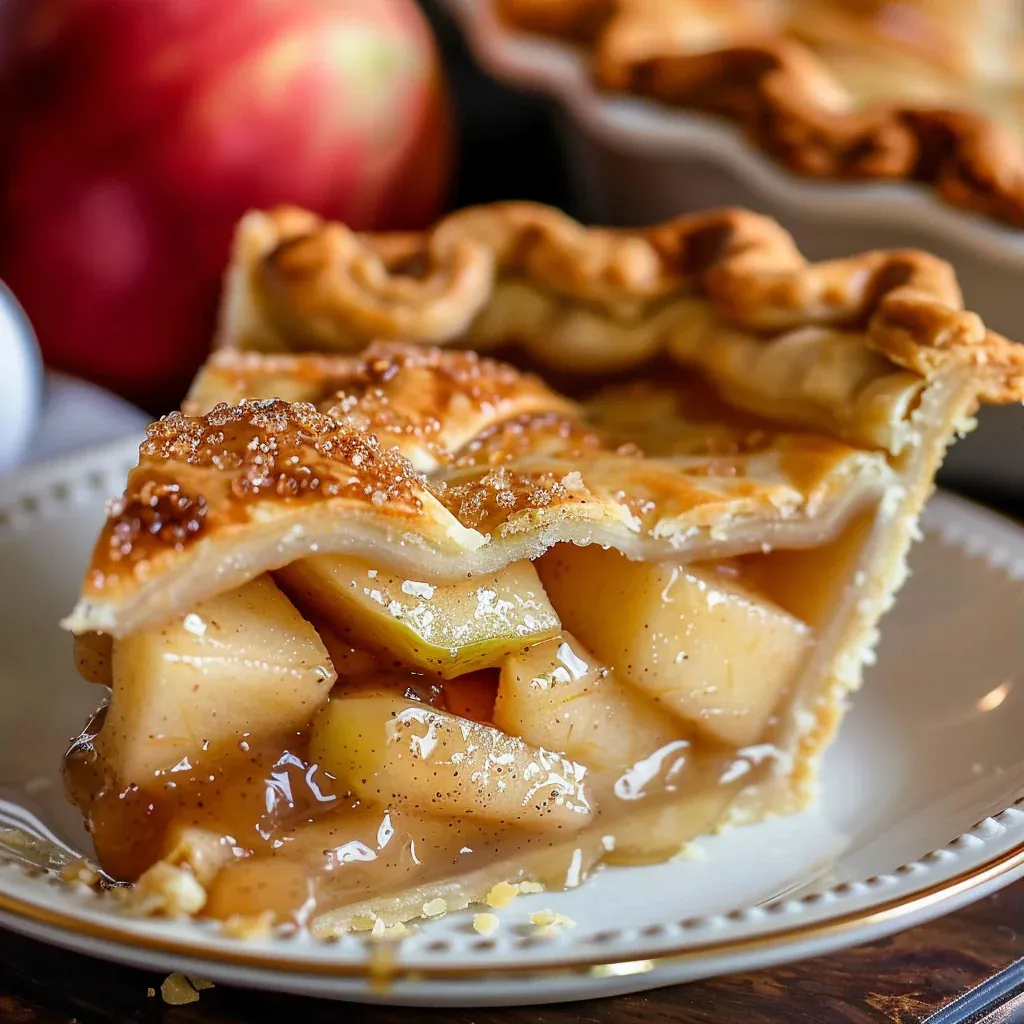
Recipe for Apple Pie is a timeless classic that fills the kitchen with the warm, inviting aroma of baked apples and spices. As the golden crust bakes to perfection, you can almost taste the nostalgia of family gatherings and cozy afternoons spent savoring every slice. The combination of tart Granny Smith apples with the sweetness of Gala and Golden Delicious creates a delightful flavor balance that is simply irresistible. With each bite, the flaky crust crumbles beautifully, revealing the luscious, homemade filling that embodies the essence of artisan baking. Whether it’s a Sunday family dinner or a special occasion, this apple pie will surely impress your guests and bring comfort to your table.
- Why This Recipe Is Worth Your Time
- Main Ingredients
- Tools Needed
- Step-by-Step Instructions
- Pro Tips
- Serving Ideas and Pairings
- Variations and Swaps
- Leftovers and Storage Tips
- Nutrition Notes
- Frequently Asked Questions
Why This Recipe Is Worth Your Time
Creating an artisan-quality apple pie is not just about following a recipe; it’s about embracing the craft of baking. This recipe balances the tartness of apples with the sweetness of sugars and the warmth of spices, creating a symphony of flavors that is both comforting and sophisticated. The technique of cooking the apples before baking ensures they are perfectly tender, allowing them to hold their shape while still being delightfully soft. The homemade double pie crust, flaky and buttery, elevates this dish to a level that store-bought pies simply cannot achieve. With each step, from selecting the right apples to cooling the pie for the perfect slice, you are crafting a work of art that embodies the joy of cooking. This apple pie is not just a dessert; it’s a celebration of simple, quality ingredients and the love that goes into making them shine.
Main Ingredients for Recipe for Apple Pie
This recipe for apple pie relies on a few key ingredients that work harmoniously together. Here’s a closer look at each one:
- Homemade double pie crust: The foundation of a great pie. Use high-quality butter for a flaky texture.
- 1/4 teaspoon lemon zest: Adds brightness and enhances the flavors of the apples.
- Juice from half a lemon: Prevents browning of the apples and balances the sweetness.
- 5 pounds apples: A mix of Granny Smith, Gala, and Golden Delicious offers the perfect flavor profile.
- 3/4 cup brown sugar: Provides depth and a hint of caramel flavor to the filling.
- 3/4 cup granulated sugar: Sweetens the filling without overpowering the apples.
- 5 tablespoons all-purpose flour: Helps thicken the filling for a perfect consistency.
- 1/4 teaspoon kosher salt: Enhances the overall flavor and balances sweetness.
- 1 & 1/2 teaspoons cinnamon: A classic spice that adds warmth and comfort.
- 3/4 teaspoon nutmeg: Deepens the flavor with its earthy tones.
- 1/2 teaspoon cardamom: Introduces a unique aromatic quality to the filling.
- 1 teaspoon vanilla: Sweetens and rounds out the flavor profile.
- 1 tablespoon milk: For brushing the crust, ensuring a golden finish.
- 1 tablespoon beaten egg: Adds richness to the crust and helps achieve a beautiful glaze.
- 1 tablespoon raw sugar: For sprinkling on top, adding a delightful crunch.
Tools Needed for Recipe for Apple Pie
| Tool | Purpose / what it helps with |
| Microplane grater | For zesting the lemon peel finely. |
| 12-inch high-sided skillet | To cook the apple filling evenly. |
| Potato peeler | To peel the apples easily. |
| Deep 9-inch pie dish | To hold the pie crust and filling securely. |
| Rubber spatula | To transfer and spread the filling into the pie dish. |
| Baking sheet | To catch any drips and promote even baking. |
| Tin foil | To cover the pie while baking to prevent over-browning. |
| Wire rack | To cool the pie evenly after baking. |
Step-by-Step Instructions for Recipe for Apple Pie
Now, let’s dive into the detailed steps to create this delightful apple pie. Follow these instructions carefully, and don’t forget to enjoy the process!
- Choose your apples. You need 5 pounds of apples for this recipe, which is about 11 large apples. A mix of Granny Smith, Gala, and Golden Delicious apples is ideal for the best flavor. Aim for apples that are firm and crisp.
- Make the filling: Use a microplane grater to zest 1/4 teaspoon lemon peel into a 12-inch high-sided skillet. The zest will provide a fragrant brightness to the filling.
- Add the juice from half the lemon: Squeeze in about 2 tablespoons of lemon juice to the skillet, which will prevent the apples from browning and add a refreshing tang.
- Peel the apples: Using a potato peeler, peel the apples and slice them into 1/8 inch pieces. To prevent browning, peel and slice one apple at a time, adding it to the lemon juice in the pan as you go. Stir the apples in the pan occasionally to coat them with lemon juice.
- Cook the apples: Once all the apples are peeled and sliced in the pan, set it over medium heat on the stove. Cook them gently to begin softening.
- Add the sugars and spices: Stir in 3/4 cup packed brown sugar, 3/4 cup granulated sugar, 5 tablespoons flour, 1/4 teaspoon salt, 1 and 1/2 teaspoons cinnamon, 3/4 teaspoon nutmeg, and 1/2 teaspoon cardamom. Gently stir the mixture to avoid breaking the apples.
- Cook until tender: Once everything is moistened and there are no patches of flour or cinnamon, set a timer for 20 minutes. Cover the mixture with a lid, stirring every 3 minutes. Cook for 20 minutes until the apples are fork tender but still hold their shape. Taste to see if you want to cook them longer. If they stick to the pan, add 1 tablespoon of water as needed.
- Finish the filling: Remove the pan from heat and stir in 1 teaspoon vanilla. This adds a lovely aroma to the filling.
- Transfer the filling: Carefully transfer the apple pie filling (including the caramelized juices) to a half sheet pan or any pan with a lip. Spread the apples evenly and cool the filling completely in the fridge or freezer for about 30 minutes.
- Prepare the crust: Roll out your pie dough and place it in a deep 9-inch pie dish, allowing the excess to hang over the edges. This will create a beautiful, rustic edge.
- Fill the pie: Use a rubber spatula to scrape all the chilled apple pie filling into the pie dish, ensuring to include all the gooey filling. Spread it out evenly.
- Add the top crust: Top your pie with the other pie crust. You can make a lattice crust or place the whole crust on top. Make sure to vent your pie by poking the top with a sharp knife if you didn’t do a lattice.
- Crimp the edges: Fold in the edges of the pie crust and crimp as desired. This not only seals the pie but adds a decorative touch.
- Chill the pie: Place the whole pie in the fridge or freezer for about 20-30 minutes. This helps keep the crust from shrinking while baking.
- Preheat the oven: Preheat your oven to 425 degrees F with a baking sheet on the center rack for at least 20-25 minutes to ensure it’s hot.
- Brush the crust: Before placing the pie in the oven, brush the crust with milk or egg, or both. I recommend 1 tablespoon of milk mixed with 1 tablespoon of beaten egg for a nice finish.
- Sprinkle with sugar: Sprinkle raw sugar over the pie, or regular sugar if you prefer, to give it a lovely crunch and shine.
- Bake the pie: Place the chilled pie onto the hot baking sheet in the oven and bake for 15 minutes until the edge of the crust is light brown.
- Prepare the foil: Meanwhile, prepare a piece of tin foil the size of your pie. Fold it in half twice and cut out a circle in the center. Open it up to have a square with a circle cut out.
- Reduce heat: Reduce the heat to 350 degrees F. Remove the pie from the oven and place the foil on top, crimping it around the edges to protect from burning.
- Continue baking: Remember to lower the oven temperature to 350. Place the pie back on the baking sheet in the oven and bake for an additional 40-45 minutes.
- Check for doneness: The pie is done when the edges are brown and the center is lightly golden brown, with bubbling filling if you made a lattice crust.
- Cool the pie: Let the pie cool on a wire rack for about 4 hours. This step is crucial to ensure the filling sets properly and doesn’t run out when sliced.
- Serve: Once the pie is completely cool, slice and serve! It pairs beautifully with vanilla ice cream and a drizzle of caramel sauce for an indulgent treat.
- Store the pie: Store the pie on the counter for up to 2 days covered with plastic wrap. After that, transfer it to the fridge to keep it fresh.
Pro Tips for Perfect Recipe for Apple Pie
- Choose a mix of tart and sweet apples for a more complex flavor.
- Don’t rush the cooling process; it helps set the filling and makes for cleaner slices.
- Make the pie crust in advance and keep it chilled until you’re ready to assemble.
- Experiment with different spices or add a touch of ginger for a unique twist.
- Make sure to vent the top crust to allow steam to escape and prevent sogginess.
- Use a hot baking sheet to help the crust start cooking immediately for a flakier texture.
- For a deeper flavor, consider using brown sugar exclusively for sweetness.
Serving Ideas and Pairings
- Serve warm with a scoop of vanilla ice cream.
- Drizzle with caramel sauce for an indulgent treat.
- Pair with a dollop of whipped cream for a classic touch.
- Serve with a side of spiced cider for a cozy fall experience.
- Garnish with fresh mint leaves for a pop of color and flavor.
- Accompany with a cup of hot tea or coffee for a comforting dessert experience.
Variations and Swaps for Recipe for Apple Pie
Restaurant-Style Version
For a restaurant-style apple pie, consider adding a layer of almond paste to the bottom of the crust before adding the filling. This adds an unexpected richness and flavor that elevates the dish.
Rustic Home-Cook Version
For a more rustic look, you can leave the top crust off entirely and sprinkle the filling with a crumb topping made from oats, flour, brown sugar, and butter.
Make-Ahead Version
Prepare the filling a day in advance and store it in the fridge. Assemble the pie the next day for a quick bake when needed.
Seasonal Ingredient Version
Incorporate seasonal ingredients by adding diced pears or cranberries to the apple filling for a unique twist that celebrates the flavors of fall.
Leftovers and Storage Tips
- Keep the pie covered at room temperature for up to 2 days.
- After 2 days, transfer the pie to the fridge to maintain freshness.
- Reheat slices in the oven at 350 degrees F for about 10-15 minutes for the best flavor and texture.
- This pie freezes well; wrap it tightly in plastic wrap and aluminum foil for up to 3 months.
- To reheat from frozen, bake at 350 degrees F until warmed through, about 20-30 minutes.
Nutrition Notes
This apple pie recipe serves approximately 8 slices. Each slice contains around 300-400 calories, depending on the size and ingredients used. To adjust for dietary preferences, consider using less sugar or a sugar substitute while ensuring the balance of flavors remains intact. The use of whole fruits provides essential vitamins and fiber, making this dessert a more wholesome choice when enjoyed in moderation.
Frequently Asked Questions About Recipe for Apple Pie
What type of apples are best for making apple pie?
A mix of Granny Smith, Gala, and Golden Delicious apples provides the best flavor balance, combining tartness with sweetness.
Can I make the filling in advance for the apple pie?
Yes, you can prepare the apple filling a day ahead and store it in the refrigerator until you are ready to assemble the pie.
How do I keep my apple pie crust from getting soggy?
Ensure the apple filling is cooled before adding it to the crust, and consider pre-baking the pie crust slightly before filling it.
What should I serve with my apple pie?
This recipe for apple pie pairs beautifully with vanilla ice cream, whipped cream, or a drizzle of caramel sauce for an indulgent treat.
How long can I store leftovers of apple pie?
The apple pie can be stored at room temperature for up to 2 days and in the refrigerator for up to a week.
Now that you’ve unlocked the secrets to making a delightful Recipe for Apple Pie, I encourage you to give it a try. As you gather your ingredients and immerse yourself in the process, remember that artisan cooking is about the love and care you put into each step. Enjoy the journey and every delicious slice!

Deliciously Classic Apple Pie
Ingredients
Method
- Add the juice from half the lemon to the skillet, about 2 tablespoons.
- Peel the apples using a potato peeler and slice them into 1/8 inch pieces. To prevent browning, peel and slice one apple at a time, adding it to the lemon juice in the pan as you go. Stir the apples in the pan occasionally to coat them with lemon juice.
- Once all the apples are peeled and sliced in the pan, set it over medium heat on the stove.
- Add 3/4 cup packed brown sugar, 3/4 cup granulated sugar, 5 tablespoons flour, 1/4 teaspoon salt, 1 and 1/2 teaspoons cinnamon, 3/4 teaspoon nutmeg, and 1/2 teaspoon cardamom. Gently stir the mixture to avoid breaking the apples.
- Once everything is moistened and there are no patches of flour or cinnamon, set a timer for 20 minutes. Cover the mixture with a lid, stirring every 3 minutes. Cook for 20 minutes until the apples are fork tender but still hold their shape. Taste to see if you want to cook them longer. If they stick to the pan, add 1 tablespoon of water as needed.
- Remove the pan from heat and stir in 1 teaspoon vanilla.
- Transfer the apple pie filling (including the caramelized juices) to a half sheet pan or any pan with a lip. Spread the apples evenly and cool the filling completely in the fridge or freezer for about 30 minutes.
- Roll out your pie dough and place it in a deep 9 inch pie dish, allowing the excess to hang over the edges.
- Use a rubber spatula to scrape all the chilled apple pie filling into the pie dish, ensuring to include all the gooey filling.
- Top your pie with the other pie crust. You can make a lattice crust or place the whole crust on top. Make sure to vent your pie by poking the top with a sharp knife if you didn’t do a lattice.
- Fold in the edges of the pie crust and crimp as desired. Place the whole pie in the fridge or freezer for about 20-30 minutes.
- Preheat your oven to 425 degrees F with a baking sheet on the center rack for at least 20-25 minutes to ensure it’s hot.
- Before placing the pie in the oven, brush the crust with milk or egg, or both. I recommend 1 tablespoon of milk mixed with 1 tablespoon of beaten egg for a nice finish.
- Sprinkle raw sugar over the pie, or regular sugar if you prefer.
- Place the chilled pie onto the hot baking sheet in the oven and bake for 15 minutes until the edge of the crust is light brown.
- Meanwhile, prepare a piece of tin foil the size of your pie. Fold it in half twice and cut out a circle in the center. Open it up to have a square with a circle cut out.
- Reduce the heat to 350 degrees F. Remove the pie from the oven and place the foil on top, crimping it around the edges to protect from burning.
- Remember to lower the oven temperature to 350. Place the pie back on the baking sheet in the oven and bake for an additional 40-45 minutes.
- The pie is done when the edges are brown and the center is lightly golden brown, with bubbling filling if you made a lattice crust.
- Let the pie cool on a wire rack for about 4 hours. This step is crucial to ensure the filling sets properly and doesn't run out when sliced.
- Once the pie is completely cool, slice and serve! It pairs beautifully with vanilla ice cream and a drizzle of caramel sauce for an indulgent treat.
- Store the pie on the counter for up to 2 days covered with plastic wrap. After that, transfer it to the fridge.


