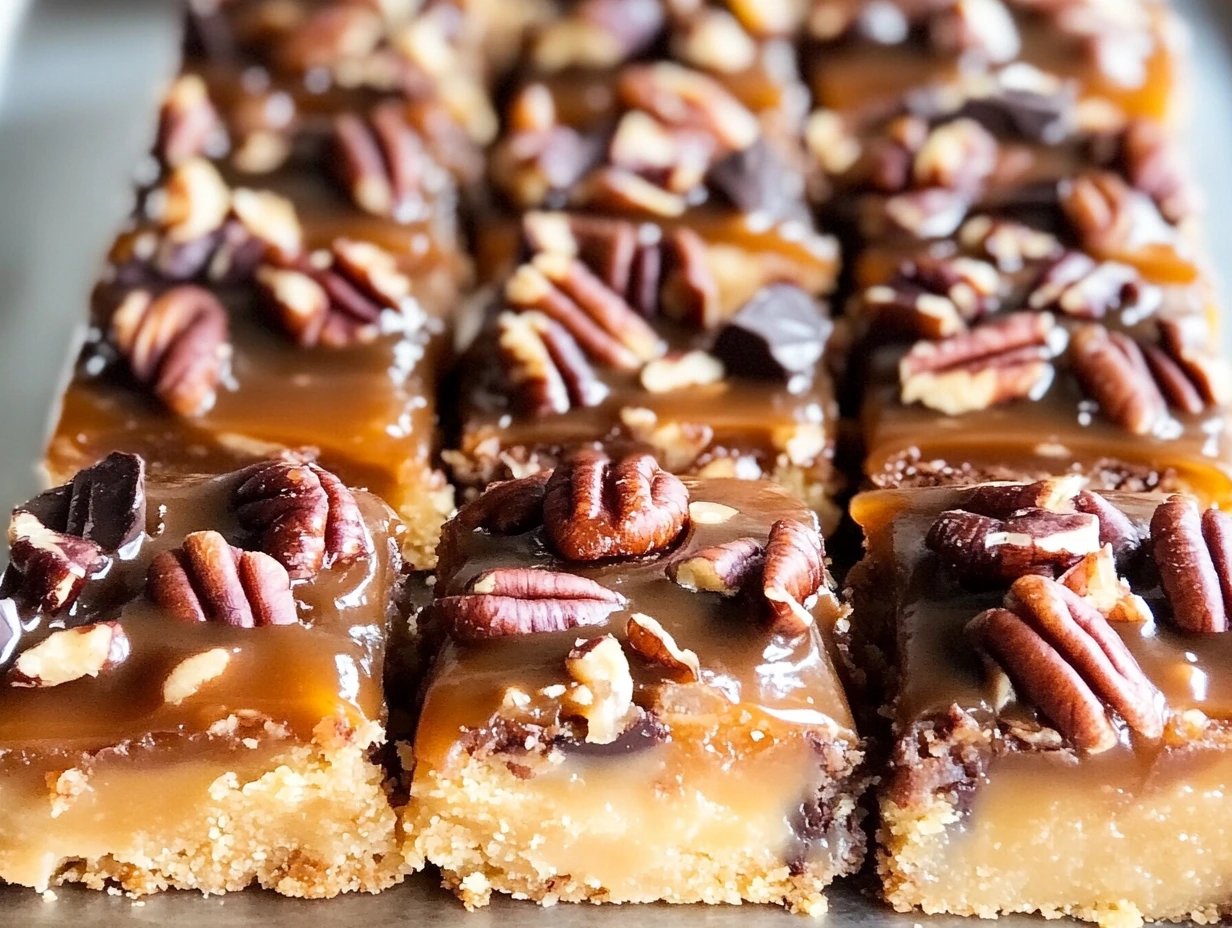
If you’ve ever indulged in a classic turtle candy, you know how irresistible the combination of rich caramel, smooth chocolate, and crunchy pecans can be. But imagine turning that sweet and salty flavor into a bar that’s both easier to make and even more satisfying. That’s where these Easy Turtle Bars come in! With a buttery shortbread base, a gooey caramel layer, a smooth chocolate topping, and a generous sprinkle of pecans, these bars are nothing short of a treat.
I’m always looking for ways to make a dessert that’s just as indulgent as it is easy, and let me tell you, this one checks all the boxes. The layers come together so quickly, and it doesn’t require any fancy techniques or ingredients—just a few simple steps, and you’ll have a batch of these incredible bars ready to go. Whether you’re baking for a family gathering, a holiday treat, or just to satisfy your sweet tooth, these turtle bars are a guaranteed hit. Let’s dive in!
Step 1: Preheat & Prep
Before we get into the fun stuff, it’s important to get the oven ready. Preheat your oven to 350°F (175°C). This temperature is ideal for baking the shortbread base, ensuring that it gets lightly golden without becoming too crunchy.
Now, grab an 8×8-inch baking pan and line it with parchment paper. You want to make sure there’s a little overhang so you can easily lift the bars out once they’re done. This simple trick makes slicing the bars so much easier later on, and trust me, you’ll thank yourself for it.

Step 2: Make the Shortbread Base
The shortbread layer is the foundation of this entire recipe, so let’s take our time to get it just right. In a mixing bowl, cream the softened butter and granulated sugar together. You want this mixture to be light and fluffy, which usually takes a couple of minutes with a hand mixer or stand mixer. Don’t rush this step; it really helps give the shortbread that melt-in-your-mouth texture.
Once the butter and sugar are combined and fluffy, gradually add in the flour and salt. Mix until everything is just incorporated, and you should have a soft, dough-like consistency. It’ll feel a little crumbly, but it should come together when you press it into the pan.
Now, take that dough and press it evenly into the bottom of your prepared baking pan. It doesn’t need to be perfect—just make sure it covers the entire bottom and that the thickness is somewhat even. This shortbread base will bake in the oven for about 20 minutes or until it’s lightly golden and fragrant. It’s a great time to take a deep breath and imagine the deliciousness that’s coming your way!
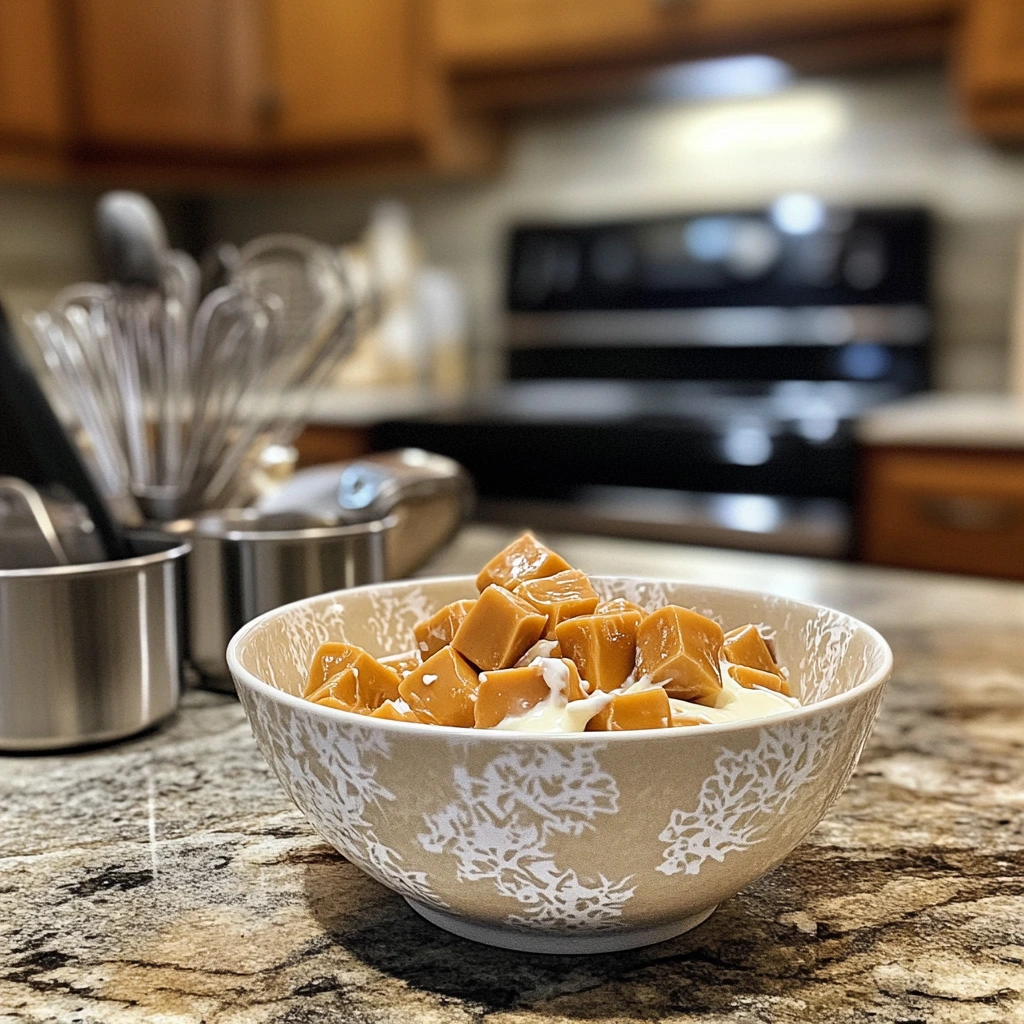
Step 3: Add the Caramel Layer
While your shortbread base is baking and cooling slightly, we can work on the next layer—the caramel! In a microwave-safe bowl, combine the unwrapped caramels and heavy cream. This is the easiest way to get a smooth caramel layer without any fuss. Pop the bowl in the microwave and heat the mixture in 30-second intervals, stirring in between each interval, until it’s completely melted and smooth.
Once the caramel is ready, pour it over the slightly cooled shortbread base. Spread it out evenly with a spatula to cover the base completely. Now, here’s the fun part—sprinkle your chopped pecans on top of the caramel layer. They’ll add a nice crunch and bring that signature “turtle” flavor to the bars.
I love how the rich caramel starts to pool into the shortbread, and those pecans just create a beautiful layer of texture. This step is where the magic really starts to happen.
Step 4: Add the Chocolate Layer
Now it’s time for the chocolate! Sprinkle the semi-sweet chocolate chips evenly over the caramel layer. Don’t worry about being too precise here—the chocolate will melt and cover everything perfectly once we give it a little time in the oven.
Return the pan to the oven for about 1-2 minutes, just until the chocolate chips start to soften. You’ll notice that they begin to melt into little puddles of chocolate goodness. At this point, use a spatula to gently spread the melted chocolate into an even layer, covering the caramel and pecans. The warm, gooey chocolate creates a smooth top layer that ties everything together.
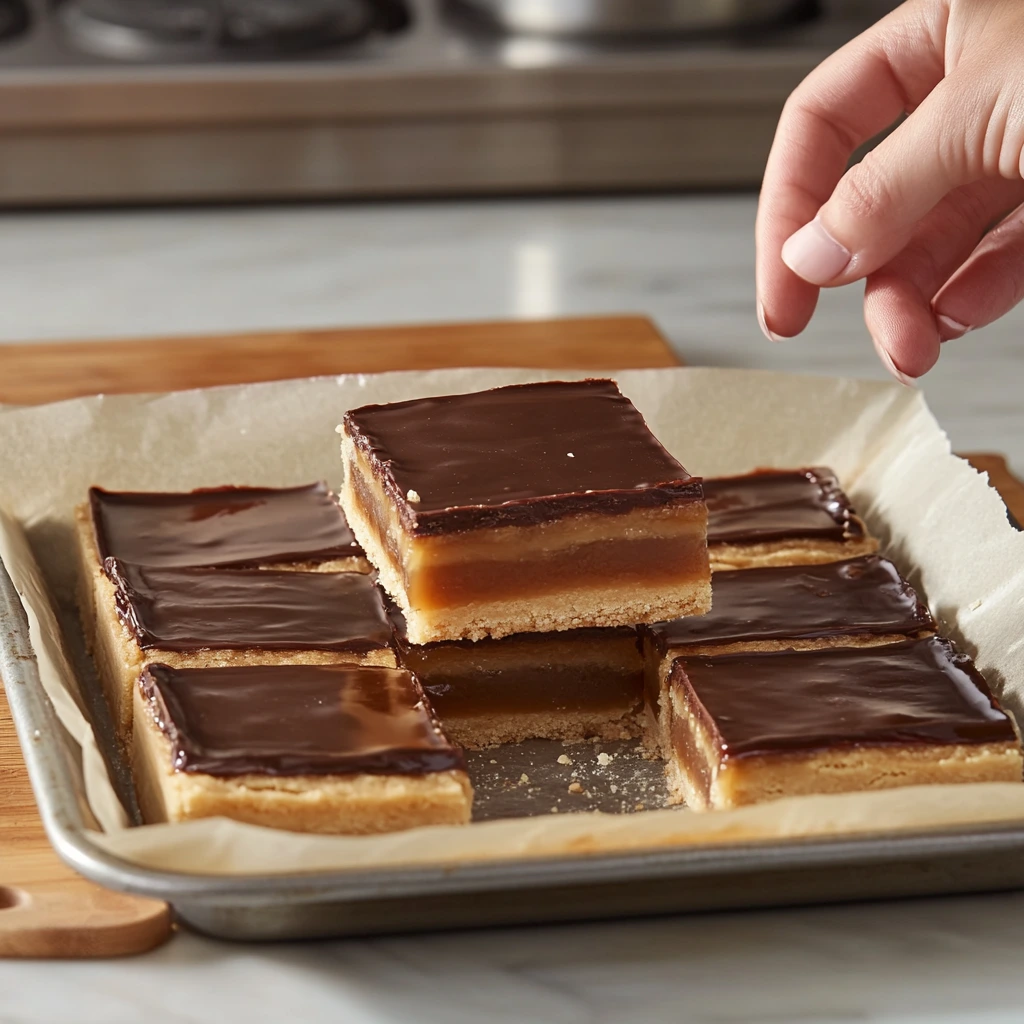
Step 5: Chill & Slice
Now comes the hardest part—waiting for the bars to set! I know, the temptation to dig in is real, but trust me, it’s worth the wait. Let the bars chill in the refrigerator for at least 1–2 hours, or until they’re firm and fully set. The chilling time helps everything come together and makes them much easier to slice without making a mess.
Once they’re fully chilled, use the parchment paper overhang to lift the bars out of the pan. Place them on a cutting board and slice them into squares. Depending on how large you want your bars, you can cut them into 16-20 pieces. I find that cutting them into smaller pieces makes them feel a little more decadent, and they’re perfect for sharing!
Easy Turtle Bars: More Tips, Tricks, and Variations to Make These Bars Even Better
Now that you’ve made your turtle bars, let’s talk about a few ways to take them from great to extraordinary. While the basic recipe is absolutely delicious, there’s always room for a little personalization or tweaking. Whether it’s adjusting the flavors, using different nuts, or perfecting your technique, I’ve got you covered. Let’s dive into the next steps of the recipe and a few tips to make these bars your own!
Step 6: Customize the Caramel Layer
The caramel layer in these turtle bars is truly the star of the show. It’s rich, gooey, and just melts perfectly into the shortbread. But did you know that you can make a few adjustments to this layer if you want to get creative? If you prefer a deeper flavor, try using dark or bittersweet chocolate chips instead of semi-sweet—this can create a more robust contrast with the sweetness of the caramel.
Another great tip is to add a pinch of sea salt over the caramel layer before adding the pecans. The slight salty crunch balances out the sweetness and brings that perfect “turtle” candy flavor. You can also try using salted caramel (instead of the regular caramels) for an even more decadent treat!
Step 7: Choose Your Nuts
Pecans are the traditional nut used in turtle candy and these bars, but that doesn’t mean you have to stick to them if you prefer something different. Walnuts are a great alternative, offering a slightly bitter flavor that pairs well with the sweet caramel and chocolate. If you’re feeling a little adventurous, you could even use a combination of both walnuts and pecans for added texture.
For a fun twist, you could also try toasted almonds or macadamia nuts. While they aren’t part of the classic turtle combination, their creamy texture and flavor would add something really special to these bars.
Step 8: Try a Different Base
While shortbread is the perfect base for these turtle bars, there’s no rule that says you can’t switch things up. If you love the flavor of graham crackers, try using graham cracker crumbs mixed with melted butter instead of the shortbread. This will create a slightly different flavor and texture that some people might really enjoy.
You could also opt for a chocolate cookie base if you’re craving something with a deeper chocolate flavor. The key is to make sure the base is sturdy enough to hold up the caramel and chocolate layers without falling apart.
Step 9: Make It Ahead of Time
If you’re planning on serving these Easy Turtle Bars at a party, family gathering, or even as a dessert to take to a potluck, making them ahead of time is a huge time-saver. Once they’ve fully set in the fridge, you can store them in an airtight container for up to 5 days. This means you can bake them the night before and let them chill in the fridge overnight. They’ll be even firmer the next day, making them easier to slice.
Another great way to prepare them ahead of time is to freeze them. Once the bars have fully set and you’ve sliced them into squares, place them in a single layer on a baking sheet and freeze them for an hour. After they’re frozen, transfer the bars to a ziplock bag or airtight container and store them in the freezer for up to 3 months. When you’re ready to eat, just thaw them at room temperature for about 10 minutes and enjoy.

Step 10: Experiment with Different Chocolate
I’ve given you the option to use semi-sweet chocolate chips in the recipe, but if you’re a true chocolate lover, you can get a bit fancy with your chocolate choices. For a more intense chocolate flavor, consider using dark chocolate chips. If you’re someone who prefers milk chocolate, then feel free to swap it out for a milk chocolate variety.
Another fun twist is to drizzle white chocolate over the bars after the regular chocolate layer has set. This can add a decorative and sweet touch that’s perfect for holiday gatherings or special occasions. Plus, white chocolate pairs wonderfully with both the caramel and the nuts!
Step 11: Cutting the Bars Just Right
One final tip: when it comes to slicing your Easy Turtle Bars, using a sharp knife is key. The layers of caramel and chocolate can be a bit sticky, so a dull knife might make it difficult to get clean cuts. To prevent any mess, you can dip your knife in hot water between slices. This helps the knife glide through the bars with ease, leaving you with perfect, clean cuts. You’ll get those beautifully neat squares without the gooey caramel sticking to the knife.
Step 12: Serve and Enjoy!
Once the bars are fully chilled, set them out on a platter, and watch them disappear. They’re perfect for serving at parties, holiday gatherings, or even as a midday treat when you’re craving something sweet. The combination of the buttery shortbread, rich caramel, silky chocolate, and crunchy pecans is irresistible—and it’s hard to eat just one!
These Easy Turtle Bars also make a wonderful gift for friends and family. Place a batch in a cute gift box, tie it with a ribbon, and you’ve got an amazing homemade treat that’s sure to impress. It’s a fun way to share the joy of baking with others.
Easy Turtle Bars: FAQ and Conclusion
I’m so glad you’re making these Easy Turtle Bars! By now, I hope you’ve had the chance to try them or at least get inspired to bake a batch soon. But before you dive into the kitchen (or if you’re already in the middle of baking), you might have some lingering questions. Don’t worry—I’ve got you covered! Below, I’ll answer some frequently asked questions and wrap things up with a little encouragement for you to get baking.
FAQ
1. Can I make these bars ahead of time?
Yes! In fact, making these bars ahead of time is a great idea. Once the bars have fully set in the fridge, you can store them in an airtight container for up to 5 days. If you want to make them even earlier, you can freeze them. After slicing them into squares, freeze them in a single layer for about an hour. Then, store them in an airtight container in the freezer for up to 3 months. When you’re ready to enjoy them, simply let them thaw for about 10 minutes.
2. Can I use a different type of nut?
Absolutely! While pecans are traditional for turtle bars, you can easily swap them out for other nuts like walnuts, almonds, or even macadamia nuts. Each nut adds a slightly different flavor and texture, so feel free to experiment to find your favorite combination.
3. How long do these bars need to chill?
To get the best results, let the bars chill in the fridge for about 1-2 hours. This allows the caramel and chocolate layers to firm up, making them easier to slice. If you’re in a rush, you could also place them in the freezer for 30 minutes, but the fridge works best for setting everything up properly.
4. Can I use store-bought caramel sauce instead of unwrapped caramels?
While unwrapped caramels mixed with heavy cream are the easiest option to create a thick, smooth caramel layer, you could use store-bought caramel sauce if needed. However, store-bought caramel tends to be thinner, so you might need to cook it a little longer to thicken it up, or just be prepared for a slightly different texture in your bars.
5. Do I need to use parchment paper to line the pan?
It’s highly recommended to use parchment paper or aluminum foil with some overhang when lining your baking pan. This will allow you to easily lift the bars out once they’ve set, making slicing them much cleaner and neater. Without parchment paper, you might find it difficult to remove the bars from the pan without them sticking.
6. Can I use a different type of chocolate?
Absolutely! While semi-sweet chocolate is commonly used, you can swap it out for dark chocolate, milk chocolate, or even white chocolate if you prefer. Dark chocolate will give a richer flavor, while milk chocolate will make the bars sweeter. White chocolate can also be drizzled on top after the regular chocolate layer has set for a fun, decorative twist.
7. What if I don’t have an 8×8-inch pan?
No worries! If you don’t have an 8×8-inch pan, you can use a 9×9-inch pan instead. The bars will be slightly thinner, but the recipe will still work just fine. Just keep an eye on the baking time and adjust as needed, since the bars will bake faster in a slightly larger pan.
Conclusion
These Easy Turtle Bars are the perfect combination of indulgent flavors and textures, with buttery shortbread, rich caramel, smooth chocolate, and crunchy pecans coming together in every bite. Whether you’re treating yourself to a sweet snack or preparing a batch for a special occasion, these bars are guaranteed to be a crowd-pleaser.
What’s great about this recipe is how versatile it is—you can customize it with different nuts, chocolates, and even bases to make it your own. Plus, they’re so simple to make, and the results are always delicious. I hope you enjoy making (and eating!) these Easy Turtle Bars as much as I do.
So, grab your ingredients, get into the kitchen, and create your own batch of these irresistible bars. If you try any fun variations or have any questions along the way, be sure to let me know in the comments below. Happy baking!
Print
Easy Turtle Bars
- Author: Sophia
Description
These Easy Turtle Bars combine the delicious flavors of buttery shortbread, rich caramel, smooth chocolate, and crunchy pecans for a treat that’s a perfect balance of sweet and salty. These bars are simple to make but incredibly indulgent, making them an excellent choice for parties, holiday gatherings, or just when you need a sweet pick-me-up. With layers of caramel and chocolate on top of a shortbread base, they’re a delightful take on the classic turtle candy.
Ingredients
For the Shortbread Base:
1 cup unsalted butter, softened
½ cup granulated sugar
2 cups all-purpose flour
¼ tsp salt
For the Topping:
14 oz caramels (soft, unwrapped)
¼ cup heavy cream
1 cup semi-sweet chocolate chips
1 cup chopped pecans (or walnuts, if preferred)
Instructions
Step 1: Preheat & Prep
Preheat the oven to 350°F (175°C). Line an 8×8-inch baking pan with parchment paper, leaving some overhang for easy removal later.
Step 2: Make the Shortbread Base
In a mixing bowl, cream the butter and sugar together until light and fluffy. Gradually add in the flour and salt, mixing until a soft dough forms. Press the dough evenly into the bottom of the prepared pan.
Bake for 20 minutes, or until lightly golden. Let it cool slightly while you prepare the next layer.
Step 3: Add the Caramel Layer
In a microwave-safe bowl, combine the caramels and heavy cream. Microwave in 30-second intervals, stirring in between, until the mixture is smooth and fully melted.
Pour the caramel over the slightly cooled shortbread layer, spreading it out evenly. Sprinkle the chopped pecans on top.
Step 4: Add the Chocolate Layer
Sprinkle the chocolate chips evenly over the caramel layer.
Return the pan to the oven for 1–2 minutes, just until the chocolate softens. Use a spatula to spread the melted chocolate into an even layer over the caramel.
Step 5: Chill & Slice
Refrigerate the bars for 1–2 hours, or until they are fully set and firm. Once chilled, lift the bars out of the pan using the parchment paper overhang and cut into squares.
Notes
-
You can substitute the pecans with walnuts if preferred or use a mix of both for added texture.
-
For extra convenience, make the bars ahead of time and refrigerate them overnight for an even firmer texture when cutting.
-
If you like your chocolate a bit firmer, you can allow the bars to cool completely at room temperature before slicing instead of refrigerating them.