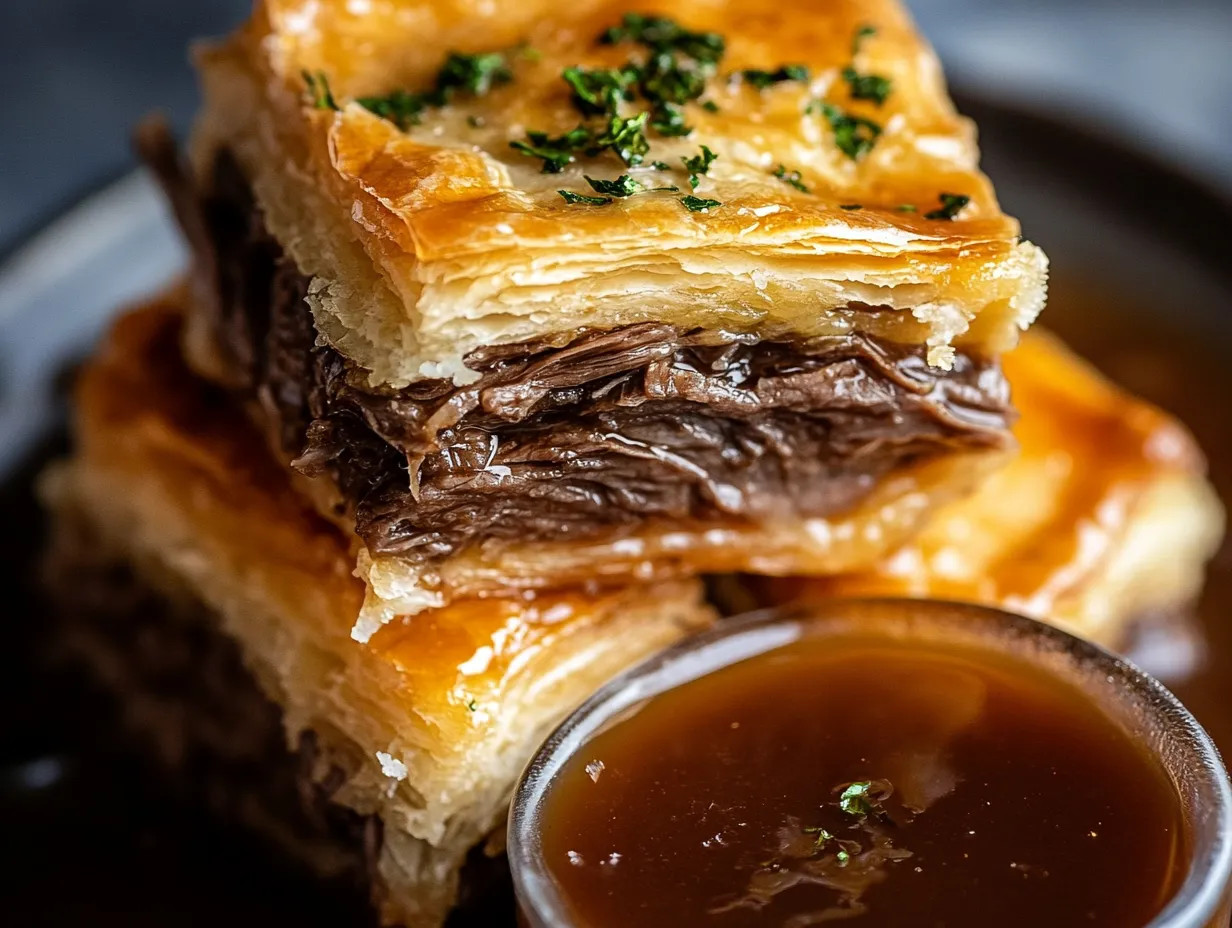
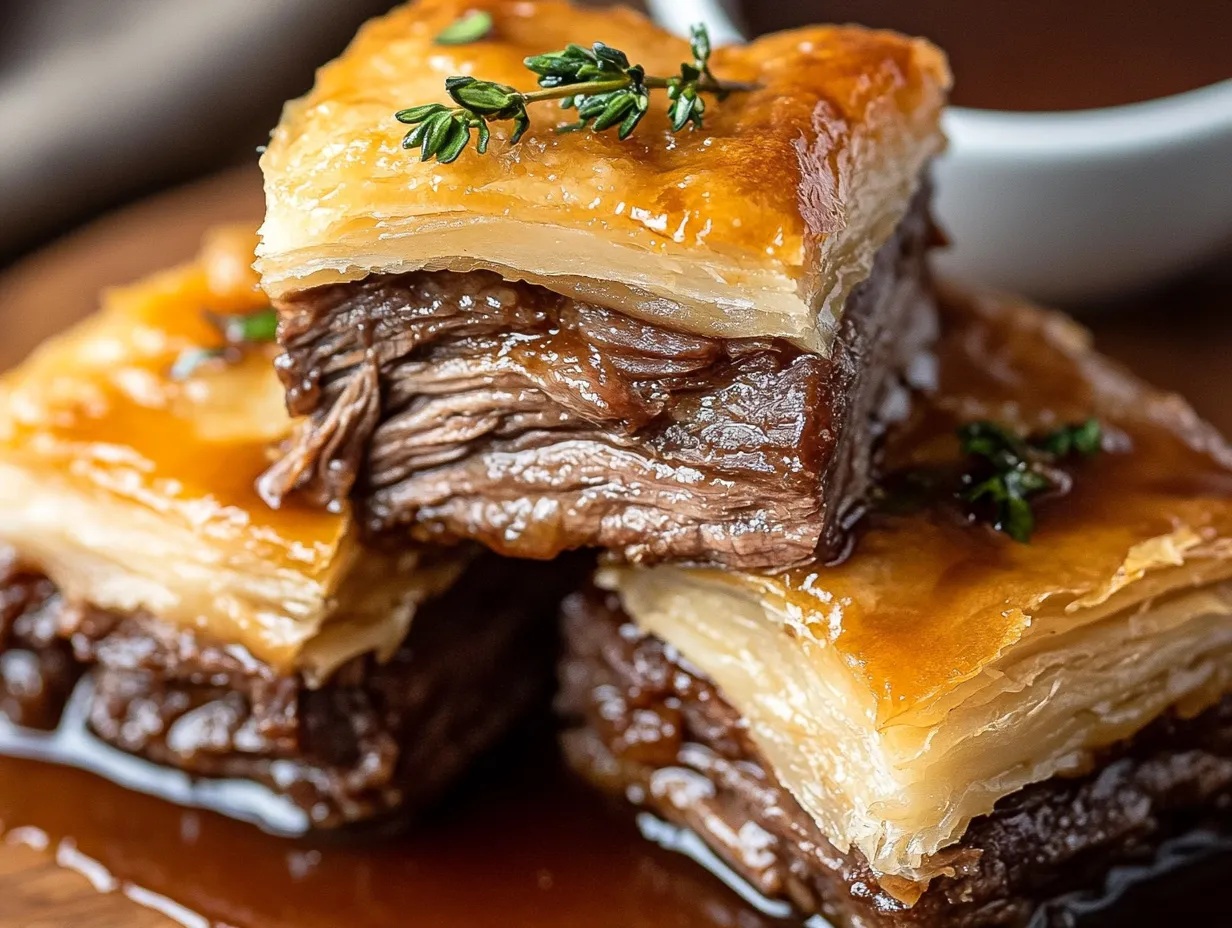
French Dip Squares are a creative and delicious twist on the classic French Dip sandwich, transforming it into an easy-to-make, shareable dish. Instead of assembling individual sandwiches, French Dip Squares are baked as a layered casserole, making them perfect for parties, potlucks, or even casual weeknight dinners. The crescent roll dough serves as both the base and the topping, encasing layers of tender deli roast beef and melted Swiss cheese for a comforting yet sophisticated flavor.
This recipe captures the essence of the beloved French Dip, especially when paired with a warm beef broth for dipping. Its simplicity is a key part of its appeal. With only a handful of ingredients and minimal prep time, these squares deliver all the flavors of the traditional sandwich in a convenient, easy-to-serve form. The ease of preparation makes it a go-to recipe when you want something impressive but stress-free.
Ingredients Breakdown and Their Importance
- Refrigerated Crescent Rolls: These provide a buttery, flaky crust that mimics the bread in a French Dip sandwich. They’re easy to work with and bake quickly, making them ideal for this recipe.
- Deli Roast Beef: The main protein in this dish, roast beef offers a tender, savory bite. Using deli-sliced beef ensures it cooks evenly and is easy to layer.
- Swiss Cheese: Known for its mild, nutty flavor, Swiss cheese melts beautifully, complementing the beef without overpowering it.
- Dry Onion Soup Mix: This seasoning mix adds depth to the dish by bringing savory, onion-forward notes that elevate the flavors of the beef and cheese.
- Butter, Worcestershire Sauce, and Garlic Powder: These ingredients combine to create a rich, savory drizzle that adds extra flavor to the top of the dish, ensuring every bite is packed with taste.
- Beef Broth for Dipping: The dipping sauce is what makes this dish reminiscent of a traditional French Dip sandwich. Warm, savory beef broth enhances the flavors and adds moisture to the dish.
Preparation Tips
When preparing French Dip Squares, a few key steps can make the process smoother and the final result more satisfying:
- Use Non-Stick Spray: Spray your 9×13 inch baking dish with non-stick spray before adding the dough. This prevents sticking and ensures that the squares will come out cleanly after baking, making for easy serving and minimal cleanup.
- Working with Crescent Rolls: Unroll the first can of refrigerated crescent rolls directly into the baking dish. Be sure to pinch any seams together to create a solid, unified layer that will hold the roast beef and cheese in place. The same technique applies to the top layer after assembling the filling.
- Even Layering: Spread the roast beef and cheese evenly over the bottom crescent roll layer. This ensures that each square has a balanced amount of beef and cheese for consistent flavor and texture in every bite.
- Soup Mix Drizzle: The mixture of melted butter, onion soup mix, Worcestershire sauce, and garlic powder should be drizzled over the cheese layer. This adds flavor, moisture, and richness to the dish, enhancing the overall experience.
- Substitutions: For a different twist, try using cheddar or provolone instead of Swiss, or substitute roast beef with turkey or ham for a lighter option.
Step-by-Step Cooking Process
Step 1: Prepping the Baking Dish and Crescent Roll Layer
Begin by preheating your oven to 375°F (190°C) and preparing a 9×13 inch baking dish. Spray the dish generously with non-stick cooking spray to prevent the crescent rolls from sticking during baking. This ensures that the French Dip Squares will release easily from the dish after baking.
Unroll the first can of refrigerated crescent roll dough and carefully lay it in the bottom of the prepared dish. It’s important to spread the dough evenly, pressing it into the corners to create a consistent base layer. Be sure to pinch together any seams in the dough where the perforations are visible, creating one smooth and uniform sheet. This step is crucial for preventing any gaps or leakage, ensuring that the filling remains encased within the dough during baking.
By establishing a solid base, you’ll create a sturdy foundation for the layers of roast beef and cheese that follow.
Step 2: Layering the Roast Beef and Cheese
With the crescent roll base in place, it’s time to add the filling. Start by evenly distributing the deli-sliced roast beef over the dough. Take care to arrange the slices so that they cover the entire surface of the crescent roll base without leaving any gaps. This ensures that every square will contain a substantial amount of beef, making each bite satisfying and flavorful.
Next, sprinkle a generous layer of grated Swiss cheese over the roast beef. Swiss cheese is an excellent choice for this recipe due to its creamy, mild flavor and excellent melting properties. It pairs beautifully with the savory roast beef and will melt into the layers during baking, creating a rich and cohesive filling. Be sure to spread the cheese evenly, so that each section of the dish gets an equal amount of cheesy goodness.
Proper layering is key to achieving the perfect balance of flavors and textures in every bite.
Step 3: Preparing and Drizzling the Onion Soup Mixture
In a small bowl, combine the dry onion soup mix with 1/4 cup of melted butter, 1 teaspoon of Worcestershire sauce, and 1/2 teaspoon of garlic powder. Stir the mixture until all the ingredients are well incorporated. The onion soup mix adds a savory, concentrated flavor to the dish, while the butter and Worcestershire sauce bring richness and depth. The garlic powder provides a subtle kick of additional flavor.
Once the mixture is ready, drizzle it evenly over the layer of Swiss cheese. The goal is to spread this flavorful mixture across the entire surface of the cheese to infuse each bite with its delicious, rich seasoning. The butter will melt into the cheese and beef as the dish bakes, helping to keep the filling moist and enhancing the overall flavor profile. Be sure to distribute the mixture as evenly as possible for consistent flavor throughout the dish.
Step 4: Adding the Top Crescent Roll Layer
Now, take the second can of refrigerated crescent roll dough and unroll it over the top of the cheese and onion soup mixture layer. Just as you did with the bottom layer, carefully spread the dough across the surface, ensuring that it fully covers the filling. Pinch together any seams or perforations to create a smooth, continuous sheet of dough.
Pinching the seams is particularly important here, as it ensures that the top layer will bake evenly and retain its structure, preventing any of the filling from leaking out during baking. This top layer will form the golden-brown crust that gives the French Dip Squares their appealing, flaky exterior. Take care to press the dough down gently around the edges to seal the dish and encase the beef and cheese layers inside.
By properly sealing the dish with this top dough layer, you’ll ensure a neat, well-contained final product with a crispy, golden crust.
Step 5: Baking and Timing
Place the assembled dish in the preheated oven and bake for 15 to 20 minutes, or until the top layer of crescent roll dough is golden brown and cooked through. Keep an eye on the dish as it bakes, as oven times can vary slightly.
The golden-brown color is your indicator that the top layer has achieved the perfect level of crispness. If the top begins to brown too quickly, you can loosely cover it with foil to prevent burning while ensuring the dough cooks evenly. Once done, remove the dish from the oven and allow it to cool slightly before cutting.
Step 6: Preparing the Beef Broth Dipping Sauce
While the French Dip Squares are baking, prepare the beef broth dipping sauce. Pour 1 cup of beef broth into a small pot and heat it over medium heat until warmed through. You can enhance the broth’s flavor by adding a splash of Worcestershire sauce or seasoning it with salt and pepper to taste.
The warm beef broth is essential for replicating the authentic French Dip experience. Serving it alongside the squares allows each bite to be dipped, adding moisture and enhancing the beefy, savory flavors. Once the broth is warm, transfer it to a small serving bowl and present it alongside the French Dip Squares for dipping.
Serving and Presentation
Cutting and Serving the French Dip Squares
Once the French Dip Squares are finished baking, it’s important to let them cool for about 5-10 minutes before cutting. This cooling period allows the cheese to set slightly, preventing it from spilling out when the squares are sliced. Letting the dish rest also makes it easier to achieve cleaner cuts, giving the squares a neat, appealing appearance.
When ready to serve, use a sharp knife or a pizza cutter to slice the French Dip Squares into evenly-sized portions. Aim for squares that are roughly the same size, making them easy to share and ensuring that everyone gets an equal portion. Depending on the occasion, you can cut them into larger pieces for a main dish or smaller, bite-sized squares for appetizers at a party. Either way, the cleanly cut squares are ready to be enjoyed with the warm beef broth for dipping.
Pairing Suggestions and Variations
French Dip Squares can be served alongside various side dishes to create a well-rounded meal. A simple green salad with a light vinaigrette provides a fresh, crisp contrast to the richness of the squares. Alternatively, fries or roasted potatoes make excellent, hearty accompaniments that enhance the classic comfort food vibe.
For creative variations, consider switching up the meat or cheese. Swap the roast beef for sliced turkey or ham to create a lighter version or try using provolone or cheddar cheese for a different flavor profile. You can also experiment with additional fillings like caramelized onions or sautéed mushrooms to add more depth and complexity. These variations can keep the dish exciting and adaptable to different preferences, making it a versatile recipe for any occasion.
Presentation Tips
For an appealing presentation, consider serving the French Dip Squares in the same rustic baking dish you cooked them in. This casual yet homey approach is perfect for family-style dining. If you want to elevate the dish further, garnish the squares with a sprinkle of fresh parsley or thyme for a pop of color.
Set up a dipping station with small bowls of warmed beef broth so guests can easily dip their squares. This interactive element makes serving fun and emphasizes the French Dip experience. You can also provide tongs or spatulas for easy serving, keeping the presentation clean and inviting.
FAQs and Troubleshooting
Can I use other types of cheese?
Yes, you can substitute Swiss cheese with other varieties like provolone or cheddar. Provolone provides a mild, creamy taste similar to Swiss, while cheddar offers a sharper, richer flavor. However, Swiss is often preferred because its mildness complements the savory roast beef without overpowering it.
How can I make this ahead of time?
You can prepare the French Dip Squares ahead of time by assembling the dish up to the point before baking. Cover it tightly and store it in the refrigerator for up to 24 hours. When ready to serve, simply bake it as directed, adding a few extra minutes to account for the chilled temperature. Alternatively, you can bake the dish in advance, refrigerate or freeze it, and reheat in the oven before serving.
What can I use if I don’t have onion soup mix?
If you don’t have dry onion soup mix, you can create a similar flavor by using sautéed onions combined with beef bouillon or concentrated beef stock. This will replicate the savory, beefy, onion flavor the soup mix provides, making the dish just as delicious.
Troubleshooting Tips
What if the top layer isn’t browning evenly?
If the top layer of crescent rolls isn’t browning evenly, try rotating the baking dish halfway through the baking time to promote even cooking. If the top begins to brown too quickly while the center is still undercooked, you can cover the dish loosely with foil to prevent burning.
How can I avoid soggy bottoms?
To avoid soggy bottoms, ensure the crescent roll dough is pinched tightly to seal the base layer. Also, use non-stick spray and preheat the oven properly to create a crisp foundation. Avoid overfilling the dish with too much liquid or moisture from the beef.

French Dip Squares
- Author: Munil
Description
These French Dip Squares are a fun, shareable twist on the beloved French Dip sandwich. Perfect for parties or casual family dinners, they feature layers of buttery crescent roll dough filled with tender roast beef and melty Swiss cheese. A savory mixture of dry onion soup mix, Worcestershire sauce, and garlic powder gives the dish a flavorful boost, while a warm beef broth dipping sauce elevates each bite. Easy to prepare and full of comforting flavors, this dish is sure to be a crowd-pleaser.
Ingredients
- 2 cans of refrigerated crescent rolls
- 1/2 pound deli-sliced roast beef
- 1 cup grated Swiss cheese
- 1 packet dry onion soup mix
- 1/4 cup melted butter
- 1 teaspoon Worcestershire sauce
- 1/2 teaspoon garlic powder
- 1 cup beef broth (for dipping)
Instructions
1️⃣ Preheat the oven to 375°F (190°C). Lightly spray a 9×13 inch baking dish with non-stick cooking spray.
2️⃣ Layer the base: Roll out one can of crescent rolls in the bottom of the baking dish, pressing any seams together to form an even layer.
3️⃣ Add the filling: Layer the deli-sliced roast beef evenly over the dough, followed by a sprinkling of Swiss cheese.
4️⃣ Prepare the sauce: In a small bowl, mix the dry onion soup mix, melted butter, Worcestershire sauce, and garlic powder. Drizzle this mixture over the cheese layer.
5️⃣ Top with dough: Roll out the second can of crescent rolls and place it over the beef and cheese, pinching the seams together to create a smooth top layer.
6️⃣ Bake: Place the dish in the oven and bake for 15-20 minutes, or until the crescent rolls are golden brown and fully cooked.
7️⃣ Heat the broth: While the squares are baking, warm the beef broth in a small pot over medium heat to serve as your dipping sauce.
8️⃣ Cool and cut: Let the French Dip Squares cool slightly after baking, then cut into squares.
9️⃣ Serve: Serve the squares with the warmed beef broth for dipping and enjoy!
Notes
- These squares are great for appetizers or a casual meal. You can add caramelized onions or sautéed mushrooms for extra flavor.
- If you prefer a spicier version, add a bit of horseradish or Dijon mustard to the roast beef before layering.


