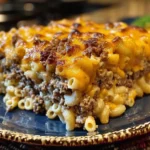
Looking for the ultimate comfort food that brings together the best parts of a chili cheese dog—all in one dish? This Fully Loaded Classic Chili Cheese Dog Casserole is your new go-to for cozy family dinners, potlucks, or game-day spreads. It’s everything you love about the classic ballpark favorite: juicy hot dog flavor, zesty chili, buttery buns, and plenty of melty cheese—all baked into one ridiculously satisfying casserole.
We’re talking serious comfort food vibes here.
Now, I know what you’re thinking: chili cheese dogs in casserole form? Yes, and trust me—it’s as delicious as it sounds. I first whipped this up on a whim during a Sunday football game when I wanted to serve something hearty without having to stand over a grill. It ended up being the kind of dish where everyone goes back for seconds (or thirds), and it’s been in heavy rotation ever since.
Let’s jump right into this flavorful, crowd-pleasing bake that hits all the nostalgic notes of your favorite diner food—with a cozy twist.

Ingredients You’ll Need:
-
1 pound ground beef
-
1 small onion, finely diced
-
2 cloves garlic, minced
-
1 cup canned chili (with or without beans—your call!)
-
½ cup ketchup
-
2 tablespoons yellow mustard
-
1 teaspoon smoked paprika
-
Salt and pepper to taste
-
8 hot dog buns, cut into 1-inch pieces
-
2 cups shredded cheddar cheese, divided
-
½ cup dill pickle slices, chopped
-
⅓ cup diced red onion
-
2 tablespoons butter, melted
STEP 1: Preheat and Prep
Start by preheating your oven to 375°F (190°C). This casserole comes together pretty quickly once you get rolling, so it’s a good idea to have everything chopped and ready before you start cooking. Dice the onion, mince the garlic, chop the pickles, and cut up the hot dog buns into bite-sized pieces.
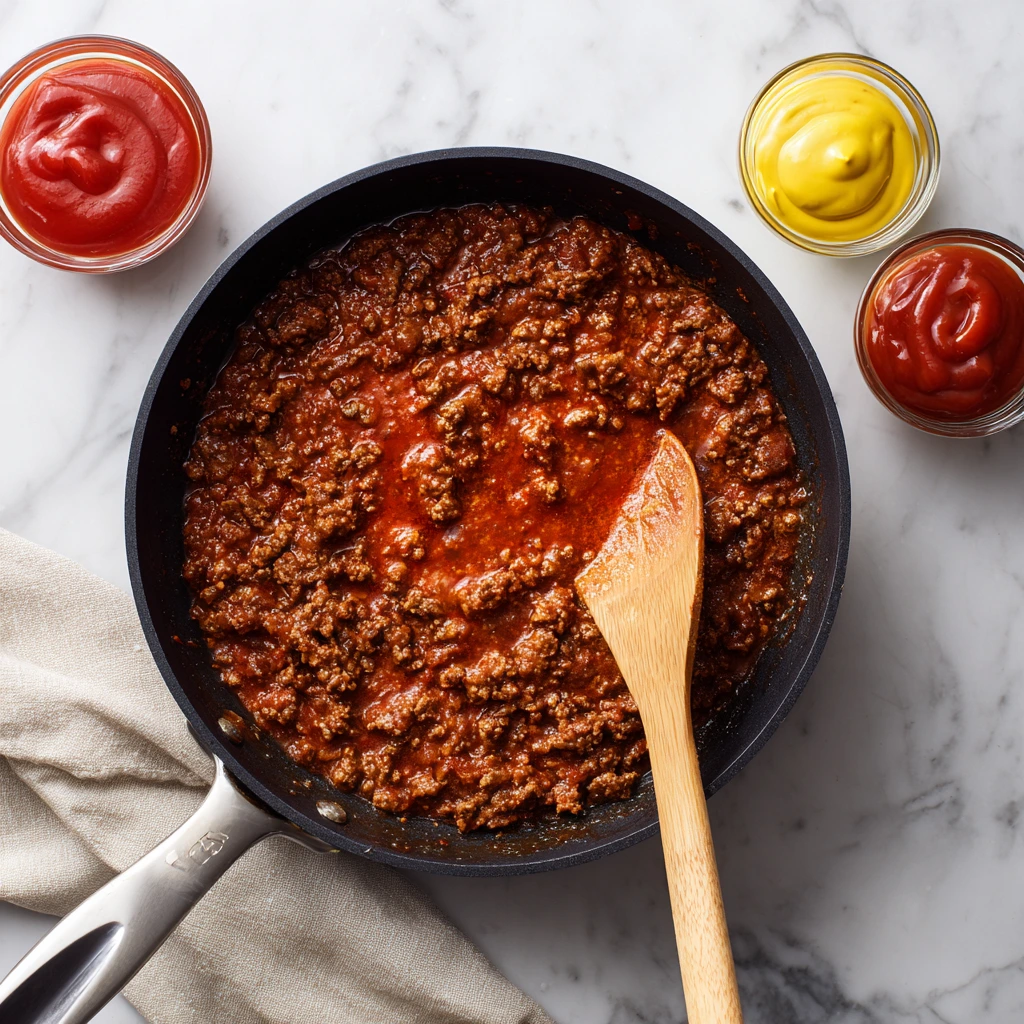
STEP 2: Cook the Beef and Build the Flavor
In a large skillet over medium heat, add the ground beef and finely diced onion. Cook until the beef is browned and the onion is softened—this should take about 6-8 minutes. Make sure to break up the meat as it cooks so it’s nice and crumbled.
Once the beef is cooked, stir in the minced garlic and let it cook for another minute or so, just until it smells amazing (you’ll know the moment it hits your nose!).
Now, add in the canned chili, ketchup, yellow mustard, and smoked paprika. Give everything a good stir and season with salt and pepper to taste. Let the mixture simmer for 5 minutes so the flavors can really come together. The sauce should be thick, flavorful, and just a little tangy from the mustard.
STEP 3: Toss the Bread and Assemble the First Layer
While your chili mixture is simmering, it’s time to get that bread base ready. In a large bowl, toss your chopped hot dog buns with the melted butter. This is what gives the casserole that buttery, slightly crisp texture that mimics a toasted bun. You can use any style of hot dog bun here, but potato rolls or brioche buns add a little extra indulgence.
Grease a 9×13-inch baking dish, then spread half of the buttered bun pieces evenly across the bottom. This will serve as the base layer and soak up all that meaty, cheesy goodness in the next step.
STEP 4: Add the Chili Mixture and First Layer of Cheese
Once your chili beef mixture is done simmering, spoon it right over the first layer of buns in the baking dish. Be sure to spread it evenly so every bite gets a hit of chili flavor.
Next, sprinkle on one cup of the shredded cheddar cheese. You can absolutely get creative here and mix in pepper jack or Monterey Jack for a little kick—but good old sharp cheddar really brings home that classic chili cheese dog flavor.
Fully Loaded Classic Chili Cheese Dog Casserole
Alright, now that we’ve got our base layers of buttery bread, chili-spiced beef, and melty cheddar in place, it’s time to finish assembling this Fully Loaded Classic Chili Cheese Dog Casserole and get it into the oven. This part is where all that cozy, cheesy magic really starts to happen.
If you’ve made casseroles before, you know how satisfying it is to see them come together in layers. This one is no different—except it’s got the bold, nostalgic flavors of a chili cheese dog packed into every bite.
Let’s keep going!
STEP 5: Add the Final Bread Layer and Press It Down
With your chili beef mixture and first layer of cheese already in the dish, now it’s time to add the rest of the buttery bun pieces on top. Spread them evenly across the surface, making sure to cover all the saucy goodness underneath.
Once everything’s in, gently press down on the bread with your hands or the back of a spatula. You don’t need to squash it, but giving it a little press helps compact the layers slightly so they bake together into a cohesive, scoopable casserole. It also helps the bread absorb more of that rich flavor.
STEP 6: Bake Covered, Then Uncovered for Golden, Melty Goodness
Now, cover the baking dish with foil and pop it into your preheated 375°F oven. Bake for 15 minutes covered—this gives the casserole time to warm through and allows the flavors to blend without drying out the bread on top.
After 15 minutes, carefully remove the foil. Sprinkle the remaining cup of shredded cheddar cheese all over the top of the casserole. Return it to the oven uncovered and bake for another 10 minutes, or until the cheese is fully melted, bubbly, and lightly golden around the edges.
This is the part where your kitchen starts smelling like pure comfort food heaven.
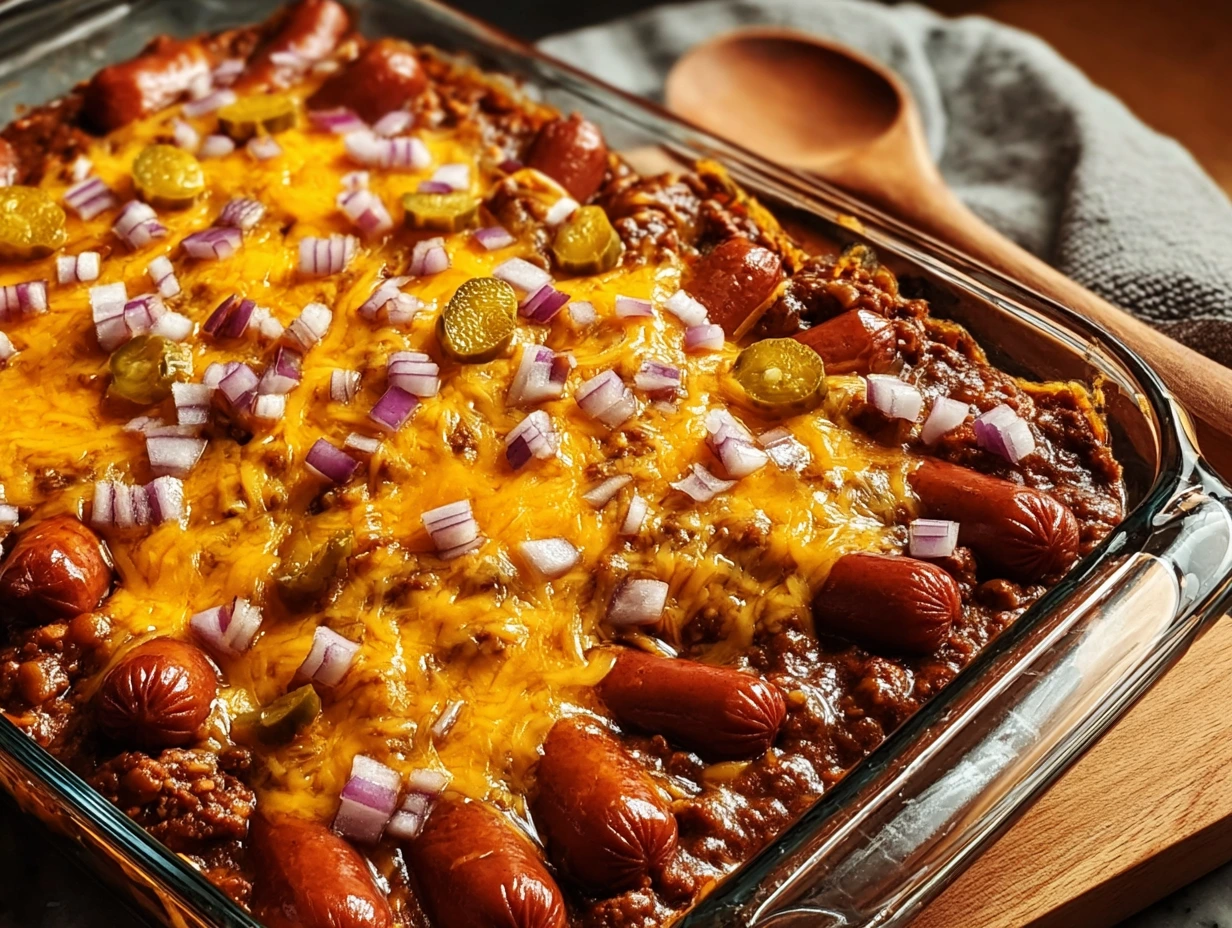
STEP 7: Let It Rest, Then Add the Final Toppings
As tempting as it is to dive in the second it comes out of the oven, give the casserole 5 minutes to rest. This quick pause lets the cheese settle and makes it easier to serve.
Once it’s rested, sprinkle the chopped dill pickles and diced red onion right over the top. This is what gives it that full-on chili cheese dog experience. The pickles add a tangy crunch, and the raw red onion brings a fresh bite that cuts through the richness of the casserole. It’s the perfect finishing touch.
Tips & Variations to Make It Your Own
This casserole is super flexible and easy to customize based on what you have on hand or your personal flavor preferences. Here are a few ideas to take it up a notch:
-
Use Different Cheeses: Try a combo of sharp cheddar and pepper jack for a little kick, or even add in mozzarella for that classic cheese pull.
-
Spice It Up: Want more heat? Stir a few dashes of hot sauce or chopped jalapeños into the chili mixture.
-
Make It Meaty: You can add sliced hot dogs into the chili mixture for a true chili cheese dog effect. Just cook them with the beef or stir them in after.
-
Bread Swap: Don’t have hot dog buns? Hamburger buns, sandwich rolls, or even leftover brioche work just as well. Just aim for a soft bread that will soak up the flavors.
-
Assemble Ahead: This casserole can be assembled up to 24 hours in advance and stored in the fridge. Just add a few extra minutes to the bake time if you’re putting it in the oven straight from cold.
Fully Loaded Classic Chili Cheese Dog Casserole
We’ve built it. We’ve baked it. And now you’ve got a hot, cheesy, chili-loaded casserole ready to serve. This dish really is the perfect blend of casual fun and total comfort. Whether you’re feeding a hungry family, bringing something to a potluck, or just looking to switch up your weeknight dinner rotation, this casserole delivers big flavor with minimal fuss.
Before we wrap up, let’s dive into some frequently asked questions I often get when making or serving this recipe. These tips and answers will help make sure your casserole comes out just right—every time.

Frequently Asked Questions
1. Can I make this casserole ahead of time?
Absolutely! You can assemble the entire casserole up to 24 hours in advance. Just cover it tightly with foil and store it in the fridge. When you’re ready to bake, add about 5–10 extra minutes to the covered bake time if it’s going straight from cold.
2. What kind of chili works best for this recipe?
You can use any canned chili you like, with or without beans. If you prefer homemade chili, go for it—just make sure it’s on the thicker side so the casserole doesn’t get soggy.
3. Can I use hot dog slices in this recipe?
Yes! To make it feel even more like a traditional chili cheese dog, you can slice up a few hot dogs and stir them into the chili beef mixture before layering. It adds a fun, meaty twist.
4. How should I store and reheat leftovers?
Store any leftovers in an airtight container in the refrigerator for up to 3 days. Reheat individual portions in the microwave or warm the entire dish in a 300°F oven until heated through.
5. Is this casserole freezer-friendly?
You can freeze it, but I recommend freezing it before baking for the best texture. Wrap the unbaked casserole tightly in foil and freeze for up to 2 months. Thaw overnight in the fridge and bake as directed, adding 10–15 minutes to the bake time.
6. Can I make this vegetarian?
Sure! Just swap the ground beef for a plant-based meat alternative or use canned vegetarian chili. Everything else stays the same.
7. What sides go well with this dish?
Print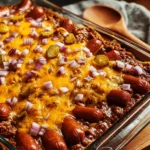
Fully Loaded Classic Chili Cheese Dog Casserole
- Author: Sophia
Description
A hearty, crowd-pleasing bake that brings together all the best flavors of a chili cheese hot dog in casserole form. Soft hot dog slices nestle in a cheesy, chili-spiked sauce, then get topped with crisp onions, tangy pickles, and extra cheese for melting. Perfect for family dinners, potlucks, or game-day snacking, this casserole is comfort food at its finest.
Ingredients
1 pound ground beef
1 small onion, finely diced
2 cloves garlic, minced
1 cup canned chili (with beans or without, your preference)
½ cup ketchup
2 tablespoons yellow mustard
1 teaspoon smoked paprika
Salt and pepper to taste
8 hot dog buns, cut into 1-inch pieces
2 cups shredded cheddar cheese, divided
½ cup dill pickle slices, chopped
⅓ cup diced red onion
2 tablespoons butter, melted
Instructions
Preheat the oven to 375°F (190°C). In a large skillet over medium heat cook the ground beef with the diced onion until the meat is browned and the onion is softened. Stir in the minced garlic, cooking until fragrant.
Add the canned chili, ketchup, mustard, and smoked paprika to the meat mixture. Season with salt and pepper and simmer for 5 minutes to meld the flavors together.
Meanwhile toss the hot dog bun pieces with the melted butter in a large bowl. Spread half of the buttery bread pieces in the bottom of a greased 9×13-inch baking dish.
Spoon the chili-beef mixture over the first layer of bread, then sprinkle with one cup of the shredded cheddar. Top with the remaining bread pieces and press down lightly to compact.
Cover the casserole with foil and bake for 15 minutes. Remove the foil, sprinkle with the remaining cheddar cheese, and bake for an additional 10 minutes or until the cheese is melted and bubbly.
Let the casserole rest for 5 minutes before scattering the chopped pickles and red onion over the top. Serve warm, scooping out generous portions of gooey, fully loaded goodness.
Notes
Use your favorite style of hot dog bun—potato rolls or brioche add extra richness. For a spicier kick, stir in a few dashes of hot sauce or chopped jalapeños to the chili mixture. This casserole can be assembled ahead of time and refrigerated (covered) for up to 24 hours before baking; just add an extra few minutes to the bake time if baking straight from cold. Leftovers reheat well in the oven or microwave, and you can customize toppings to suit each eater’s taste.
This casserole is rich and filling, so simple sides work best. Think coleslaw, a crisp green salad, or even corn on the cob for that classic cookout vibe.
Final Thoughts & Serving Suggestions
This Fully Loaded Classic Chili Cheese Dog Casserole brings serious flavor and fun to the dinner table. It’s a dish that feels familiar but still totally exciting every time you serve it. The layers of buttery bread, bold chili, melty cheese, and those crunchy pickles and onions on top—it all just works.
I love serving this with a big scoop of tangy coleslaw on the side and maybe even a cold root beer float if we’re going full-on diner-style. It’s kid-friendly, crowd-approved, and endlessly customizable.
If you give this recipe a try, I’d love to hear how it turned out for you! Feel free to share your own twists—maybe a spicy version with jalapeños, or even a veggie-packed take for Meatless Monday. Drop a comment, tag me in your photos, or just tell me how many people asked for seconds.