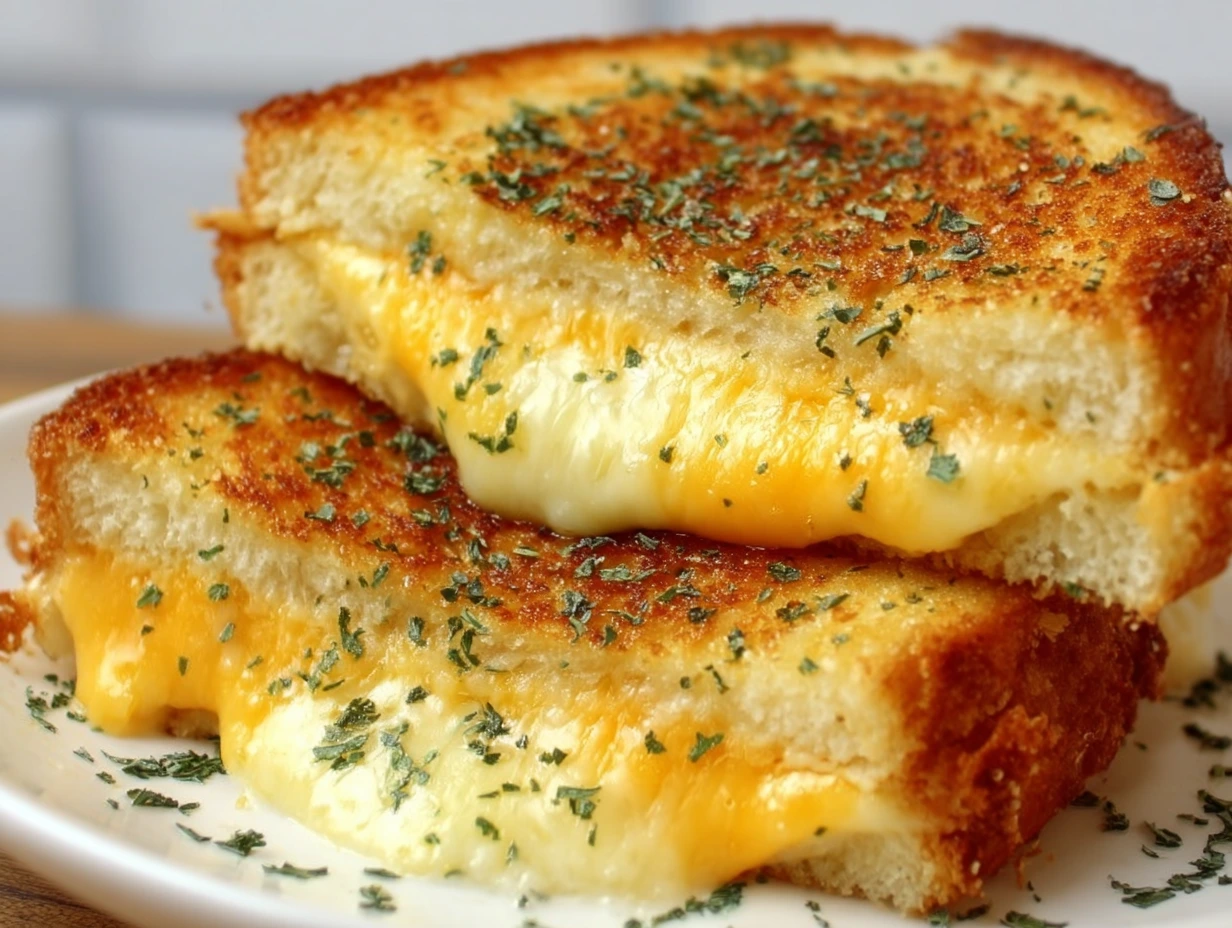
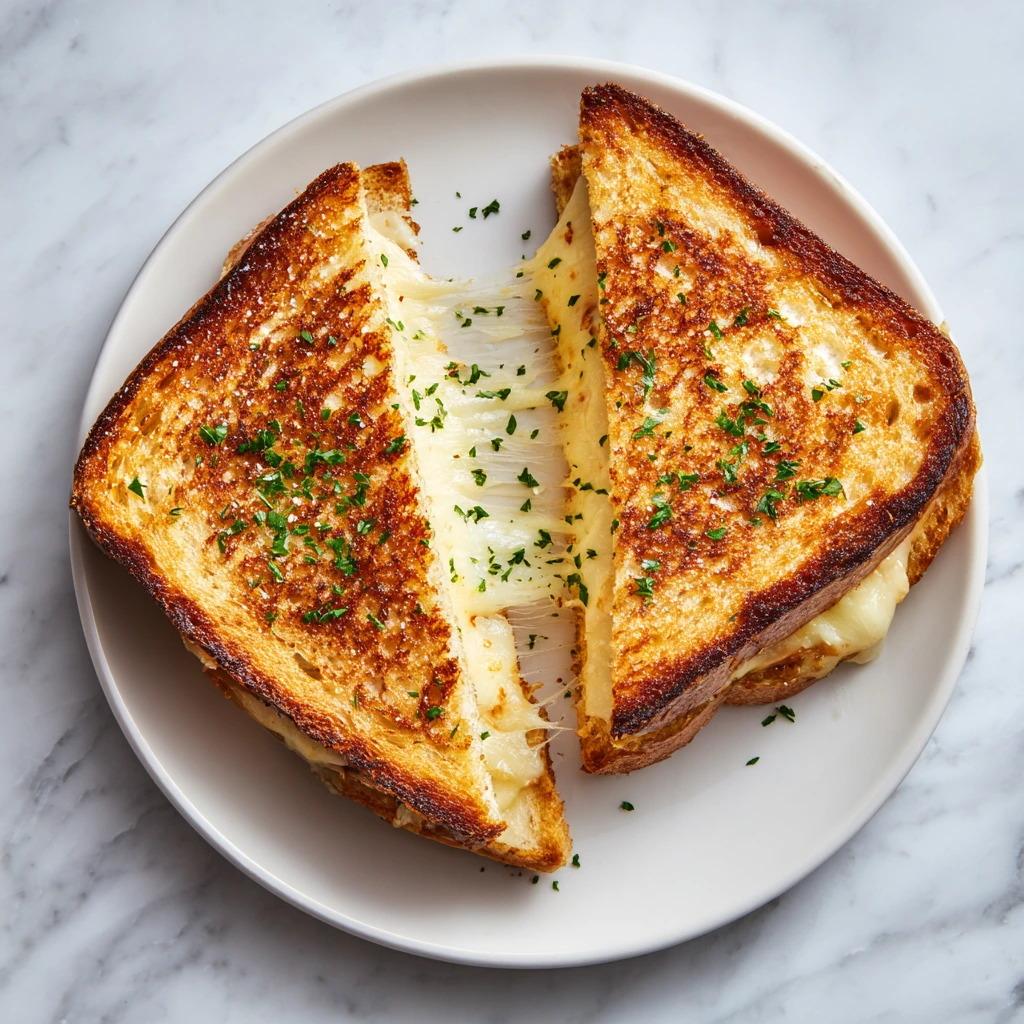
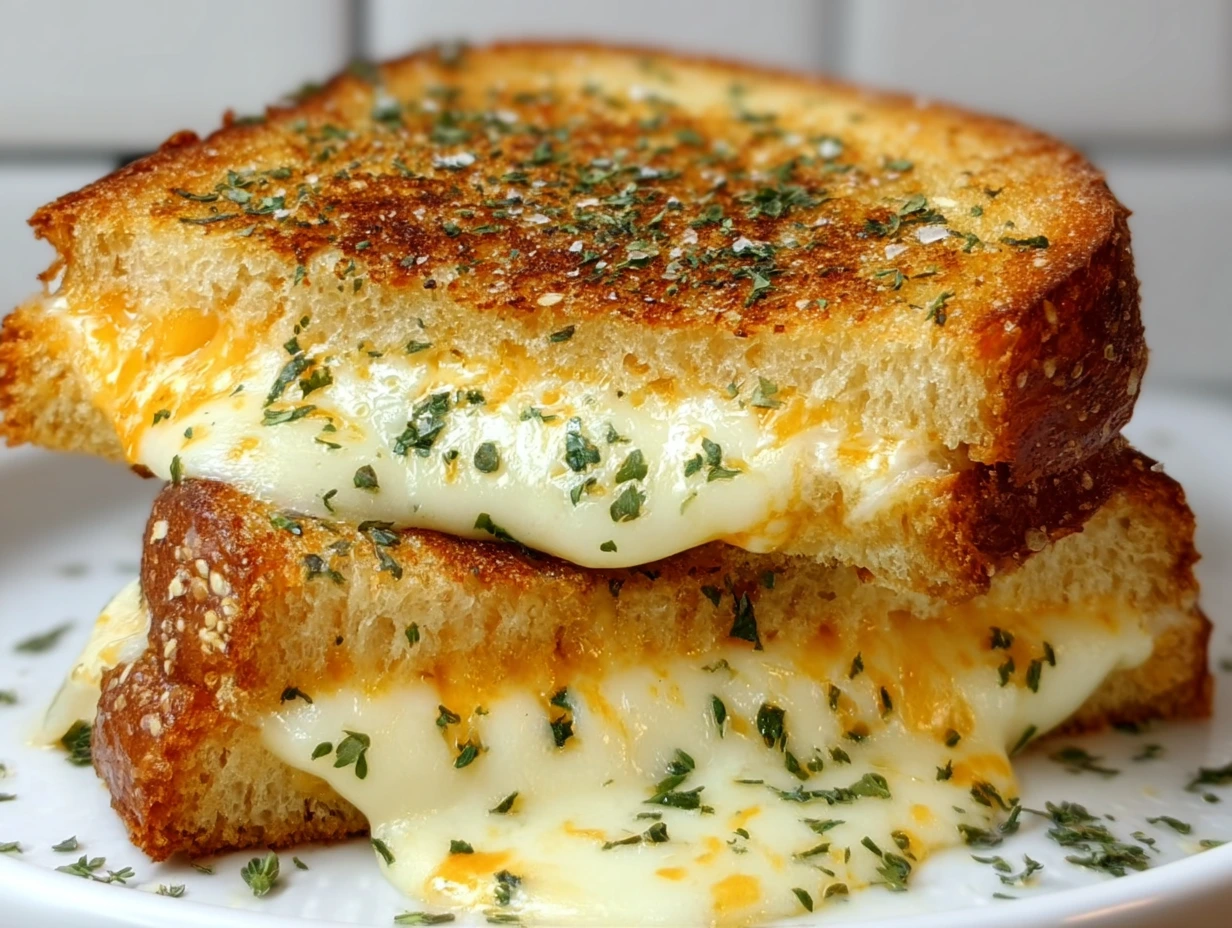
When it comes to comfort food, grilled cheese is right up there at the top of the list. And garlic bread? Let’s just say that if I had to choose one aroma to fill my kitchen forever, garlic butter sizzling on warm bread would be a serious contender. So what happens when you take these two cozy classics and smash them together? You get the Garlic Bread Grilled Cheese—a golden, crispy, cheesy bite of pure indulgence.
This sandwich has quickly become a family favorite in my kitchen. It’s ridiculously easy to make, uses pantry staples, and the end result is so delicious it feels like it should’ve been invented decades ago. It’s perfect for rainy days, lazy weekend lunches, or honestly, just when you’re in the mood for something warm and comforting but still totally crave-worthy.
I first stumbled on this idea when I had some leftover garlic butter from a pasta night and a few slices of sourdough that were begging to be used. I didn’t want to make the usual grilled cheese—I was craving something with a little extra oomph. That buttery garlic flavor combined with sharp cheddar sealed between two crispy slices of bread? Game changer.
Let’s jump into how to make this dreamy grilled cheese sandwich at home. It comes together in less than 15 minutes and tastes like it came straight from your favorite bistro.

Ingredients You’ll Need
-
4 slices rustic Italian or sourdough bread
-
2 tablespoons unsalted butter, softened
-
2 cloves garlic, minced
-
½ teaspoon dried parsley or Italian seasoning
-
Salt and black pepper, to taste
-
4 slices sharp cheddar cheese or mozzarella
-
1 tablespoon mayonnaise (optional, for extra crispness)
STEP 1: Make the Garlic Butter
This is where all the flavor magic begins. In a small bowl, mix the softened butter with the minced garlic, dried parsley (or Italian seasoning), and a pinch each of salt and pepper. Stir it all together until smooth and spreadable.
This garlic butter is your new best friend. I sometimes make a double batch and keep it in the fridge—it’s incredible on toast, veggies, or even tossed into pasta.
STEP 2: Butter the Bread
Take your four slices of bread and spread a generous layer of the garlic butter on one side of each slice. Don’t be shy here—the more butter, the more flavor. If you’re using mayonnaise for that extra crispy golden edge (which I highly recommend), spread a thin layer on the opposite side of each slice. It might sound strange, but mayo browns beautifully and gives the bread a slight tang that complements the garlic and cheese.
STEP 3: Assemble the Sandwich
Now for the fun part. Heat a nonstick skillet or griddle over medium heat until it’s hot but not smoking. Lay two slices of bread, garlic-butter side down, onto the skillet. Top each with two slices of cheese—sharp cheddar is my go-to, but mozzarella or even a combo of the two works wonderfully.
Press the remaining slices of bread on top, mayo side facing out (or plain if you skipped the mayo).
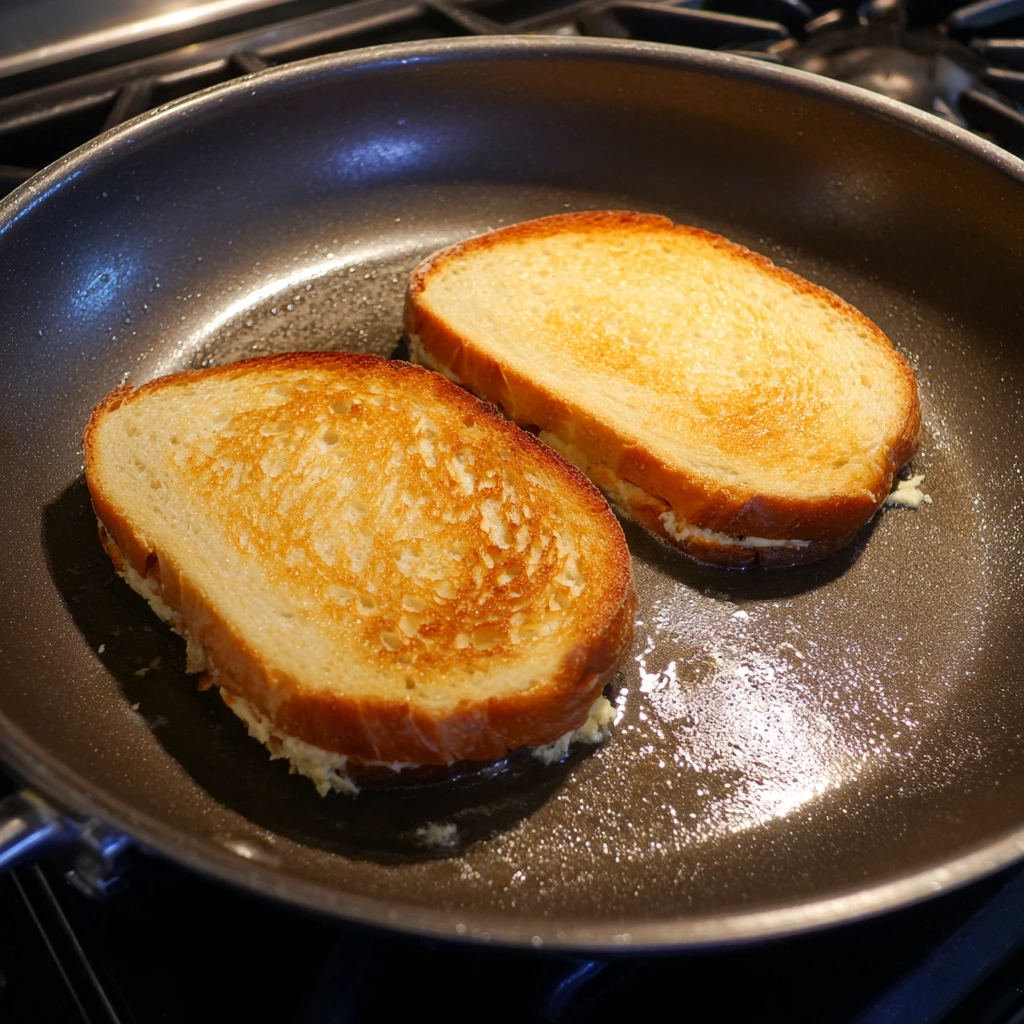
STEP 4: Grill Until Golden and Gooey
Let the sandwiches cook for 3 to 4 minutes, or until the bottom slice is beautifully golden and the cheese starts to melt. Carefully flip each sandwich and cook for another 2 to 3 minutes on the other side, pressing down slightly with a spatula to get that signature crispy crust.
Once both sides are golden brown and the cheese is completely melted, transfer the sandwiches to a cutting board. Let them rest for a minute (trust me, it’s worth the wait) before slicing each one in half.
Next-Level Garlic Bread Grilled Cheese: Tips, Add-ins, and Variations
Okay, so by now, you’ve got the basics down: buttery garlic bread, perfectly melted cheese, and a crispy crust that’s pretty much irresistible. But let’s talk about how to take this already amazing Garlic Bread Grilled Cheese to the next level. This part is all about the little tweaks and optional upgrades that make this sandwich feel extra special.
I’ve played around with this recipe quite a bit—what started as a cozy lunch idea turned into a bit of an obsession. From adding extra fillings to experimenting with different breads and cheeses, I’ve discovered a few tricks that’ll help you customize this grilled cheese to fit whatever you’re craving.
STEP 5: Add Extra Fillings (Totally Optional But Totally Delicious)
One of the best things about this sandwich is how flexible it is. It’s perfect as-is, but if you want to add some bonus flavor or make it a heartier meal, here are a few of my favorite upgrades:
-
Cooked bacon: Adds smoky crunch and richness. Just a strip or two per sandwich does the trick.
-
Sliced tomatoes: A thin layer of fresh tomato cuts through the richness beautifully.
-
Caramelized onions: Sweet and savory, they pair perfectly with cheddar.
-
Spinach or arugula: A handful of greens adds freshness and a nice texture contrast.
-
Grated Parmesan: Stir a little into the garlic butter before spreading—it gives the crust a salty, nutty edge.
To add these fillings, simply layer them between the cheese slices before grilling. Just make sure not to overstuff the sandwich or it might fall apart when flipping.
STEP 6: Use the Right Pan for the Best Results
If you’ve ever struggled with uneven browning or soggy grilled cheese, your pan might be the issue. A cast-iron skillet is my go-to—it retains heat beautifully and gives the bread that perfect golden sear.
No cast-iron? A good nonstick skillet works too. Just make sure it’s hot before the bread hits the pan, but not smoking. Medium heat is your friend here. Too hot, and the bread burns before the cheese melts.
If you own a sandwich press or panini maker, this is an excellent time to use it. It creates the ultimate crispy crust and perfectly melted center with minimal effort.
STEP 7: Let It Rest Before Slicing
This part might be the hardest, but it’s so worth it: once your sandwich is done cooking, transfer it to a cutting board and let it sit for about a minute before slicing. This short rest lets the cheese set slightly so it doesn’t completely ooze out the second you cut into it.
Then grab your sharpest knife and slice it in half. Diagonally or straight across—your call.
Tips for Leftovers and Reheating
If you happen to have leftovers (which, let’s be honest, is rare), don’t just toss them in the microwave. The magic of this sandwich is all about that crispy, buttery crust—and microwaving it just won’t do it justice.
Here’s how I reheat mine:
-
Skillet method: Place the sandwich in a dry skillet over low heat. Cover loosely with foil and warm each side for 2-3 minutes until it’s hot and crisp again.
-
Oven method: Wrap the sandwich in foil and bake at 350°F for about 10 minutes. You can open the foil for the last few minutes to crisp the outside more.
Both methods bring the sandwich back to life without losing that irresistible crunch.
Variations for Different Diets
Want to make this sandwich work for your dietary needs? Here are a few easy swaps:
-
Dairy-free: Use a plant-based butter and dairy-free cheese. You can also brush the bread with garlic-infused olive oil instead of butter—it adds flavor and keeps it vegan-friendly.
-
Gluten-free: Use your favorite gluten-free bread. Just make sure it’s sturdy enough to hold up to grilling and gooey cheese.
-
Low-carb option: Try making a garlic butter cheese melt using low-carb bread or even large portobello mushrooms in place of bread (seriously—don’t knock it till you try it).
This sandwich is so flexible, you can adjust it to fit just about any dietary need without sacrificing the flavor and indulgence that make it special.
Garlic Bread Grilled Cheese: FAQ and Final Thoughts
By now, you’ve seen just how easy—and delicious—it is to bring this Garlic Bread Grilled Cheese to life. Whether you’re cooking up a quick lunch or serving it alongside tomato soup for a cozy dinner, this sandwich is sure to become one of your go-to comfort food recipes.
Before we wrap up, I wanted to answer some of the most common questions I get when I share this recipe. Whether you’re wondering about storage, reheating, or how to switch things up, this FAQ section has you covered.
Frequently Asked Questions
1. Can I make this sandwich in an air fryer?
Yes! To air fry, assemble the sandwich as usual, then place it in a preheated air fryer at 375°F for about 6–8 minutes, flipping halfway through. Keep an eye on it to avoid over-browning. The result is crisp and golden with a perfectly melted center.
2. What’s the best cheese to use for this grilled cheese?
Sharp cheddar is classic and adds great flavor, but mozzarella works beautifully for extra meltiness. You can also try provolone, Havarti, Monterey Jack, or a combination. The key is to use a cheese that melts well and complements the garlic butter.
3. Can I prep these sandwiches ahead of time?
You can prep the garlic butter mixture and even butter the bread in advance, storing the slices in the fridge for a day or so. I recommend assembling and grilling the sandwich fresh for the best texture, but pre-buttered bread does save time.
4. How do I keep the bread from getting soggy?
Make sure your skillet or press is fully preheated before you add the sandwich. A hot cooking surface ensures the bread crisps up quickly, sealing in the butter and preventing sogginess. Letting the sandwich rest before slicing also helps retain that crunch.
5. Can I freeze these sandwiches?
It’s not ideal to freeze fully assembled grilled cheese sandwiches due to the bread’s texture after thawing. However, you can freeze the garlic butter mixture for later use and simply spread it on fresh bread whenever a craving hits.
6. What’s the best bread to use?
Rustic Italian bread and sourdough are my top choices. They’re sturdy, flavorful, and hold up well to the rich butter and gooey cheese. Avoid overly soft sandwich bread—it tends to get mushy and doesn’t crisp up as well.
7. Is mayonnaise really better than butter for grilling?
It’s a personal preference, but many people (myself included) love using a thin layer of mayo on the outside of the sandwich. It browns more evenly and gives a little tang that works especially well with the garlic and cheese combo. Try both and see what you like best!
Final Thoughts: Try It Your Way and Make It Your Own
There’s something about this Garlic Bread Grilled Cheese that feels like home. It’s cozy, flavorful, and easy enough for weeknights, but with a richness that makes it feel like a treat. What I love most is how customizable it is. You can stick with the simple version, or throw in your favorite add-ins and cheeses to make it totally your own.
Pair it with a bowl of tomato soup, a fresh salad, or even just enjoy it on its own with a crisp pickle on the side—whatever your combo, you’re in for a serious comfort food win.
If you try this recipe, I’d love to hear how it turned out! Leave a comment, let me know what variations you used, and don’t forget to share if it became a hit in your house like it did in mine.
Print
Garlic Bread Grilled Cheese
- Author: Sophia
Description
A decadent twist on the classic grilled cheese sandwich, featuring rich garlic butter spread on crisp, golden bread with melted cheese oozing from the center. This indulgent sandwich combines the irresistible flavors of garlic bread and grilled cheese for a comforting treat that’s perfect for lunch, dinner, or a cozy snack.
Ingredients
4 slices rustic Italian or sourdough bread
2 tablespoons unsalted butter, softened
2 cloves garlic, minced
½ teaspoon dried parsley or Italian seasoning
Salt and black pepper to taste
4 slices sharp cheddar cheese or mozzarella
1 tablespoon mayonnaise (optional, for extra crispness)
Instructions
Combine the softened butter, minced garlic, dried parsley, salt, and pepper in a small bowl until smooth. Spread the garlic butter evenly on one side of each bread slice. If using mayonnaise, spread it on the opposite side of the bread for added browning and crisp texture.
Heat a nonstick skillet or griddle over medium heat until hot. Place two slices of bread, garlic-butter side down, on the skillet. Top each with two slices of cheese and then press the remaining bread slices on top, mayonnaise side down if used.
Cook until the bottom slice is golden brown and the cheese begins to melt, about 3 to 4 minutes. Carefully flip the sandwiches and continue cooking until the second side is golden and the cheese is fully melted, about 2 to 3 minutes more.
Remove from the skillet and let rest for a minute before slicing each sandwich in half. Serve immediately while the cheese is warm and gooey.
Notes
Use a cast-iron skillet or a sandwich press for extra-even heat and perfect grill marks. Swap in garlic-infused olive oil in place of butter for a dairy-free version, or add a sprinkle of grated Parmesan to the butter mixture for an extra savory bite. For a deluxe variation, layer in cooked bacon, sliced tomato, or caramelized onions before grilling. Leftover sandwiches can be reheated on a skillet over low heat to restore crispness, or wrapped in foil and warmed in a 350°F oven for about 10 minutes.