If there’s one recipe that instantly transports you to a breezy beach in Hawaii, it’s this Hawaiian Huli Huli Chicken. It’s got everything: juicy grilled chicken, sweet and tangy marinade, caramelized pineapple rings, and a tropical aroma that turns your backyard into a mini island escape. Whether you’re firing up the grill for a weekend barbecue or just craving something fun and flavorful for dinner, this recipe is your golden ticket to island-inspired bliss.
I first came across Huli Huli Chicken at a summer cookout hosted by a friend who’d just gotten back from a trip to Maui. One bite in, and I was hooked. I mean, how could I not be? The chicken was tender and juicy with just the right amount of char, and that sweet-savory glaze paired with grilled pineapple? Absolute magic. It was the kind of dish that had everyone going back for seconds (and thirds). Naturally, I had to recreate it—and after a few test runs and tweaks, this version became my go-to.
Now I’m so excited to share it with you. Trust me, once you try this, it’s going straight into your regular rotation—especially during grilling season. Let’s get started!

Ingredients You’ll Need
Here’s everything you’ll need to make this crowd-pleasing Hawaiian Huli Huli Chicken:
For the Marinade:
-
1 cup teriyaki sauce
-
½ cup pineapple juice
-
¼ cup soy sauce
-
2 tablespoons brown sugar
-
2 cloves garlic, minced
-
1 teaspoon fresh ginger, grated
-
1 tablespoon sesame oil
For the Chicken & Pineapple:
-
4 boneless, skinless chicken thighs or breasts
-
1 fresh pineapple, sliced into rings
For Garnish (Optional):
-
Sesame seeds
-
Sliced green onions
STEP 1: Mix Up the Marinade
In a medium-sized bowl, whisk together the teriyaki sauce, pineapple juice, soy sauce, brown sugar, minced garlic, grated ginger, and sesame oil. Keep whisking until the brown sugar has completely dissolved and everything looks well combined.
This marinade is what gives the chicken its signature Huli Huli flavor—it’s sweet, savory, and full of tropical notes from the pineapple and ginger. I recommend using fresh ginger if you can; it adds a really nice kick that powdered just doesn’t quite capture.
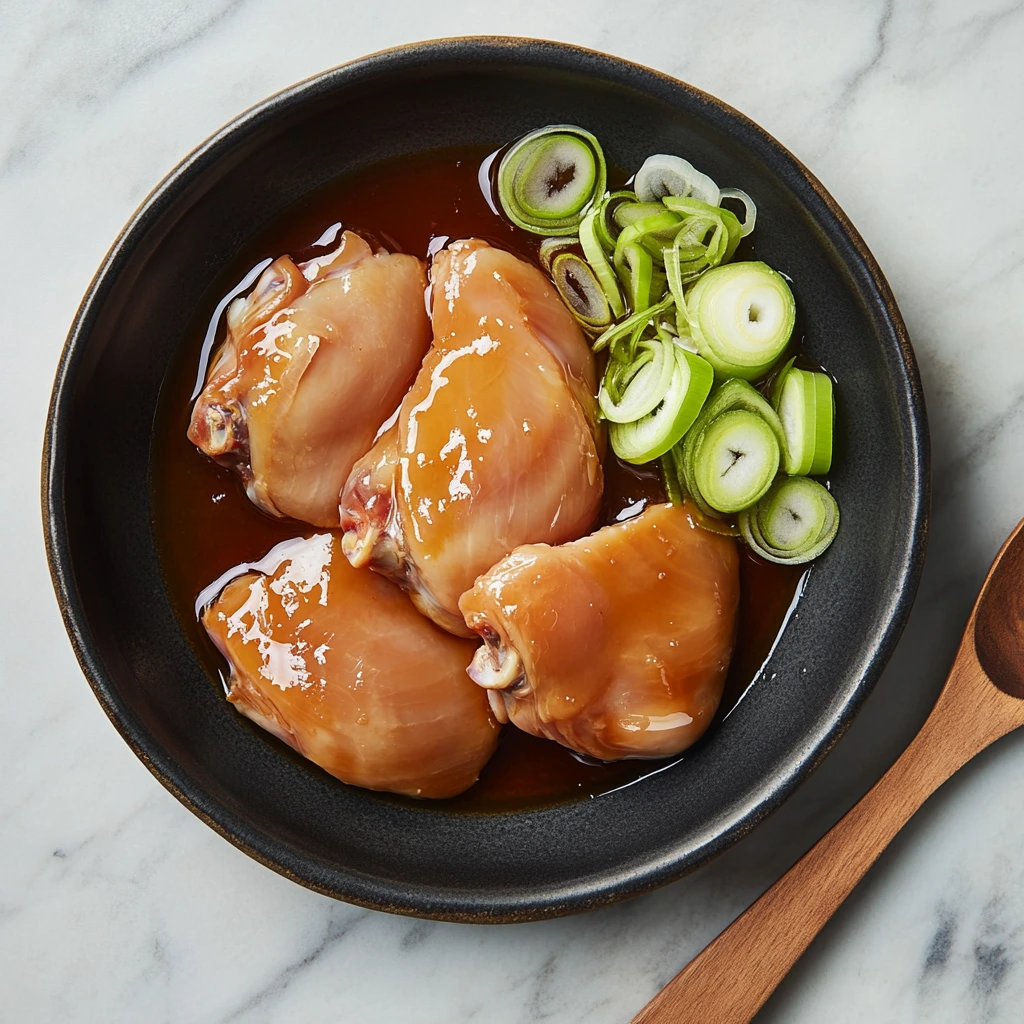
STEP 2: Marinate the Chicken
Place your chicken (either thighs or breasts—your choice!) in a large resealable plastic bag or a shallow dish. Pour the marinade over the chicken, making sure everything is nicely coated. Seal the bag or cover the dish, then pop it in the fridge.
Now, here’s the key: let it marinate for at least 2 hours, but overnight is even better if you’ve got the time. The longer the chicken sits in that marinade, the more flavor it soaks up. I usually prep mine the night before a cookout and it’s absolutely worth the wait.
STEP 3: Get the Grill Ready
When you’re ready to cook, preheat your grill to medium-high. If you’re using charcoal, aim for a nice even bed of hot coals. For gas grills, just give it a few minutes to heat up properly.
Remove the chicken from the marinade, letting the excess drip off. Important: Don’t toss that marinade just yet—we’ll be using it to baste the chicken as it grills. Just make sure to set it aside and don’t reuse it raw after basting.
How to Grill Huli Huli Chicken to Perfection (Plus a Pineapple Twist!)
Alright, now that our chicken has had time to soak up all that incredible flavor, it’s time to fire up the grill and bring this tropical dish to life. This is the part where everything comes together—and trust me, your backyard is about to smell amazing. Between the charred, caramelized edges on the chicken and the sweet, smoky pineapple slices, this recipe delivers serious summer vibes in every bite.
I’ve found that people often think grilling chicken is tricky, but with the right timing and a few simple tips, it’s actually one of the easiest and most rewarding things to make. Let’s jump right into the next steps and I’ll walk you through exactly how to grill this Hawaiian Huli Huli Chicken like a pro.
STEP 4: Grill the Chicken
Once your grill is hot and ready, place the marinated chicken on the grates. Be sure to reserve the leftover marinade—we’ll use it to baste as the chicken cooks. Just be cautious not to use any marinade that’s been in contact with raw chicken near the end of grilling unless you boil it first.
Grill the chicken for about 6 to 7 minutes per side, turning only once to get those beautiful grill marks. You’re aiming for the internal temperature to reach 165°F (74°C)—a digital meat thermometer makes this super easy to check.
While the chicken cooks, baste it occasionally with the reserved marinade. This helps layer on more flavor and gives the surface that sticky-sweet glaze that Huli Huli chicken is known for.
Tip: If you’re dealing with flare-ups or your grill runs hot, you can start the chicken over direct heat to get a nice sear, then move it to indirect heat to finish cooking gently without burning the outside.
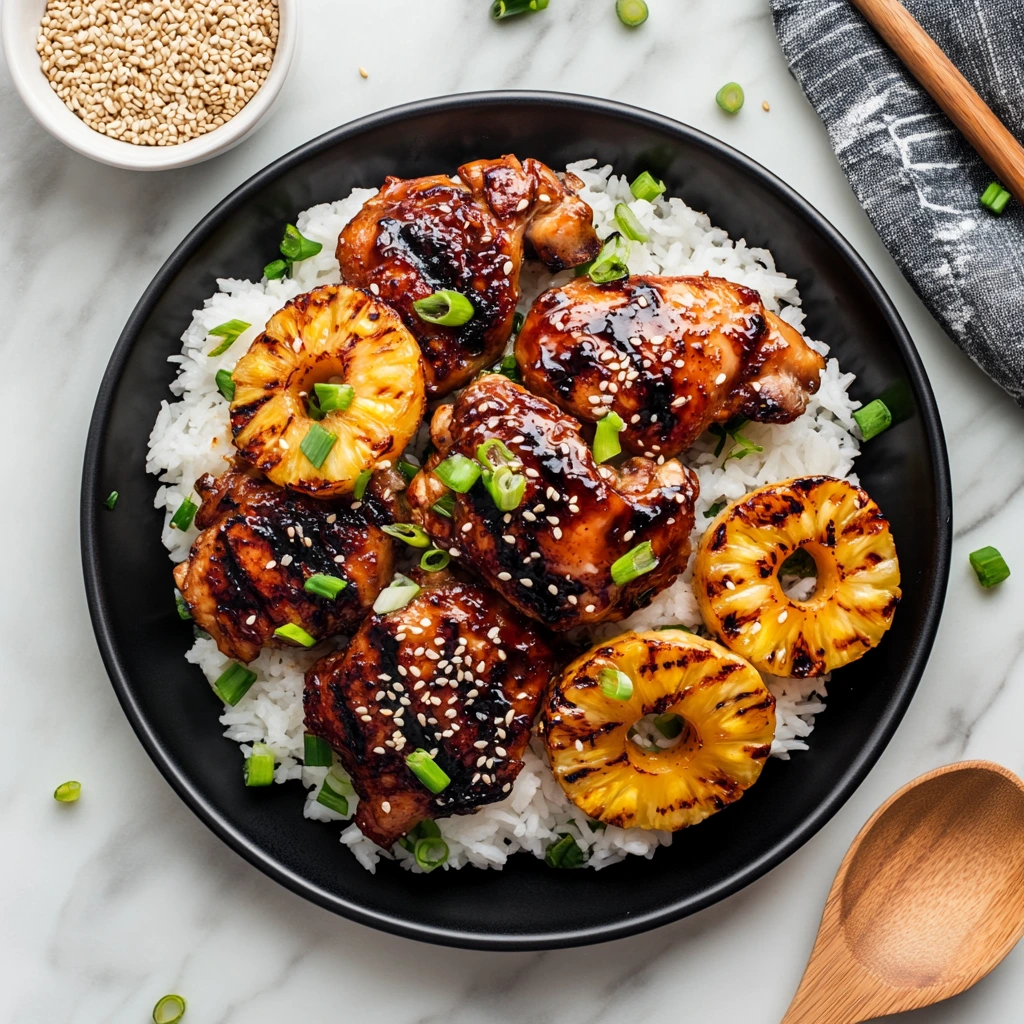
STEP 5: Grill the Pineapple Rings
Next up: the pineapple. This step might seem simple, but it’s a total game changer when it comes to flavor and presentation.
Place the fresh pineapple rings directly on the grill grates and cook them for 2 to 3 minutes per side, or until you see clear grill marks and the sugars start to caramelize. The edges should be lightly golden and soft, but not mushy.
Grilled pineapple adds a pop of sweetness and a juicy contrast to the savory chicken. It also looks gorgeous when served alongside the meat—seriously, it makes the whole plate look like it came straight from a beachside café.
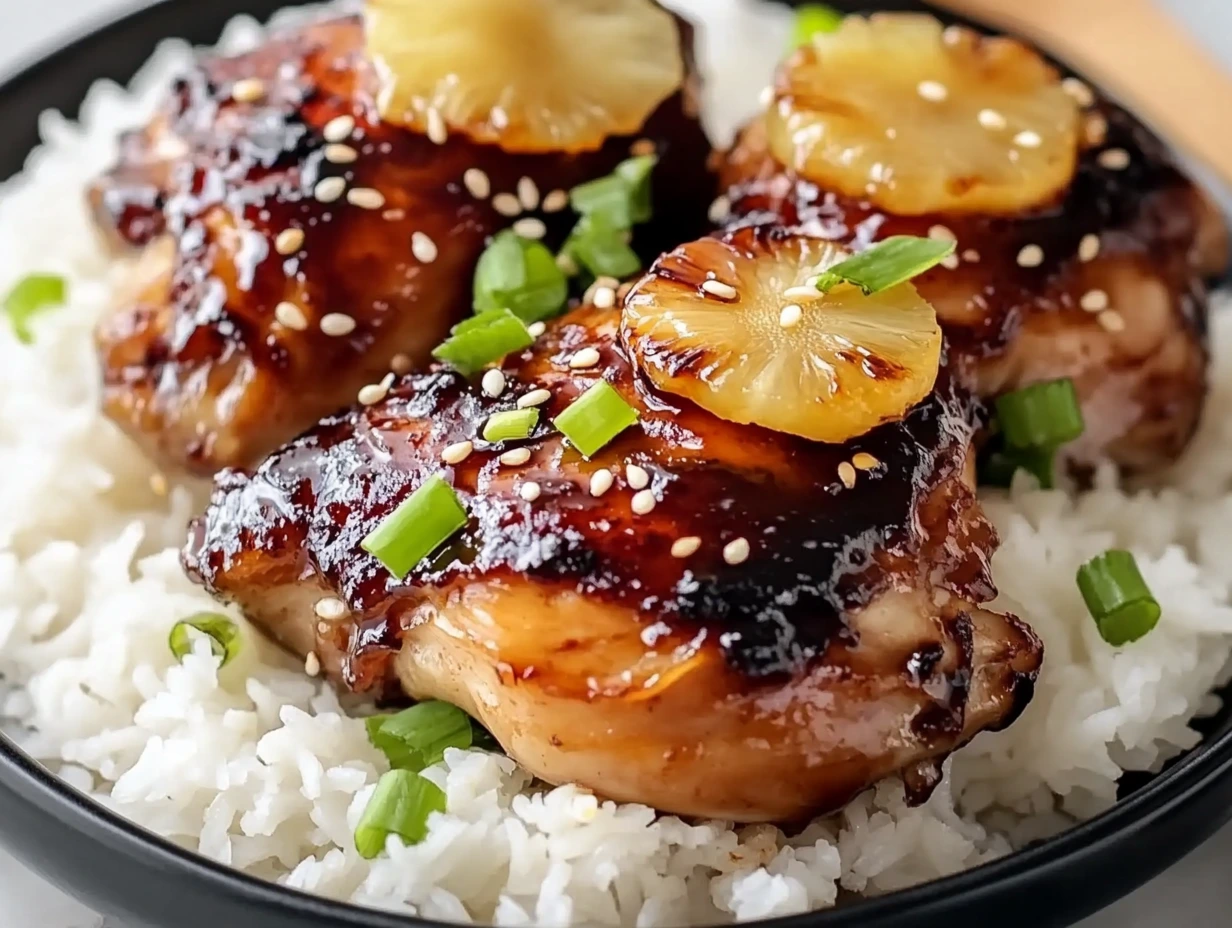
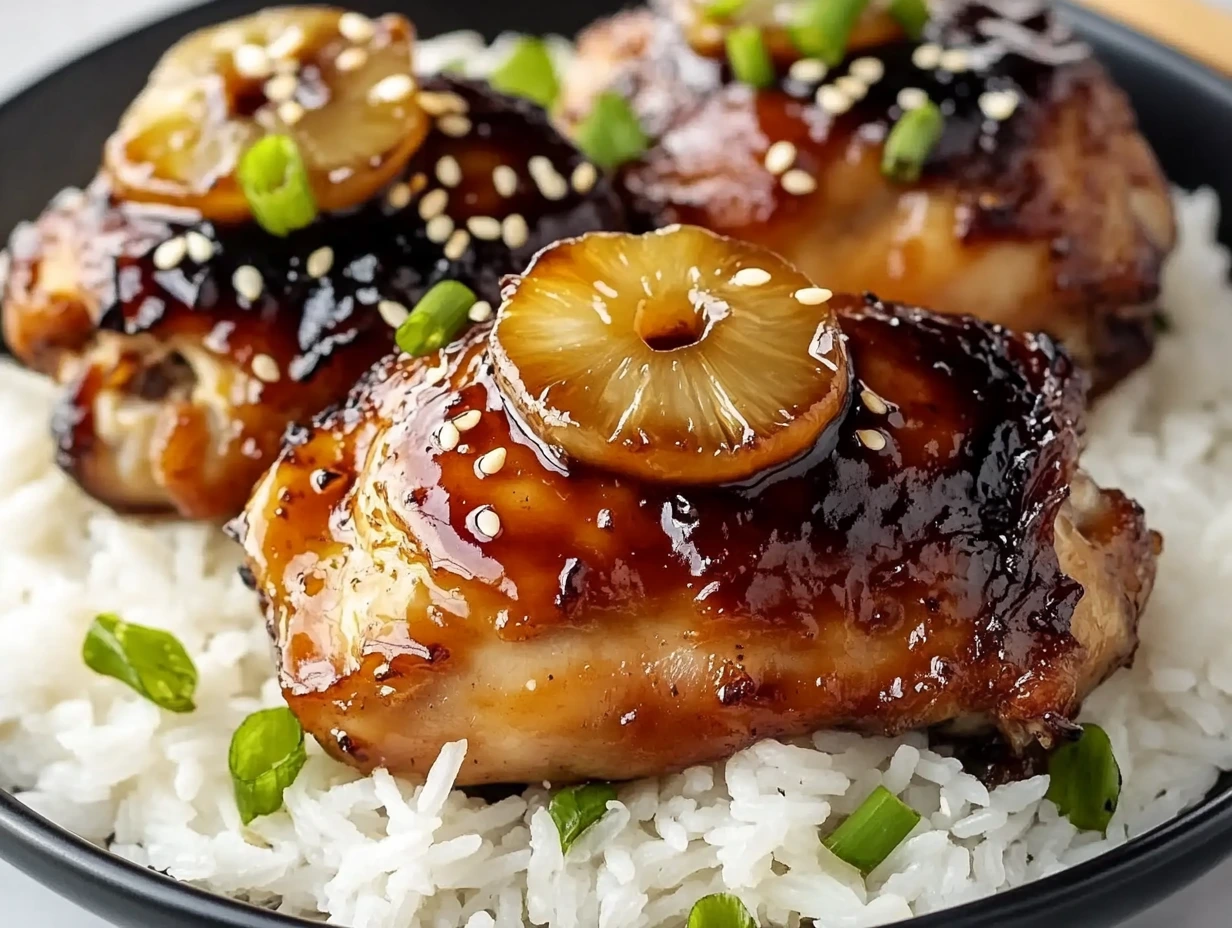
STEP 6: Plate and Garnish
Once everything is perfectly cooked, transfer the grilled chicken and pineapple rings to a serving platter. If you want to go the extra mile, sprinkle the top with sesame seeds and sliced green onions. Not only does it add a little crunch and freshness, but it also makes the dish pop visually.
And there you have it—a plate full of vibrant, smoky-sweet goodness that’s just begging to be shared.
Extra Tips for Next-Level Flavor
Here are a few quick tricks to help you get the best results every time:
-
Want a thicker glaze? Simmer the reserved marinade in a saucepan on the stove for 5–10 minutes until it reduces by half. Then brush it over the chicken during the last few minutes on the grill.
-
Try thighs for juicier results. While you can use chicken breasts, boneless thighs tend to be more forgiving on the grill and stay juicier.
-
Add some heat. If you like a little kick, toss a dash of crushed red pepper flakes or a splash of sriracha into your marinade before soaking the chicken.
-
Meal prep friendly. Leftovers keep well and can be sliced up for salads, tacos, or rice bowls throughout the week. That flavor only gets better the next day.
Huli Huli Chicken FAQ + Final Thoughts on This Tropical Favorite
By now, your kitchen (or backyard) probably smells amazing and you’ve got a plate full of golden, juicy chicken and sweet, caramelized pineapple ready to serve. But before you dive in—or if you’re prepping for an upcoming grill night—you might have a few questions. Whether it’s about substitutions, cooking alternatives, or storing leftovers, I’ve got you covered.
Below are some of the most common questions I’ve gotten about this Hawaiian Huli Huli Chicken recipe. Let’s clear them up so you can cook with total confidence!
Frequently Asked Questions
1. Can I make Huli Huli Chicken without a grill?
Absolutely! If you don’t have access to a grill, you can cook the chicken in a grill pan or even bake it in the oven. For the oven method, bake at 400°F (200°C) for about 25–30 minutes, flipping once and basting halfway through. Then, broil for a couple of minutes at the end to get a little caramelization on top.
2. What’s the best cut of chicken to use?
Boneless, skinless chicken thighs are my personal favorite—they’re flavorful, juicy, and forgiving on the grill. But if you prefer leaner meat, chicken breasts will also work well. Just be sure not to overcook them.
3. Can I use canned pineapple instead of fresh?
You can, though fresh pineapple definitely gives the best results when grilled. If you use canned rings, opt for the kind packed in juice (not syrup), and drain them well before grilling.
4. How long should I marinate the chicken?
At least 2 hours, but overnight is ideal. The longer you marinate, the deeper the flavor. Just don’t go over 24 hours, as the acid from the pineapple juice can start to break down the chicken too much and make it mushy.
5. Can I freeze the marinated chicken for later?
Yes! Place the chicken and marinade in a freezer-safe bag and freeze for up to 2 months. When you’re ready to use it, thaw overnight in the fridge and then grill as usual.
6. What sides go well with Huli Huli Chicken?
So many options! Coconut rice, grilled veggies, Hawaiian rolls, or a simple cabbage slaw pair beautifully with this dish. If you’re feeding a crowd, consider adding macaroni salad or a tropical fruit salad for a true island-style feast.
7. Is the marinade safe to use after touching raw chicken?
Only if it’s boiled first. If you want to use the leftover marinade as a glaze or sauce, bring it to a full boil on the stove for several minutes to ensure it’s safe to consume.
Final Thoughts: Make It Your Own Island Classic
There’s just something about Hawaiian Huli Huli Chicken that feels like a celebration. Maybe it’s the sweet and savory balance of the marinade, or the way the grill caramelizes everything to perfection—but whatever it is, this dish never fails to impress. It’s simple enough for a weeknight dinner, but special enough to be the star of your next summer get-together.
And the best part? It’s super flexible. Want to serve it in tacos? Go for it. Prefer it over a bed of rice with a drizzle of thickened glaze? You do you. Once you’ve made it once, I promise you’ll start dreaming up all kinds of ways to enjoy it.
Print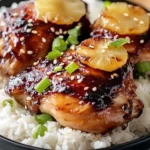
Hawaiian Huli Huli Chicken
- Author: Sophia
Description
Tender, juicy chicken thighs (or breasts) marinated in a sweet-savory blend of teriyaki, pineapple juice and ginger, then grilled alongside caramelized pineapple rings for a tropical twist. Finished with sesame seeds and green onions, this dish brings island flavors straight to your backyard.
Ingredients
Main
4 boneless, skinless chicken thighs or breasts
1 cup teriyaki sauce
½ cup pineapple juice
¼ cup soy sauce
2 tablespoons brown sugar
2 cloves garlic, minced
1 teaspoon fresh ginger, grated
1 tablespoon sesame oil
1 fresh pineapple, sliced into rings
Garnish (optional)
sesame seeds
sliced green onions
Instructions
In a medium bowl whisk together the teriyaki sauce, pineapple juice, soy sauce, brown sugar, minced garlic, grated ginger and sesame oil until the sugar dissolves and the mixture is smooth.
Place the chicken in a resealable plastic bag or a shallow dish and pour the marinade over it. Seal or cover and refrigerate for at least two hours, or up to overnight, to allow the flavors to infuse.
Preheat your grill to medium-high. Remove the chicken from the marinade, reserving the liquid for basting, and shake off any excess.
Grill the chicken for six to seven minutes per side, basting occasionally with the reserved marinade, until it reaches an internal temperature of 165°F (74°C) and has a nice char.
While the chicken cooks, place the pineapple rings on the grill and cook for two to three minutes per side, until grill marks appear and the fruit is lightly caramelized.
Discard any remaining marinade that contacted the raw chicken. Transfer the grilled chicken and pineapple to a serving platter.
Sprinkle with sesame seeds and sliced green onions before serving.
Notes
For even deeper flavor, char the chicken over direct heat then finish it over indirect heat to avoid flare-ups. If you prefer a thicker glaze, simmer the reserved marinade on the stovetop until reduced by half before using it to baste. Leftover chicken makes a great filling for tacos, salads or sandwiches.