

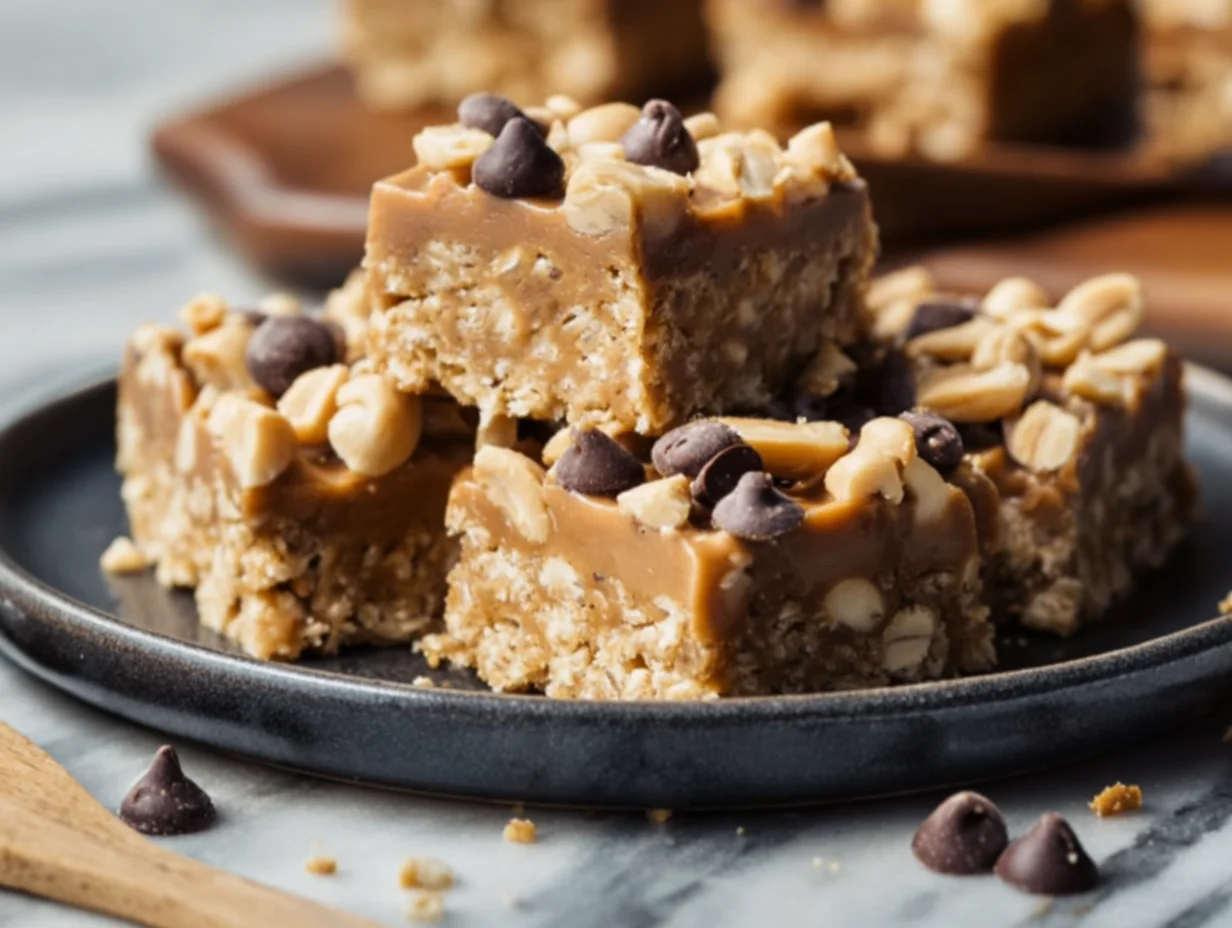
There’s just something comforting about having a wholesome snack tucked away in your fridge, ready to grab when hunger strikes. For me, it’s all about finding that balance—something that feels indulgent but is actually nourishing. These Healthy No-Bake Oatmeal Bars check all the boxes. They’re naturally sweetened, made with pantry staples, and versatile enough to satisfy even the pickiest eaters.
I first started making these bars when I needed a quick, portable breakfast option during a hectic week. What I love most is that they don’t require turning on the oven—perfect for summer days when the last thing you want is extra heat in the kitchen. Plus, you can easily customize them depending on what you’ve got on hand. Think of them as your blank canvas for all things delicious: nuts, seeds, dried fruit, or even a sprinkle of mini chocolate chips for those who like a little sweetness.
In this first part, we’ll go over what makes these bars so special, break down the simple ingredient list, and walk through the first steps to getting that chewy, satisfying texture you’ll love.
Why You’ll Love These Oatmeal Bars
-
No baking required – Just a few minutes on the stovetop and some fridge time.
-
Wholesome ingredients – Oats, peanut butter, and honey form the base.
-
Customizable – Add in whatever you’re craving—nuts, dried fruit, or even seeds.
-
Perfect for meal prep – Make a batch, refrigerate, and enjoy all week.
-
Kid-friendly – A great alternative to store-bought granola bars.
Ingredients You’ll Need
Here’s what goes into the base of the recipe:
-
2 cups old-fashioned rolled oats – These give the bars their hearty texture.
-
1 cup natural peanut butter (smooth or crunchy) – Holds everything together and adds protein.
-
1/2 cup honey or pure maple syrup – The natural sweetener that also helps bind.
-
1/2 teaspoon vanilla extract – A little flavor boost that makes a big difference.
-
Pinch of salt – Balances out the sweetness.
Optional add-ins (choose one or a mix for extra texture and flavor):
-
1/3 cup mini dark chocolate chips
-
1/4 cup chopped nuts or seeds
-
1/4 cup dried cranberries or raisins
Step 1: Prep Your Pan
Line an 8×8-inch square baking dish with parchment paper and set it aside. This simple step ensures your bars won’t stick and makes it super easy to lift them out once they’re chilled. I like to leave a little parchment hanging over the sides—it acts like built-in handles for later.

Step 2: Melt the Peanut Butter and Honey
In a medium saucepan over low heat, add your peanut butter and honey (or maple syrup). Stir continuously until the mixture is smooth, creamy, and fully combined. Be patient here—you don’t want the mixture to boil, just gently melt together. Once it’s nice and smooth, remove it from the heat and stir in the vanilla extract and a pinch of salt.
This step is the secret to bars that hold together beautifully. The warm peanut butter and honey mixture acts like glue, binding everything into chewy, sliceable squares.
Step 3: Coat the Oats
Add your rolled oats directly into the warm peanut butter mixture and stir until every oat is evenly coated. If you’re planning to mix in extras like chocolate chips or dried fruit, wait a few minutes to let the mixture cool slightly. That way, the chocolate won’t melt and turn into a swirl (unless that’s what you’re going for—no judgment here!).
At this point, your kitchen will smell incredible—nutty, sweet, and cozy.
How to Finish and Perfect Your No-Bake Oatmeal Bars
Now that we’ve got the oats coated in that creamy peanut butter and honey mixture, it’s time to bring everything together and create bars that slice cleanly, hold up well, and taste amazing. This part of the recipe is where patience really pays off, especially when it comes to chilling. Don’t worry though—it’s still quick, simple, and foolproof.
Step 4: Transfer and Press the Mixture
Grab your prepared 8×8-inch baking dish lined with parchment paper and scoop in the oat mixture. Using the back of a spatula, press the mixture down firmly to form an even layer. This step is more important than it might seem. The firmer you press, the more compact and chewy your bars will be.
If you don’t press firmly enough, you risk ending up with crumbly pieces that fall apart when sliced. For an extra smooth top, you can lightly grease your hands with a little oil or butter and press it down with your palms.

Step 5: Chill Until Firm
Once the mixture is spread evenly in the pan, it’s time to let the refrigerator do its work. Cover the pan loosely and place it in the fridge for at least 2 hours, or until the bars feel firm when touched. If you’re in a rush, you can pop them into the freezer for about 45 minutes to speed things up.
This step is non-negotiable if you want neat, uniform slices. The chilling allows the peanut butter and honey to set up properly, locking everything together.
Step 6: Slice and Store
When the mixture has set, lift the entire block out of the pan by pulling up on the parchment paper. Place it on a cutting board and use a sharp knife to slice into bars or squares. I usually cut mine into 12 bars, but you can make them smaller for kid-friendly bites or larger if you want a more filling snack.
Store the bars in an airtight container in the fridge for up to 1 week, or wrap them individually and freeze them for up to 3 months. They’re best kept chilled, especially if your kitchen tends to run warm, since they soften quickly at room temperature.

Tips for the Best No-Bake Oatmeal Bars
-
Don’t skip the parchment paper – It makes removing and slicing the bars a breeze.
-
Adjust sweetness – If you prefer a less-sweet bar, reduce the honey or maple syrup slightly. Just remember, it also helps bind the mixture, so don’t cut it back too much.
-
Nut-free alternative – Sunflower seed butter works beautifully in place of peanut butter.
-
Mix-ins matter – Add chocolate chips once the mixture cools a little to prevent melting. For a burst of flavor, try dried cranberries, chopped apricots, or pumpkin seeds.
-
Serving ideas – Pair a bar with Greek yogurt and fruit for a quick breakfast, or enjoy one with a cup of coffee for an afternoon energy boost.
Variations to Try
These bars are endlessly customizable. Here are a few fun twists to keep them exciting:
-
Trail Mix Bars – Add chopped almonds, cashews, dried cranberries, and a sprinkle of chocolate chips.
-
Chocolate Lovers’ Bars – Mix in mini dark chocolate chips and drizzle melted chocolate on top before chilling.
-
Tropical Bars – Stir in dried pineapple, shredded coconut, and macadamia nuts.
-
Breakfast Bars – Add a scoop of protein powder and some chia seeds for a more filling version.
Healthy No-Bake Oatmeal Bars FAQ
By now, you’ve got a tray of chewy, wholesome bars ready to enjoy. But if you’re like most home cooks, a few questions might pop up along the way. Let’s go over some of the most common ones so you can feel confident making these again and again.
1. Can I make these bars ahead of time?
Yes! These bars are perfect for meal prep. Make them at the beginning of the week, store them in the fridge, and you’ll have a ready-to-go snack or quick breakfast waiting. They’ll stay fresh for up to 7 days when refrigerated.
2. Do the bars need to stay refrigerated?
They hold best when chilled. Because the base is peanut butter and honey, they can soften if left at room temperature for too long, especially in warmer months. If you want them portable for school lunches or work, keep them in a cooler pack.
3. Can I freeze no-bake oatmeal bars?
Absolutely. Wrap individual bars in parchment or plastic wrap, place them in a freezer-safe bag, and store for up to 3 months. When you’re ready to eat, just thaw one in the fridge overnight—or for a quicker option, leave it at room temperature for about 20 minutes.
4. What if I don’t like peanut butter?
You can swap in almond butter, cashew butter, or sunflower seed butter for a nut-free version. The flavor will change slightly depending on the butter, but the texture will stay just as good.
5. Can I reduce the amount of honey or maple syrup?
Yes, but keep in mind that the sweetener also acts as a binder. If you cut it back too much, the bars may become crumbly. A safe adjustment is reducing by 1–2 tablespoons if you prefer a less-sweet bar.
6. How do I keep the bars from crumbling when slicing?
The key is pressing the mixture firmly into the pan and chilling for the full recommended time. Use a sharp knife to cut through in clean, decisive strokes. If your bars are still crumbly, they may need a bit more honey or nut butter for binding.
7. Can I make these gluten-free?
Yes—just be sure to use certified gluten-free oats, since regular oats may be cross-contaminated with wheat.
Final Thoughts on Healthy No-Bake Oatmeal Bars
There you have it—a simple, nourishing snack that takes just minutes to put together and keeps you fueled all week. I love these bars because they’re endlessly adaptable, whether you’re craving something sweet and chocolatey, fruity and chewy, or even a little nutty and crunchy.
If you’re new to no-bake recipes, this is a great place to start. You don’t need fancy tools, and you don’t have to worry about the oven—just a saucepan, a mixing bowl, and a little patience while they chill. Before you know it, you’ll have a stack of bars that taste far better than anything you could buy at the store.
So go ahead and give these Healthy No-Bake Oatmeal Bars a try. I’d love to hear how you customize yours—whether you go the chocolate chip route, add a tropical twist, or stick with the classic peanut butter and honey combo. Leave a comment, share your variation, and inspire others to get creative with this recipe.
Print
Healthy No-Bake Oatmeal Bars
- Author: Sophia
Description
These Healthy No-Bake Oatmeal Bars are a perfect snack or quick breakfast option, packed with wholesome ingredients like oats, peanut butter, and honey. They’re naturally sweetened, easy to make, and require zero baking. Customize them with your favorite add-ins like chocolate chips, dried fruits, or seeds for a nutrient-dense treat.
Ingredients
For the base:
2 cups old-fashioned rolled oats
1 cup natural peanut butter (smooth or crunchy)
1/2 cup honey or pure maple syrup
1/2 teaspoon vanilla extract
Pinch of salt
Optional add-ins:
1/3 cup mini dark chocolate chips
1/4 cup chopped nuts or seeds
1/4 cup dried cranberries or raisins
Instructions
Line an 8×8-inch square baking dish with parchment paper and set aside.
In a medium saucepan over low heat, add the peanut butter and honey. Stir continuously until the mixture is smooth and fully combined. Remove from heat and stir in the vanilla extract and a pinch of salt.
Add the rolled oats to the peanut butter mixture and stir until everything is well coated. If using any add-ins like chocolate chips or dried fruit, let the mixture cool slightly before folding them in to prevent melting.
Transfer the oat mixture to the prepared baking dish. Press it down firmly using the back of a spatula or your hands to create an even layer.
Refrigerate the bars for at least 2 hours, or until firm enough to slice. Once set, lift them out using the parchment paper and cut into bars or squares.
Store in an airtight container in the fridge for up to 1 week or freeze for longer storage.
Notes
For a nut-free version, use sunflower seed butter instead of peanut butter. You can also adjust the sweetness by reducing the amount of honey or maple syrup. These bars hold best when chilled, especially in warm weather, so keep them refrigerated until ready to serve.


