There’s something about a dessert that’s unapologetically messy, rich, and downright irresistible — and these Knock You Naked Bars check every single box. If you’ve never had the pleasure of biting into one of these gooey, caramel-filled treats, then you’re seriously in for a life-changing bite. I’m not even exaggerating.
The first time I brought these to a family barbecue, they vanished faster than the grilled burgers — and trust me, in my family, that’s saying something. Everyone wanted to know what they were, and the name alone had people laughing and reaching for seconds (and thirds). These bars are indulgent, sticky, and exactly what a sweet tooth craves.
Today, I’m walking you through my go-to version of this decadent dessert. It all starts with a shortcut using German chocolate cake mix, and from there we layer in melted caramels, chocolate chips, and buttery goodness. They’re easy enough for beginner bakers but have that “wow” factor that makes them perfect for parties, potlucks, or just a Friday night treat.
Let’s dive into the first half of the recipe and get that ooey-gooey magic started!
Ingredients You’ll Need:
-
1 box German chocolate cake mix
-
1 cup evaporated milk, divided
-
½ cup unsalted butter, melted
-
60 soft caramel candies, unwrapped
-
1 cup semi-sweet chocolate chips
-
½ cup chopped pecans (optional)
-
Powdered sugar for dusting (optional)
STEP-BY-STEP INSTRUCTIONS
Step 1: Preheat & Prep Your Pan
Start by preheating your oven to 350°F. Then, grease a 9×13-inch baking pan or line it with parchment paper if you want easier cleanup (highly recommended — especially with sticky caramel involved).
Step 2: Make the Base Dough
In a large mixing bowl, combine your German chocolate cake mix, ½ cup evaporated milk, and ½ cup melted butter. Stir everything together until a thick dough forms. Don’t worry — it’ll be dense and sticky, almost like cookie dough. That’s exactly what we want here.
Step 3: Press & Bake the First Layer
Divide the dough into two equal halves. Press one half evenly into the bottom of your prepared baking pan. Use your fingers or the back of a spoon to spread it out. Pop that into the oven and bake for 8 to 10 minutes, just until it sets. You’re not looking for a full bake here — we just want it firm enough to hold the caramel.

Step 4: Melt the Caramels
While that first layer is baking, grab a small saucepan and toss in the 60 unwrapped caramels with the remaining ½ cup evaporated milk. Set the heat to low and stir constantly until the caramels melt completely into a smooth, creamy sauce. It should be thick, glossy, and oh-so tempting. (Try not to eat it by the spoonful — we need it for the bars!)
Knock You Naked Bars: Gooey Layers of Chocolate & Caramel Goodness
Now that we’ve got the first layer baked and the caramel sauce melted to perfection, it’s time to build the magic. This next part is where everything comes together — the soft chocolatey base, the gooey caramel center, and that rich top layer that ties it all together.
If you’re anything like me, this is where the self-control really gets tested. Between the melted caramel, the warm chocolate chips, and the buttery dough, it’s almost impossible not to sneak a taste (or three). But trust me, letting the bars bake, cool, and chill will make them 100% worth the wait.
Let’s keep going and finish these indulgent bars the right way!

Step 5: Layer the Caramel and Toppings
Take the smooth, melted caramel and pour it evenly over the baked crust layer. Use a spatula to gently spread it all the way to the edges, making sure every inch gets covered.
Next, sprinkle the 1 cup of semi-sweet chocolate chips across the caramel layer. If you’re feeling fancy or just love a little extra crunch, add the ½ cup chopped pecans here too. They bring a nutty texture and that toasty flavor that pairs beautifully with the caramel and chocolate — but they’re totally optional.
Step 6: Add the Top Layer of Dough
Now grab the remaining half of the dough you set aside earlier. Since it’s too thick to spread traditionally, you’ll want to take pieces of it, flatten them in your hands, and gently lay them across the top of the caramel layer.
Here’s the thing — it doesn’t need to be perfect. In fact, it’s better if you leave some gaps. As the bars bake, the caramel will bubble up through the cracks, giving you those signature gooey streaks that make these bars extra tempting.
Step 7: Final Bake
Place the pan back into your preheated oven and bake for another 20 to 25 minutes, or until the top is golden brown and set. Keep an eye on it toward the end — the edges should look firm, and the top should have that classic slightly crisp look of a baked cookie bar.
The smell? Absolutely incredible.
Step 8: Cool and Chill
Now comes the hardest part — waiting. Let the bars cool completely in the pan. This can take a while, but don’t rush it. Once they’ve cooled to room temperature, transfer the pan to the fridge and let them chill for at least 2 hours. This helps everything set up properly so you get clean slices and less mess.
You’ll thank yourself later — promise.
Tips for the Best Knock You Naked Bars
-
Use parchment paper to line your baking pan. It makes cleanup easy and lets you lift the bars out easily for cutting.
-
Be patient with the caramel. Low heat and constant stirring are key to getting that perfect smooth texture without burning.
-
Chill before slicing. If you try to cut these too soon, the caramel will spill everywhere. Letting them firm up in the fridge makes slicing way easier.
-
Room temperature is best for serving. These bars are great straight from the fridge, but they’re at their gooey, chewy best when they’ve had 10-15 minutes to soften on the counter.
-
Customize to your taste. Not a fan of pecans? Leave them out. Want to try white chocolate chips instead? Go for it. This recipe is flexible and still turns out amazing.
Knock You Naked Bars: Your Go-To Dessert for Any Occasion
We’ve melted the caramel, baked those rich layers, and chilled the bars to perfection — now it’s time to enjoy the payoff. Knock You Naked Bars are everything a dessert should be: simple, show-stopping, and just the right amount of over-the-top. Whether you’re making these for a potluck, holiday party, or just because you’ve had a long week and need something sweet, these bars deliver.
Before we wrap things up, let’s go over some of the most commonly asked questions I get about this recipe. Whether it’s your first time making them or you’ve baked a few batches before, these tips will help you get the best results every time.

FREQUENTLY ASKED QUESTIONS
1. Can I use a different cake mix flavor?
Yes! While German chocolate cake mix gives these bars that deep, chocolatey base, you can definitely swap in a devil’s food or regular chocolate cake mix if that’s what you have on hand. Just keep in mind that the flavor may be slightly less rich without that classic German chocolate base.
2. Is there a shortcut for the caramel layer?
You can use jarred caramel sauce in a pinch, but for the best chewy texture and structure, I highly recommend melting down soft caramel candies with evaporated milk as the recipe calls for. It really makes a difference in how the bars set up.
3. How do I keep the bars from falling apart when I slice them?
The key is chilling! Let the bars cool completely at room temperature, then chill in the fridge for at least 2 hours before cutting. Use a sharp knife and wipe it clean between cuts for neat, clean slices.
4. Do I have to use pecans?
Not at all! Pecans add a lovely crunch and nuttiness, but they’re completely optional. Feel free to leave them out or swap them with walnuts or even toffee bits for a different twist.
5. How should I store leftovers?
Store your Knock You Naked Bars in an airtight container in the refrigerator for up to 5 days. Just let them sit at room temperature for 10–15 minutes before serving to get that perfect soft texture again.
6. Can I freeze these bars?
Yes! Once they’ve fully chilled and been sliced, you can freeze them in a single layer or with parchment paper between layers. Store in an airtight container for up to 2 months. Thaw in the fridge overnight or let them sit at room temp until soft.
7. Can I make these ahead of time for an event?
Absolutely. These bars are a great make-ahead dessert. You can bake and chill them up to 2 days in advance, then slice and store them in the fridge until you’re ready to serve.
Conclusion: Your New Favorite Dessert Bar
If you’ve made it this far, congratulations — you’re officially ready to tackle one of the most addictive dessert bars you’ll ever make. Knock You Naked Bars are messy in the best way, rich without being overwhelming, and always a crowd favorite.
I love how easy they are to put together with just a handful of pantry staples, and how flexible the recipe is if you want to change things up. Whether you stick to the original or add your own spin, one thing’s for sure: they won’t last long once they hit the table.
If you give this recipe a try, I’d love to hear how it turns out! Leave a comment, share your favorite twist on the recipe, or let me know how they went over with your family or guests. And don’t forget — always chill before slicing, and always make extra. Because with bars this good, seconds are a guarantee.
Print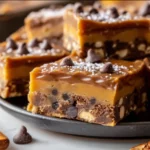
Knock You Naked Bars
- Author: Sophia
Description
Knock You Naked Bars are a decadent dessert layered with gooey caramel, chocolate chips, and a buttery cookie base. They’re soft, chewy, rich, and just the right amount of messy — the kind of sweet treat that disappears fast at potlucks or parties. The name says it all: they’re bold, indulgent, and unforgettable.
Ingredients
1 box German chocolate cake mix
1 cup evaporated milk, divided
½ cup unsalted butter, melted
60 soft caramel candies, unwrapped
1 cup semi-sweet chocolate chips
½ cup chopped pecans (optional)
Powdered sugar for dusting (optional)
Instructions
1 Preheat the oven to 350°F. Grease a 9×13-inch baking pan or line it with parchment paper.
2 In a large mixing bowl, combine the cake mix, ½ cup evaporated milk, and melted butter. Stir until a thick dough forms. Divide the dough in half.
3 Press one half of the dough into the prepared pan in an even layer. Bake for 8 to 10 minutes until just set.
4 While the base bakes, place the caramels and the remaining ½ cup evaporated milk in a saucepan over low heat. Stir constantly until the mixture is smooth and fully melted. Remove from heat.
5 Pour the melted caramel over the baked crust. Sprinkle evenly with chocolate chips and pecans if using.
6 Take the remaining dough and flatten it in pieces with your hands. Gently place the pieces over the caramel layer, covering as much as possible. It doesn’t have to be perfect — the caramel will bubble through the gaps.
7 Return the pan to the oven and bake for another 20 to 25 minutes, or until the top is golden brown.
8 Let the bars cool completely in the pan. Refrigerate for at least 2 hours before slicing to help them set.
9 Once firm, cut into squares and dust with powdered sugar if desired.
Notes
These bars are messy and rich, so chilling before cutting is key to keeping clean slices. You can substitute caramel sauce in a pinch, but the melted candy version gives the best chewy texture. Store leftovers in the fridge, but let them come to room temperature before serving for the best flavor and consistency.