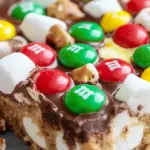
Description
M&M Marshmallow Dream Bars are a deliciously sweet and colorful treat, combining a buttery graham cracker crust with gooey melted marshmallows and crunchy M&Ms. Perfect for parties, holidays, or a fun dessert at home, these bars are easy to make and a surefire hit with both kids and adults. The recipe is highly customizable, allowing you to switch up the toppings or even adjust it for dietary preferences.
Ingredients
- 2 cups graham cracker crumbs
- 1/2 cup unsalted butter, melted
- 1 cup mini marshmallows
- 1/2 cup sweetened condensed milk
- 1 cup M&M’s candies
- 1/2 cup chocolate chips
- 1/2 cup white chocolate chips
- 1/2 cup crushed pretzels
Instructions
Preheat the oven to 350°F (175°C). Line a 9×13-inch baking dish with parchment paper or lightly grease it.
In a medium bowl, combine the graham cracker crumbs and melted butter. Press the mixture evenly into the bottom of the prepared baking dish to form a crust.
Sprinkle the mini marshmallows evenly over the crust, followed by a layer of M&M’s candies, chocolate chips, white chocolate chips, and crushed pretzels.
Drizzle the sweetened condensed milk evenly over the top of the layers.
Bake in the preheated oven for 15-20 minutes or until the edges are lightly golden and the marshmallows are melted and slightly toasted.
Remove from the oven and allow the bars to cool completely in the baking dish.
Once cooled, cut into bars and serve. Enjoy the gooey, chocolatey goodness of these M&M Marshmallow Dream Bars!
Notes
- Crust Firmness:
When preparing the graham cracker crust, be sure to press it down firmly into the baking dish. This ensures the bars hold together well when cutting and serving. You can use the back of a spoon or a flat-bottomed glass to help pack the crumbs tightly. - Marshmallow Melting Tips:
For perfectly melted marshmallows, keep the heat low if using the stovetop. Stir constantly to prevent the marshmallows from burning. In the microwave, use short bursts of 20-30 seconds, stirring between each to avoid overcooking. Overheating can make the marshmallows too firm once they cool. - Even Topping Distribution:
When sprinkling the M&Ms, spread them evenly across the marshmallow layer to ensure each bite is filled with a delicious combination of flavors. You can lightly press them into the melted marshmallows to secure them better during baking. - Customization Ideas:
- Change the color of M&Ms to match a holiday or special event (e.g., red and green for Christmas, pastel for Easter).
- Add extra toppings like chopped nuts, chocolate chips, or a drizzle of melted chocolate for added texture and flavor.
- Cooling for Clean Cuts:
Allow the bars to cool completely before cutting, either at room temperature or in the fridge. Cooling ensures the marshmallows set, making it easier to cut clean squares without the bars sticking to the knife. - Storing and Freezing:
- Store the bars in an airtight container at room temperature for up to 3 days, or refrigerate for up to a week.
- For longer storage, freeze the bars by wrapping them individually in plastic wrap and placing them in a freezer-safe container. Thaw at room temperature before serving.
- Dietary Adjustments:
For a gluten-free version, substitute the graham crackers with a gluten-free alternative. To make the bars dairy-free, use plant-based butter and sweetened condensed coconut milk in place of regular butter and milk.