
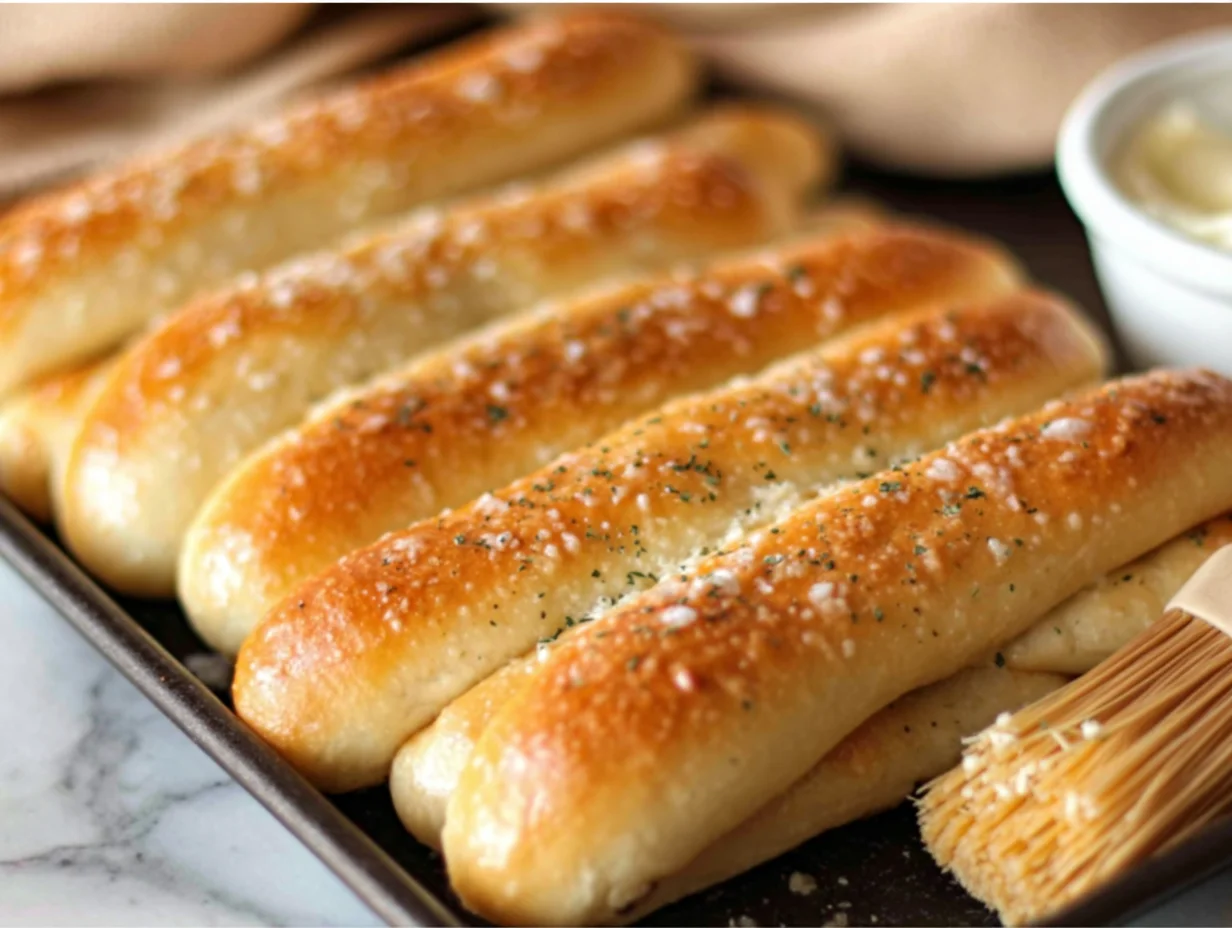
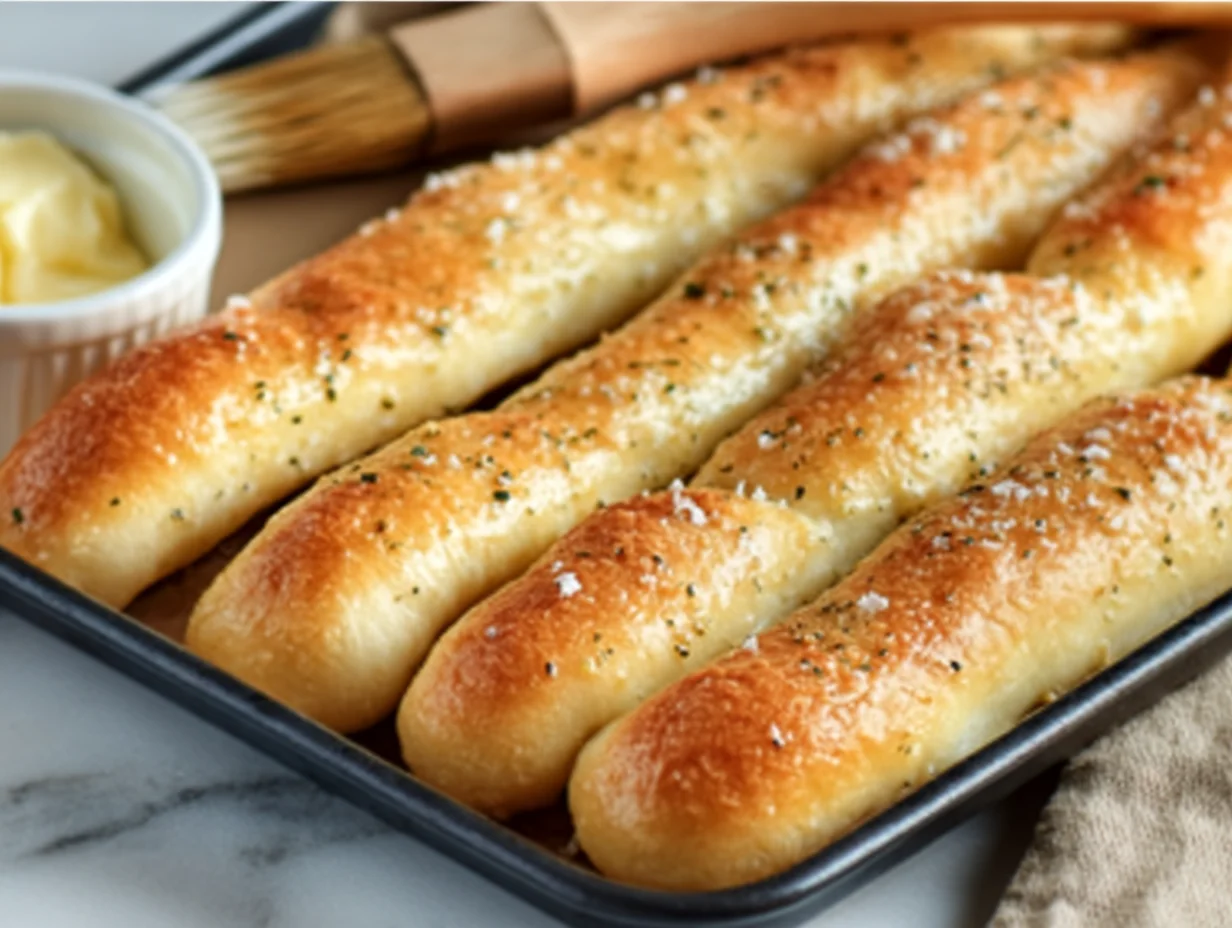
There’s just something about sitting down at Olive Garden, and before your entrée even hits the table, a basket of warm, soft, buttery breadsticks shows up. You know the ones—slightly chewy, fluffy inside, lightly golden on top, and brushed with that savory garlic butter. Well, I’ve got great news: you can make that exact experience happen right at home. These homemade Olive Garden-style breadsticks are every bit as crave-worthy, and honestly? I think they’re even better when fresh out of your own oven.
I still remember the first time I tried to recreate these—my family was doing a cozy pasta night, and I wanted to surprise them with the full Olive Garden experience. Let me tell you, the breadsticks disappeared faster than the spaghetti! Since then, they’ve become a go-to side for every Italian-style dinner we make. Whether you’re serving them with soup, salad, or a big dish of baked ziti, they steal the show every time.
These breadsticks are made with simple pantry staples and require just a bit of patience to let the dough rise and develop that irresistible soft texture. They’re easy enough for beginners, but the results? Restaurant-quality. Let’s get started!

Ingredients You’ll Need
-
1 cup warm water (about 110°F)
-
2 ¼ teaspoons active dry yeast (1 packet)
-
2 tablespoons granulated sugar
-
3 tablespoons unsalted butter, softened
-
1 ¾ teaspoons salt
-
3 cups all-purpose flour (plus more if needed)
-
2 tablespoons unsalted butter, melted (for brushing)
-
½ teaspoon garlic powder
-
½ teaspoon salt (for topping)
STEPS: Making the Dough and First Rise
1. Activate the Yeast
Start by adding the warm water, yeast, and sugar to a large mixing bowl or the bowl of your stand mixer. Let this sit for 5 to 10 minutes, until it’s nice and foamy. This step is key—if your yeast doesn’t foam, it may be expired or the water might have been too hot or too cold.
Tip: Warm water should feel like a relaxing bath—around 110°F. Not too hot or it can kill the yeast.
2. Mix the Dough
Once your yeast is activated, add in the softened butter, salt, and flour. If you’re using a stand mixer with a dough hook, mix everything until it comes together, then let the mixer knead the dough for about 5-6 minutes until it’s smooth and elastic. If kneading by hand, plan for about 8-10 minutes.
The dough should be soft but not sticky. If it’s clinging to your fingers, add a little more flour, one tablespoon at a time.
3. First Rise
Grease a clean bowl (just a light coat of oil or nonstick spray works great) and place your dough inside. Cover with a clean towel and let it rise in a warm place for about 1 hour, or until it has doubled in size.
I like to place mine in the oven with just the oven light on—no heat. It creates a perfectly warm environment for rising.
STEPS: Shaping the Breadsticks
4. Divide and Shape
Once your dough has risen, give it a gentle punch down (yes, that’s a real step—it’s fun too!). Then divide the dough into 12 equal pieces. Roll each piece into a rope about 7 inches long. They don’t have to be perfect, but try to keep them close in size so they bake evenly.
Line a large baking sheet with parchment paper and place your shaped breadsticks a couple inches apart to give them room to rise.
5. Second Rise
Cover the baking sheet with a clean towel and let the breadsticks rise again for 20-30 minutes. This second rise is what makes them fluffy and soft when baked.
If you’ve got a little extra time, let them rise a touch longer—up to 45 minutes—for an even fluffier texture.
Olive Garden-Style Breadsticks: Baking, Brushing, and Boosting the Flavor
Welcome back! Now that we’ve shaped our soft and fluffy dough into breadsticks and let them rise, we’re in the home stretch—and honestly, this is the most rewarding part. The oven does most of the work here, and then it’s all about that warm garlic butter finish that gives these breadsticks their signature flavor.
If you’ve ever found yourself reaching for a second (or third… or fourth) breadstick before your entree even hits the table at Olive Garden, this is where that magic happens. And when it’s coming out of your own oven? It’s even better.
Let’s finish these off and make your kitchen smell like a little slice of heaven.
STEPS: Baking and Brushing
6. Preheat and Bake
Preheat your oven to 400°F (200°C) while your breadsticks finish their second rise. Once the oven is ready and your breadsticks are nice and puffy, pop them in and bake for 12–14 minutes, or until they’re lightly golden on top.
They should be just golden—not too brown. We’re going for soft and chewy here, not crispy or crusty.
7. Mix the Garlic Butter
While the breadsticks are baking, you’ve got time to whip up the good stuff: that buttery garlic topping that gives these breadsticks their irresistible finish.
In a small bowl, combine:
-
2 tablespoons melted unsalted butter
-
½ teaspoon garlic powder
-
½ teaspoon salt
Give it a quick stir and set it aside until the breadsticks come out of the oven.
8. Brush Generously
As soon as you pull the breadsticks from the oven, brush them generously with the garlic butter mixture. Do it while they’re still hot—the butter soaks in better and helps lock in moisture, keeping the breadsticks super soft.
Pro Tip: Don’t be shy with that butter. This is what gives them that authentic restaurant flavor. If you’re a garlic lover, you can even sprinkle on a tiny bit more garlic powder or salt to taste.
Extra Tips for Perfect Breadsticks
Now that you’ve got the core recipe down, here are a few helpful tips and variations to make these breadsticks even more versatile (and maybe even a little addictive):
1. Want Extra Fluffy Breadsticks?
Let them rise a little longer during the second proof—35 to 45 minutes instead of 20–30. This gives them more time to puff up and results in an ultra-light texture.
2. Add a Cheesy Twist
Before baking, sprinkle your shaped dough ropes lightly with grated Parmesan or mozzarella. Bake as usual and brush with garlic butter after baking. It’s a cheesy, flavorful upgrade that’s amazing for dipping.
3. Freeze for Later
These breadsticks freeze beautifully once baked and cooled. Wrap them individually in plastic wrap, then store in a zip-top freezer bag. When ready to enjoy, warm in the oven at 350°F for about 5-7 minutes until heated through.
You can also freeze the unbaked shaped dough. Just thaw, let them rise, then bake as usual.
4. Dipping Sauces to Pair With
These breadsticks aren’t just good on their own—they’re made for dipping! Try them with:
-
Marinara sauce
-
Alfredo sauce
-
Garlic butter
-
Homemade ranch
-
Spinach artichoke dip
Trust me, you’ll want to serve a little something on the side to make the most of every bite.
5. Make Them Whole Wheat
For a slightly heartier option, replace up to 1 cup of the all-purpose flour with whole wheat flour. The texture will be a bit denser but still soft and flavorful.
Homemade Olive Garden Breadsticks: FAQs and Final Thoughts
By now, your kitchen probably smells like a bakery and your breadsticks are disappearing faster than you can count them. Whether this is your first time making homemade bread or you’re a seasoned baker, there’s something special about pulling a tray of golden, buttery breadsticks out of the oven and watching everyone reach for one (or two).
Before we wrap things up, let’s answer a few frequently asked questions that might come up as you prepare and bake these copycat Olive Garden breadsticks. Then we’ll finish with some final thoughts and serving ideas to keep you inspired.
FAQ: Your Breadstick Questions Answered
1. Can I use instant yeast instead of active dry yeast?
Yes! If you’re using instant yeast, you can skip the proofing step (where you wait for it to get foamy). Just mix it directly with the dry ingredients and continue as usual. The rising times should stay the same.
2. What if my dough doesn’t rise?
If your dough isn’t rising, it’s usually because of one of three reasons:
-
The yeast is expired or inactive.
-
The water was too hot and killed the yeast.
-
The room is too cold for the dough to rise.
Try placing the bowl in a slightly warm (but turned-off) oven or near a sunny window to help with proofing.
3. Can I make the dough ahead of time?
Absolutely. You can make the dough and let it rise in the fridge overnight. Just shape the breadsticks the next day and allow them to come to room temperature and rise before baking.
4. How do I store leftovers?
Store leftover breadsticks in an airtight container at room temperature for up to 2 days, or in the fridge for up to 5 days. Reheat in the oven or toaster oven at 350°F for about 5 minutes to restore that fresh-baked feel.
5. Can I double this recipe?
Yes, this recipe doubles beautifully. Just make sure you have a large enough bowl and baking sheets to accommodate the extra dough. You’ll end up with 24 breadsticks—perfect for a crowd.
6. What’s the best way to reheat frozen breadsticks?
If you’ve frozen your breadsticks after baking, reheat them from frozen in a 350°F oven for 8–10 minutes. If you let them thaw first, 5 minutes in the oven should do the trick. A quick brush with a little extra melted garlic butter after reheating really brings them back to life.
7. Can I make them gluten-free?
You can try using a 1:1 gluten-free flour blend, but results may vary depending on the brand. The texture likely won’t be quite as chewy or elastic, but they can still turn out tasty.
Final Thoughts: Why You’ll Keep Coming Back to This Recipe
These homemade Olive Garden-style breadsticks aren’t just a restaurant copycat—they’re a new kitchen staple. They’re simple enough to make on a weeknight, special enough to serve for a holiday meal, and versatile enough to pair with everything from pasta and salad to soup or even a hearty stew.
I’ve made these for family dinners, potlucks, and even brunch (yes, dipped in marinara alongside baked eggs—it totally works), and they never fail to get rave reviews. Plus, they freeze well, reheat easily, and can be customized however you like—add herbs, cheese, or swap in whole wheat flour. Once you’ve got the basic method down, you’ll find yourself making them again and again.
If you give this recipe a try, I’d love to hear how it turned out for you! Did you stick with the classic garlic butter? Try a cheesy topping? Let me know in the comments. And if you’ve got a favorite dipping sauce or twist on the recipe, don’t keep it a secret—share it!
Print
Olive Garden Breadsticks
- Author: Sophia
Description
These homemade Olive Garden-style breadsticks are soft, buttery, and perfectly seasoned, just like the ones served warm at the restaurant. They’re slightly chewy with a tender crumb, brushed with garlic butter and lightly salted for that iconic flavor. Whether served with soup, salad, or pasta, they’re an irresistible addition to any meal.
Ingredients
1 cup warm water (about 110°F)
2 ¼ tsp active dry yeast (1 packet)
2 tbsp granulated sugar
3 tbsp unsalted butter, softened
1 ¾ tsp salt
3 cups all-purpose flour (plus more if needed)
2 tbsp unsalted butter, melted (for brushing)
½ tsp garlic powder
½ tsp salt (for topping)
Instructions
In a large bowl or the bowl of a stand mixer, combine warm water, yeast, and sugar. Let sit for about 5-10 minutes until foamy.
Add the softened butter, salt, and flour. Mix until the dough comes together, then knead for 8-10 minutes by hand or 5-6 minutes in a mixer with a dough hook, until smooth and elastic.
Place the dough in a greased bowl, cover with a clean towel, and let rise in a warm place for about 1 hour or until doubled in size.
Punch down the dough and divide it into 12 equal pieces. Roll each piece into a rope about 7 inches long and place on a parchment-lined baking sheet.
Cover the shaped breadsticks loosely with a towel and let rise again for 20-30 minutes.
Preheat the oven to 400°F (200°C). Bake the breadsticks for 12-14 minutes, or until lightly golden on top.
While the breadsticks are baking, mix the melted butter with garlic powder and salt.
Remove the breadsticks from the oven and immediately brush them generously with the garlic butter mixture.
Serve warm.
Notes
For a fluffier texture, let the shaped breadsticks rise longer before baking. You can double the garlic butter topping for extra flavor, and these also freeze well after baking—just reheat in the oven before serving. They’re especially great for dipping in marinara, Alfredo sauce, or soup.


