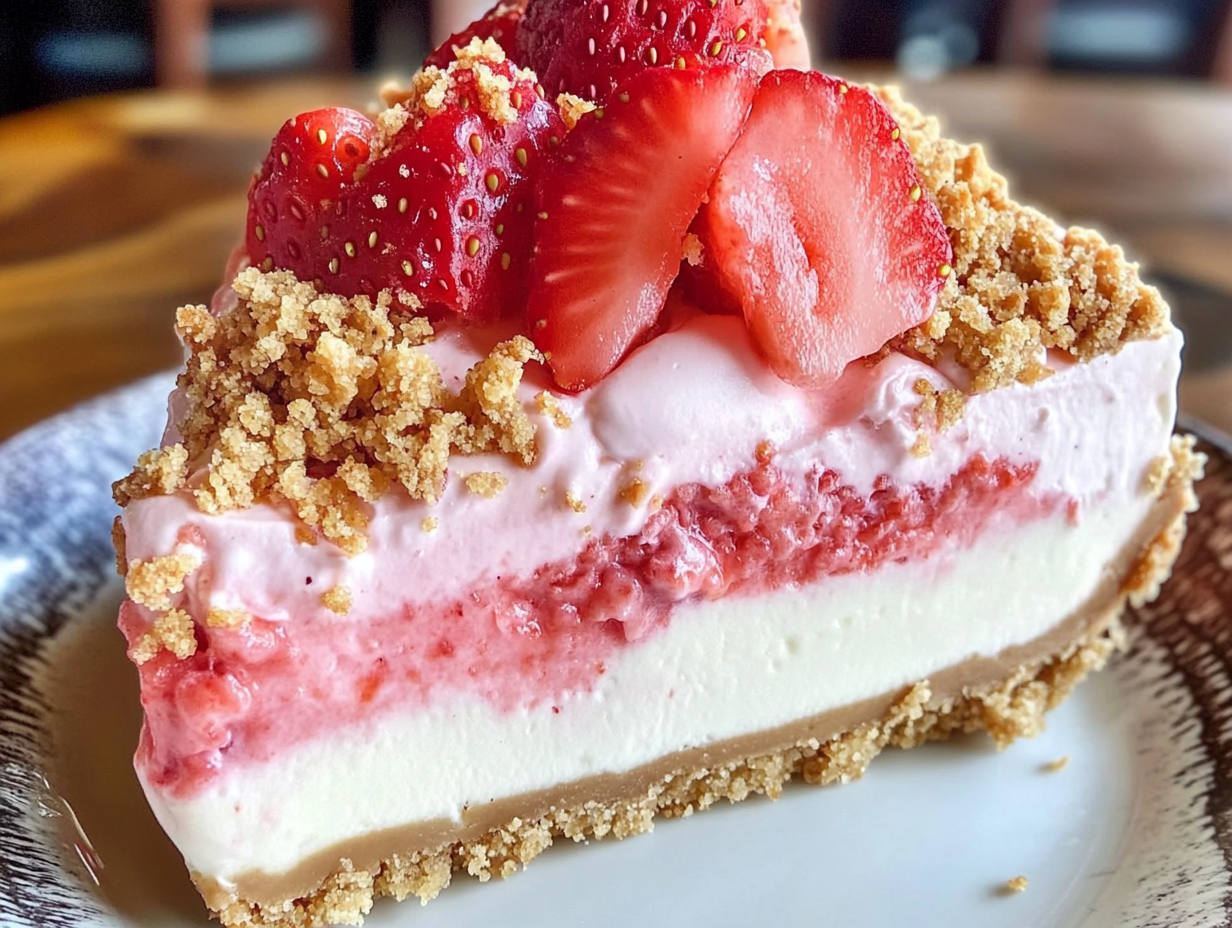
Strawberry Crunch Cheesecake is a decadent, layered dessert that combines the creamy richness of cheesecake with the nostalgic crunch of strawberry-flavored crumbles. This cheesecake has a delightful combination of textures and flavors—smooth and velvety cream cheese filling, a buttery crust, and a crunchy topping that blends sweetness with a hint of tartness from the strawberries.
The dessert draws inspiration from classic strawberry shortcake ice cream bars, which feature a similar crunchy strawberry coating. Its rising popularity in bakeries and home kitchens alike is due to its visually stunning appearance and irresistible taste. It has become a favorite for special occasions like birthdays, holidays, and family gatherings, offering a unique twist on traditional cheesecake recipes.
Whether served at a celebration or enjoyed as a personal indulgence, Strawberry Crunch Cheesecake is sure to satisfy any sweet tooth and leave a lasting impression on dessert lovers.
Key Components of Strawberry Crunch Cheesecake
Strawberry Crunch Cheesecake is made up of several delicious layers that each bring a unique flavor and texture to the final dessert:
- Cheesecake Base: The crust is typically made from crushed graham crackers, golden Oreos, or even shortbread cookies, mixed with melted butter. This forms a firm, buttery foundation that complements the creamy filling.
- Cream Cheese Filling: The heart of the cheesecake is a smooth, rich filling made with cream cheese, sugar, eggs, and vanilla extract. The texture is dense yet creamy, offering a perfect balance between sweetness and tang from the cream cheese.
- Strawberry Crunch Topping: The signature crunch topping is made from crushed golden Oreos or graham crackers combined with freeze-dried strawberries. This gives the cheesecake a beautiful pink color and adds a pleasant, crispy texture that contrasts with the smoothness of the filling.
- Fresh Strawberries and Whipped Cream (Optional): Many people like to finish their cheesecake with fresh strawberries and a dollop of whipped cream, adding extra freshness and an elegant presentation.

Why You Should Try Making Strawberry Crunch Cheesecake at Home
There are plenty of reasons to try your hand at making a Strawberry Crunch Cheesecake at home. One of the biggest advantages is the ability to control every aspect of the dessert, from the ingredients to the presentation. Homemade cheesecakes allow you to choose the quality of the cream cheese, the level of sweetness, and any flavor variations you prefer.
Making this cheesecake from scratch also gives you the opportunity to customize the recipe to fit dietary needs or preferences. For example, you can experiment with gluten-free or low-sugar crust options, or even create a vegan version using plant-based alternatives.
Another reason to make Strawberry Crunch Cheesecake at home is the sense of satisfaction that comes from crafting a beautiful, professional-looking dessert. Despite its fancy appearance, this recipe is surprisingly beginner-friendly. With just a few simple techniques and tools, you can create a show-stopping dessert that impresses friends and family. Plus, the strawberry crunch topping adds a playful and colorful element that makes it fun to assemble and decorate.
Finally, homemade cheesecake is typically more affordable than buying one from a bakery, especially if you’re preparing it for a large gathering. And since you can make the cheesecake ahead of time, it’s a stress-free way to add a stunning dessert to any occasion, whether it’s a birthday, holiday, or simply a weekend treat.
Step-by-Step Guide to Making Strawberry Crunch Cheesecake
Ingredients List
For the Crust:
- 2 cups graham cracker crumbs (or golden Oreos, or gluten-free cookies)
- 1/4 cup sugar
- 1/2 cup melted butter
For the Cheesecake Filling:
- 24 oz cream cheese (softened)
- 1 cup sugar
- 3 large eggs
- 1 tsp vanilla extract
- 1/4 cup sour cream (optional for extra creaminess)
For the Strawberry Crunch Topping:
- 1 cup golden Oreos (or graham crackers)
- 1/2 cup freeze-dried strawberries
- 2 tbsp melted butter
- 2 tbsp sugar
Optional Garnishes:
- Fresh strawberries
- Whipped cream
Substitutions:
- Gluten-free crust: Use gluten-free graham crackers or cookies
- Vegan: Use dairy-free cream cheese and vegan butter, flax eggs as a substitute for eggs
Tools You’ll Need
- Springform pan (9 inches)
- Food processor (for crushing cookies and blending filling)
- Hand or stand mixer (to blend cream cheese filling)
- Mixing bowls
- Measuring cups and spoons
- Spatula
- Baking sheet (for water bath)
- Aluminum foil (to wrap pan for water bath)
Optional Tools:
- Piping bags (for decorative whipped cream)
- Offset spatula (for spreading toppings)
- Pastry scraper (for clean slicing)
Making the Cheesecake Crust
Step-by-Step Process:
- Choose Your Base: You can use graham crackers, golden Oreos, or another cookie of your choice (gluten-free or regular). For a more traditional crust, graham crackers are a great option, but golden Oreos offer a sweeter flavor that complements the strawberry topping.
- Crush the Base: Using a food processor, pulse your chosen base until fine crumbs form. If you don’t have a food processor, you can manually crush the cookies by placing them in a sealed plastic bag and crushing them with a rolling pin.
- Combine with Butter and Sugar: In a mixing bowl, combine the crumbs with melted butter and sugar. Stir until the mixture resembles wet sand and the crumbs stick together when pressed.
- Press into the Pan: Evenly press the crumb mixture into the bottom of a 9-inch springform pan. Use the bottom of a flat glass or measuring cup to press down firmly and ensure an even, compact layer.
- Pre-Bake (Optional): For a crispier crust, you can bake it at 350°F (175°C) for about 10 minutes before adding the filling. This step helps create a more stable crust, but it can also be skipped if you prefer a softer base.
Preparing the Cheesecake Filling
Step-by-Step Guide:
- Soften Cream Cheese: Start by bringing your cream cheese to room temperature. This is key to achieving a smooth, lump-free filling. Use full-fat cream cheese for the best results, as it yields a richer texture.
- Blend Cream Cheese Until Smooth: In a large mixing bowl, use a hand mixer or stand mixer to beat the cream cheese until smooth and creamy. Ensure there are no lumps by scraping down the sides of the bowl frequently.
- Add Sugar and Vanilla: Gradually add in the sugar and vanilla extract while continuing to mix. Blend on medium speed until the sugar is fully incorporated, and the mixture is silky.
- Add Eggs One at a Time: With the mixer on low speed, add the eggs one at a time, mixing well after each addition. This helps prevent overmixing, which can cause cracks during baking. Blend until just combined, being careful not to overmix as this can incorporate too much air, leading to cracks.
- Add Sour Cream (Optional): For a tangier and creamier texture, mix in sour cream at this stage. It’s optional but adds a velvety richness that enhances the cheesecake’s smooth texture.
- Flavor Variations: If you want to add a twist, you can fold in fresh strawberry puree or chopped strawberries to create a more pronounced strawberry flavor. Alternatively, consider experimenting with different extracts, like almond or lemon, to customize the flavor profile.
Tip: To prevent cracks, avoid overbeating once the eggs are added, as this introduces excess air into the batter.
Baking the Cheesecake
Setting Up a Water Bath:
- Wrap the Pan: To prevent water from seeping into the springform pan, wrap the outside of the pan in several layers of aluminum foil. This creates a barrier and protects the crust from getting soggy.
- Prepare the Water Bath: Place the wrapped springform pan into a larger baking sheet or roasting pan. Fill the roasting pan with hot water until it reaches halfway up the sides of the springform pan. The water bath ensures even baking and helps prevent the cheesecake from cracking.
Baking the Cheesecake:
- Bake at the Right Temperature: Preheat the oven to 325°F (163°C). Bake the cheesecake for about 1 hour to 1 hour and 15 minutes. The cheesecake is done when the edges are set, but the center still has a slight jiggle.
- Check for Doneness: The center of the cheesecake should wobble slightly when the pan is shaken. It will continue to set as it cools.
Cooling the Cheesecake:
- Cool Gradually: Turn off the oven and leave the cheesecake inside with the door slightly open for 1 hour. This gradual cooling helps prevent cracks. Then, transfer it to the counter and cool completely before refrigerating for at least 4 hours, or overnight, to set fully.
Preparing the Strawberry Crunch Topping
Making the Strawberry Crunch Topping:
- Crush the Cookies and Strawberries: In a food processor, pulse the golden Oreos (or graham crackers) and freeze-dried strawberries together until they form a coarse crumb. You can control the texture by blending less for a chunkier topping or more for a finer crumble.
- Add Melted Butter and Sugar: Transfer the crumbs to a bowl and mix in melted butter and sugar. The butter helps the crumbs stick together, while the sugar enhances the sweetness. Stir until the mixture is evenly coated and slightly clumpy.
Achieving the Perfect Texture:
- Balance Crunch and Crumble: For the best texture, aim for a topping that’s neither too dry nor too soggy. If the mixture feels too dry, add a little more butter. If it’s too wet, add more crumbs.
Alternative Topping Ideas:
- Strawberry Shortcake Crumbles: For a more classic flavor, you can use a combination of vanilla wafers and freeze-dried strawberries.
- Cereal Topping: Crushed strawberry-flavored cereal, like Cap’n Crunch or Fruity Pebbles, can add an extra playful crunch.
- Cookie-Based Toppings: You can also experiment with different cookies, such as vanilla sandwich cookies or digestive biscuits, for a unique crunch.
Assembling and Decorating the Cheesecake
How to Assemble:
- Add the Topping: Once your cheesecake has chilled completely, gently press the strawberry crunch topping onto the top of the cheesecake. You can cover the entire surface or sprinkle it more sparsely for a lighter effect.
- Optional Garnishes: For added flair, decorate with fresh strawberry slices or a swirl of whipped cream around the edges. A piping bag can help create neat, decorative designs with the whipped cream.
Presentation Tips:
- Cutting Clean Slices: To achieve clean slices, run a sharp knife under hot water and wipe it dry between each cut. This prevents the cheesecake from sticking to the knife and ensures smooth, professional-looking slices.
FAQs Section
FAQ 1: How long does Strawberry Crunch Cheesecake last?
Answer: Strawberry Crunch Cheesecake can last up to 3-5 days in the refrigerator if stored in an airtight container. For longer storage, wrap the cheesecake tightly in plastic wrap or foil and freeze it for up to 1 month. Thaw overnight in the fridge before serving.
FAQ 2: Can I make Strawberry Crunch Cheesecake ahead of time?
Answer: Yes! This cheesecake can be made 1-2 days ahead of time and stored in the refrigerator. It actually benefits from sitting overnight as the flavors intensify, and the texture becomes even more luscious.
FAQ 3: Can I substitute other fruits for the strawberry topping?
Answer: Absolutely! You can use raspberries, blueberries, or a mix of berries for the topping. Freeze-dried raspberries or blueberries work just as well as strawberries in the crumble mixture.
FAQ 4: Do I have to use a water bath for baking the cheesecake?
Answer: While a water bath helps prevent cracks, you can skip it if you prefer. Instead, bake the cheesecake at a lower temperature and place a pan of water on the oven’s lower rack to create steam.
FAQ 5: Can I make this recipe gluten-free or vegan?
Answer: Yes! For a gluten-free version, use gluten-free cookies or graham crackers for the crust. For a vegan version, use dairy-free cream cheese and butter substitutes, and replace the eggs with flax eggs or a similar vegan alternative.
Print
Strawberry Crunch Cheesecake
Description
This no-bake strawberry cream cheese mousse cake combines a buttery graham cracker crust, a creamy cheesecake layer, and a fruity strawberry mousse topping. It’s an easy yet elegant dessert perfect for special occasions or a delightful weekend treat.
Ingredients
For the Crust:
- 2 cups graham cracker crumbs
- ½ cup unsalted butter, melted
For the Cream Cheese Layer:
- 2 cups cream cheese, softened
- 1 cup granulated sugar
- 1 teaspoon vanilla extract
- 2 cups heavy cream, whipped
For the Strawberry Mousse Layer:
- 1 cup strawberry preserves
- ½ cup freeze-dried strawberries, crushed
- ½ cup vanilla wafer crumbs
For the Topping:
- Fresh strawberries, for garnish
Instructions
1️⃣ Make the Crust:
In a medium bowl, combine the graham cracker crumbs with the melted butter, mixing until the crumbs are well-coated. Press the crumb mixture evenly into the bottom of a 9-inch springform pan to form the crust. Place the pan in the refrigerator while you prepare the cream cheese layer.
2️⃣ Prepare the Cream Cheese Layer:
In a large mixing bowl, beat the softened cream cheese, granulated sugar, and vanilla extract together until the mixture is smooth and creamy. Carefully fold in the whipped heavy cream using a spatula until fully combined and fluffy. Spread half of the cream cheese mixture evenly over the chilled crust in the springform pan.
3️⃣ Create the Strawberry Mousse Layer:
Gently spread the strawberry preserves over the cream cheese layer, ensuring an even distribution. Top with the remaining half of the cream cheese mixture, smoothing it out for an even surface. In a small bowl, combine the crushed freeze-dried strawberries with the vanilla wafer crumbs. Sprinkle this mixture over the top of the cheesecake, giving it a light, crunchy texture.
4️⃣ Add the Topping:
Garnish the top of the cake with fresh strawberries. For an extra decorative touch, you can slice some strawberries or leave them whole for a rustic look.
5️⃣ Chill and Serve:
Refrigerate the cheesecake for at least 4 hours, or until fully set, before removing the sides of the springform pan. Slice and serve chilled for the best flavor and texture.
Notes
- Crust Alternatives: If you prefer, you can swap the graham crackers for digestive biscuits or crushed vanilla wafers for a slightly different flavor.
- Storage: This no-bake cake can be stored in the refrigerator for up to 3 days. Cover it tightly with plastic wrap or place it in an airtight container.
- Freezing: You can also freeze this cake for up to 1 month. Thaw it in the refrigerator for a few hours before serving.