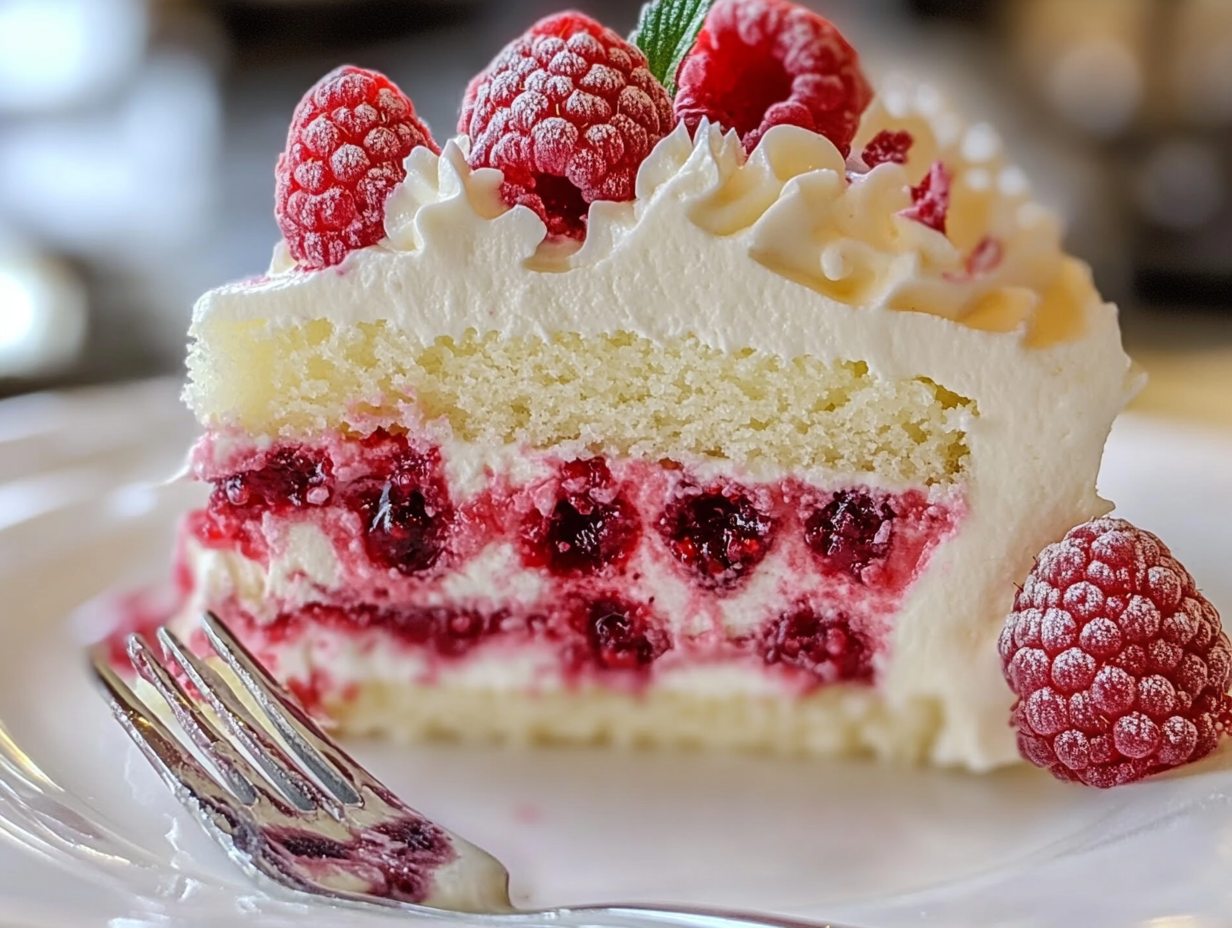
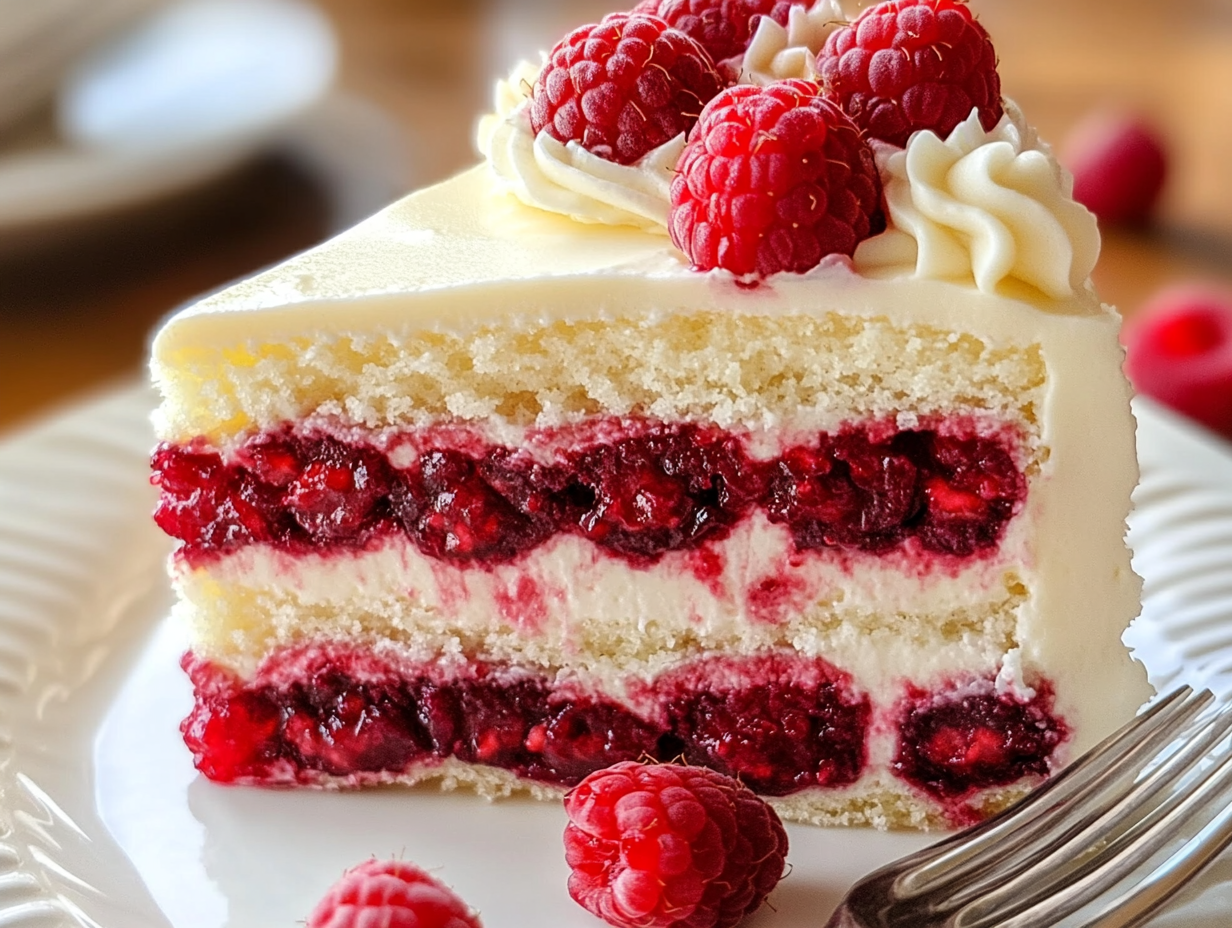
The White Chocolate Raspberry Dream Cake is a decadent treat that beautifully combines the richness of white chocolate with the bright, tangy sweetness of fresh raspberries. This cake is an ideal centerpiece for any celebration, from birthdays and weddings to intimate gatherings. Each bite offers a delightful contrast: the creamy, delicate flavor of white chocolate balanced by the refreshing tartness of raspberries, layered between soft, fluffy cake. The visual appeal of this dessert is undeniable, with layers of soft cake, cream filling, and vibrant raspberries creating a striking presentation. This dream cake is designed not only to please the taste buds but also to impress the eyes and warm the heart, making it the perfect dessert for special occasions.
Why This Cake Stands Out
This cake’s uniqueness lies in its harmonious flavor profile and elegant appearance. The creamy, almost buttery taste of high-quality white chocolate is balanced by the refreshing acidity of ripe raspberries, making each layer pop with flavor. Unlike traditional cakes that rely solely on frosting or flavor extract, this recipe incorporates whole raspberries, adding a natural burst of tartness and color that elevates it above standard cakes. The combination of textures—soft cake, creamy filling, and juicy berries—ensures each slice is a truly luxurious experience, one that’s both memorable and indulgent.
Ingredients Overview
The ingredients for the White Chocolate Raspberry Dream Cake are simple yet impactful. The foundation relies on all-purpose flour, baking powder, and eggs to create a light, fluffy texture. Granulated sugar adds sweetness, while unsalted butter brings richness. Heavy cream whipped into a smooth filling partners perfectly with high-quality white chocolate, which is essential for achieving the cake’s creamy flavor profile. Fresh raspberries add the bright, fruity contrast that makes this cake stand out. These ingredients are easy to find at most grocery stores, making this recipe accessible for home bakers looking to create an unforgettable dessert.
Dry Ingredients
The dry ingredients in the White Chocolate Raspberry Dream Cake are essential for creating the cake’s structure and balancing its flavors. All-purpose flour forms the foundation, providing the essential structure that holds the cake together and ensures a tender crumb. Granulated sugar plays a dual role: it adds the sweetness needed to balance the tartness of raspberries and also contributes to moisture retention, keeping the cake soft and flavorful. Baking powder is a key leavening agent, helping the cake rise to a light and fluffy texture by creating air pockets during baking. Finally, a touch of salt may seem subtle, but it is crucial in balancing the sweetness and enhancing the overall flavor, making each component stand out more distinctly. These dry ingredients work together to create a perfect base that complements the rich white chocolate and vibrant raspberries.
Wet Ingredients
The wet ingredients bring moisture, richness, and depth to the cake. Unsalted butter, softened to blend seamlessly into the batter, adds a luxurious richness, creating a moist, tender crumb that melts in your mouth. Its fat content also helps to carry flavors throughout the cake. Eggs serve as the glue, binding the ingredients together while also contributing to the cake’s airy texture. The proteins in eggs give structure, while their moisture and fat enhance the overall tenderness. Vanilla extract, though used in a small quantity, imparts a warm, aromatic flavor that complements the sweetness and adds depth, elevating the white chocolate and raspberry flavors without overpowering them. Together, these wet ingredients ensure that each bite of cake is soft, flavorful, and satisfying.
Additional Ingredients
The additional ingredients in this recipe bring richness, creaminess, and a fruity contrast that make the White Chocolate Raspberry Dream Cake truly unforgettable. Heavy cream, when whipped, creates a luxurious, silky filling that serves as both a frosting and a layer binder for the cake. It brings an airy lightness while adding a hint of richness that doesn’t overwhelm. White chocolate is the star of this dessert, lending a creamy, subtly sweet flavor that pairs beautifully with the raspberries. Melting and incorporating high-quality white chocolate ensures a smooth texture that enhances the overall creaminess of the filling. Fresh raspberries add a burst of fruity tartness that contrasts the cake’s sweetness, balancing each layer and adding a vibrant pop of color. These ingredients together create a delicate balance of flavors and textures, turning this cake into a beautiful and delicious masterpiece.
Required Equipment
For the White Chocolate Raspberry Dream Cake, a few key pieces of equipment are essential to achieving the best results. First, you’ll need three 9-inch round cake pans, which ensure even baking and help create uniform layers for a beautifully stacked cake. Mixing bowls are necessary for combining the wet and dry ingredients separately, allowing for smooth, well-incorporated batter. An electric mixer, whether handheld or stand-alone, is important for achieving a smooth, lump-free batter and for whipping the cream to perfect peaks. Finally, a double boiler or microwave is essential for gently melting the white chocolate without burning, preserving its creamy texture and flavor. Each tool contributes to the ease and success of preparing this delightful cake.
Step 1: Prepare Cake Pans and Preheat Oven
Start by preparing your cake pans for a smooth, easy release after baking. Grease each of the three 9-inch round cake pans thoroughly with a thin layer of butter or cooking spray, covering both the bottom and sides to prevent the cakes from sticking. After greasing, sprinkle a light layer of flour into each pan and tilt to coat evenly, tapping out any excess flour. This step creates a protective barrier that helps the cakes release easily after baking. Preheating the oven to 350°F (175°C) is essential to ensure even baking, as placing the batter in an oven that’s too cool or hot can affect the cake’s rise and texture. A properly preheated oven provides a consistent environment that promotes even cooking from the start. Taking these steps prepares your pans and oven for a smooth baking process and beautifully layered cake.
Step 2: Combine Dry Ingredients
In a large mixing bowl, combine the dry ingredients to achieve a consistent base for your cake batter. Start by measuring out the flour, granulated sugar, baking powder, and salt, and add them to the bowl. Use a whisk or a sifter to mix the ingredients thoroughly, breaking up any clumps and ensuring they are evenly distributed. This step is important for preventing pockets of baking powder or sugar in the batter, which could lead to uneven baking or flavor distribution. Whisking also introduces a little air into the dry ingredients, which can contribute to the cake’s lightness. For best results, ensure that all ingredients are fully incorporated with a uniform consistency and no visible lumps. This prepared dry mixture is now ready to be combined with the wet ingredients for a smooth batter.
Step 3: Mix in Wet Ingredients
Now it’s time to bring the batter together by adding the wet ingredients to the dry mixture. Begin by adding the softened unsalted butter to the bowl of dry ingredients. Using an electric mixer on medium speed, beat the butter into the flour mixture until it resembles coarse crumbs. This step is essential for achieving a tender crumb, as the butter coats the flour particles, helping to trap air and moisture. Next, add the eggs one at a time, continuing to beat on medium speed after each addition. Adding the eggs gradually allows them to fully incorporate and adds structure to the batter. Finally, pour in the vanilla extract, which will enhance the cake’s aroma and flavor.
Continue beating the mixture on medium speed until it is smooth and creamy. If you notice any lumps, increase the mixer speed briefly to ensure everything is well blended. Scrape down the sides of the bowl as needed to incorporate all ingredients evenly. The result should be a thick, creamy batter with a smooth consistency, free of lumps and air pockets. This thorough mixing is key to a well-risen, tender cake.
Step 4: Divide and Bake
With your batter prepared, carefully divide it among the three greased and floured cake pans. An easy way to ensure even layers is to use a measuring cup to scoop equal amounts of batter into each pan. Spread the batter evenly to the edges of each pan using a spatula, creating a smooth, level surface for even baking.
Place the pans in the preheated oven, spacing them apart to allow for good air circulation. Bake for 25-30 minutes, but start checking for doneness at the 25-minute mark. Insert a toothpick into the center of each cake layer; if it comes out clean or with just a few crumbs, the cakes are done. If the toothpick is still wet, bake for another 2-3 minutes and check again. Avoid overbaking, as this can dry out the cakes.
Once baked, let the cakes cool in the pans for about 10 minutes to settle, then run a knife around the edges to loosen them. Carefully invert each layer onto a wire rack to cool completely. Allowing the cakes to cool fully before assembling is essential to prevent the cream filling from melting, ensuring a stable and beautiful layered cake.
Step 5: Prepare White Chocolate Cream Filling
To create the rich, creamy filling, start by melting the white chocolate. Place the chopped white chocolate in a heatproof bowl and melt it gently using a double boiler. To do this, place the bowl over a pot of simmering water, making sure the bowl doesn’t touch the water directly. Stir the chocolate until it is smooth and fully melted. Alternatively, you can use a microwave: heat the chocolate in 15-second intervals, stirring between each, until smooth. Allow the melted chocolate to cool slightly to prevent it from melting the whipped cream later.
In a separate, chilled mixing bowl, pour the heavy cream and whip it with an electric mixer on medium-high speed until soft peaks form. You want a light, airy texture that will give the filling its volume. Once the cream is whipped, gently fold in the melted white chocolate. Use a spatula and fold in small amounts at a time, using a sweeping motion to avoid deflating the whipped cream. Continue folding until the mixture is smooth and fully combined, with no streaks of chocolate or cream. This delicate folding method ensures a fluffy, stable filling that will hold between the cake layers.
Step 6: Assemble the Cake Layers with Raspberry Filling
Once the cake layers are completely cool, you’re ready to assemble. Place one layer on a serving plate or cake stand. Begin by spreading a generous portion of the white chocolate cream filling on top of the cake layer, smoothing it out to the edges with a spatula. For an even spread, start in the center and work outward. After adding the cream, sprinkle a layer of raspberries over it. You can use whole or lightly mashed raspberries, depending on your preference. Lightly press them into the cream to help them adhere.
Add the second cake layer on top of the raspberries and repeat the process: spread another layer of white chocolate cream, followed by another layer of raspberries. Finally, place the third cake layer on top, pressing down gently to secure the stack. This layered approach not only looks beautiful but also ensures every slice has a perfect balance of cake, cream, and fruit. To avoid slipping layers, check that each layer is stable and aligned as you assemble. This way, the cake will hold its shape and make for clean, impressive slices when served.
Step 7: Frost the Cake
With the layers stacked, use the remaining white chocolate cream to frost the top and sides of the cake. Begin by adding a generous dollop of cream on top, smoothing it out with an offset spatula and working your way down the sides. For a smooth finish, hold the spatula at a slight angle and use long, even strokes, rotating the cake stand as needed to keep the frosting even. Add more cream as necessary, filling any gaps and ensuring a consistent layer.
If you prefer a rustic look, you can leave slight swirls in the frosting, or, for a cleaner finish, use a bench scraper or straight-edged tool to smooth out the cream completely. The white chocolate cream gives a beautiful, subtle sheen, enhancing the cake’s elegance. Once frosted, you can briefly chill the cake to set the cream before decorating with fresh raspberries or serving.
Step 8: Decorate and Serve
To complete the White Chocolate Raspberry Dream Cake, garnish it with a final touch of fresh raspberries. Arrange the raspberries evenly around the top edge of the cake for a classic look, or cluster them in the center for a more dramatic presentation. You can also sprinkle a few raspberries around the base for an added pop of color. For the best presentation, consider chilling the cake for 15-30 minutes to set the frosting. This brief chilling helps firm up the cream, making the cake easier to slice cleanly and ensuring each layer remains beautifully intact when served.
Pro Tips for Success
For perfect layering, make sure each cake layer is completely cool before assembling; this prevents the cream filling from melting and keeps the layers stable. Use a leveler or a serrated knife to trim any domed tops from the cakes, ensuring a flat, even surface for stacking. When frosting, start with a thin “crumb coat” layer, chill briefly, then apply a final layer of cream for a smooth, polished finish.
For ingredient flexibility, try substituting raspberries with other berries like strawberries or blueberries for a different flavor profile. You can also experiment with flavored extracts: almond or orange extract adds a subtle twist to the cake or cream filling.
To keep the cake fresh, cover it loosely with plastic wrap and store it in the refrigerator for up to 3 days. If you have leftovers, slice and wrap individual pieces, then freeze them for longer storage, up to 1 month.
Frequently Asked Questions (FAQs)
Can I use frozen raspberries instead of fresh?
Yes, frozen raspberries can be used if fresh ones are unavailable. Thaw and drain them well before layering to prevent excess moisture from seeping into the cake, which could make the layers soggy.
How can I make the cake less sweet?
To reduce sweetness, you can cut back on the sugar by up to 1/4 cup without compromising texture. Alternatively, use a higher percentage white chocolate with less sugar for the cream filling, or reduce the amount of white chocolate used in the filling.
Is there an alternative to heavy cream for the filling?
If you’d like a lighter filling, consider using mascarpone cheese whipped with a small amount of milk or a whipped topping alternative. Greek yogurt can also be folded into whipped cream for a tangier, lower-fat option.
How long will this cake stay fresh?
This cake can be kept in the refrigerator for up to 3 days. Be sure to cover it with plastic wrap or store it in an airtight container to keep it moist and protect it from absorbing other odors in the fridge.
Can I make this cake gluten-free?
Yes, substitute the all-purpose flour with a high-quality gluten-free baking flour that has xanthan gum added. This will help maintain the cake’s structure and texture.
What other fruits pair well with white chocolate?
Strawberries, blueberries, blackberries, or even peaches pair beautifully with white chocolate, adding a sweet and slightly tart contrast.
Can I prepare the cake layers in advance?
Absolutely! You can bake the cake layers a day or two ahead, wrap them tightly in plastic wrap, and refrigerate or freeze them. Assemble and frost the cake on the day you plan to serve for best results.
Conclusion
The White Chocolate Raspberry Dream Cake is a dessert that captures the perfect harmony of flavors and textures. With its layers of soft, buttery cake, smooth white chocolate cream, and bursts of fresh raspberries, this cake offers a rich, indulgent experience with every bite. Its elegant appearance and balanced taste make it an ideal choice for special occasions, from birthdays and anniversaries to festive gatherings. The blend of creamy white chocolate with the tart brightness of raspberries brings a unique sophistication that will impress both friends and family.
This recipe is a rewarding project for any home baker, combining simple ingredients with an impressive, show-stopping result. If you’re looking for a memorable dessert that’s both beautiful and delicious, the White Chocolate Raspberry Dream Cake is a must-try. We encourage you to bake this cake and share it with loved ones, creating unforgettable moments over a truly delightful dessert.
Print
White Chocolate Raspberry Dream Cake
- Author: Munil
Description
This elegant and decadent White Chocolate Raspberry Dream Cake combines fluffy layers of vanilla cake, creamy white chocolate, and fresh raspberries. It’s an eye-catching dessert for special gatherings and celebrations, with a perfect balance of sweetness and tartness from the raspberries.
Ingredients
- Dry Ingredients:
- 2 ½ cups all-purpose flour
- 2 cups granulated sugar
- 1 tablespoon baking powder
- ½ teaspoon salt
- Wet Ingredients:
- 1 cup unsalted butter, softened
- 4 large eggs
- 1 tablespoon vanilla extract
- Additional Ingredients:
- 1 cup heavy cream
- 8 oz high-quality white chocolate, chopped
- 2 cups fresh raspberries
Instructions
1️⃣ Prepare Cake Pans and Preheat Oven:
Preheat your oven to 350°F (175°C). Grease and flour three 9-inch cake pans to prevent sticking.
2️⃣ Combine Dry Ingredients:
In a large bowl, whisk together the flour, sugar, baking powder, and salt until well mixed.
3️⃣ Mix in Wet Ingredients:
Add the softened butter, eggs, and vanilla extract to the dry ingredients. Using an electric mixer on medium speed, beat the mixture until it becomes smooth, creamy, and well combined.
4️⃣ Divide and Bake:
Divide the batter evenly among the three prepared cake pans. Bake for 25-30 minutes, or until a toothpick inserted into the center of each cake comes out clean. Allow the cakes to cool in the pans for about 10 minutes, then transfer them to wire racks to cool completely.
5️⃣ Prepare White Chocolate Cream Filling:
While the cakes are cooling, melt the white chocolate in a double boiler or microwave, stirring until smooth. Let it cool slightly. In a separate bowl, whip the heavy cream until soft peaks form, then gently fold in the melted white chocolate until well combined and smooth.
6️⃣ Assemble the Cake Layers with Raspberry Filling:
Once the cakes are completely cool, place one cake layer on a serving plate. Spread a portion of the white chocolate cream on top, then sprinkle a layer of mashed or whole raspberries. Repeat with the remaining layers, creating a beautiful raspberry-filled stack.
7️⃣ Frost the Cake:
Use the remaining white chocolate cream to frost the top and sides of the cake. Smooth out the frosting for a clean finish.
8️⃣ Decorate and Serve:
Garnish the cake with the remaining fresh raspberries on top. Chill the cake briefly to set the frosting, if desired, and serve!
Notes
- White Chocolate: Use high-quality white chocolate for the best flavor. Avoid white chocolate chips, as they may contain stabilizers that can impact the texture when melted.
- Raspberry Filling: For added raspberry flavor, lightly mash some raspberries with a fork before spreading between the layers.
- Storage: This cake can be stored in an airtight container in the refrigerator for up to 3 days.


