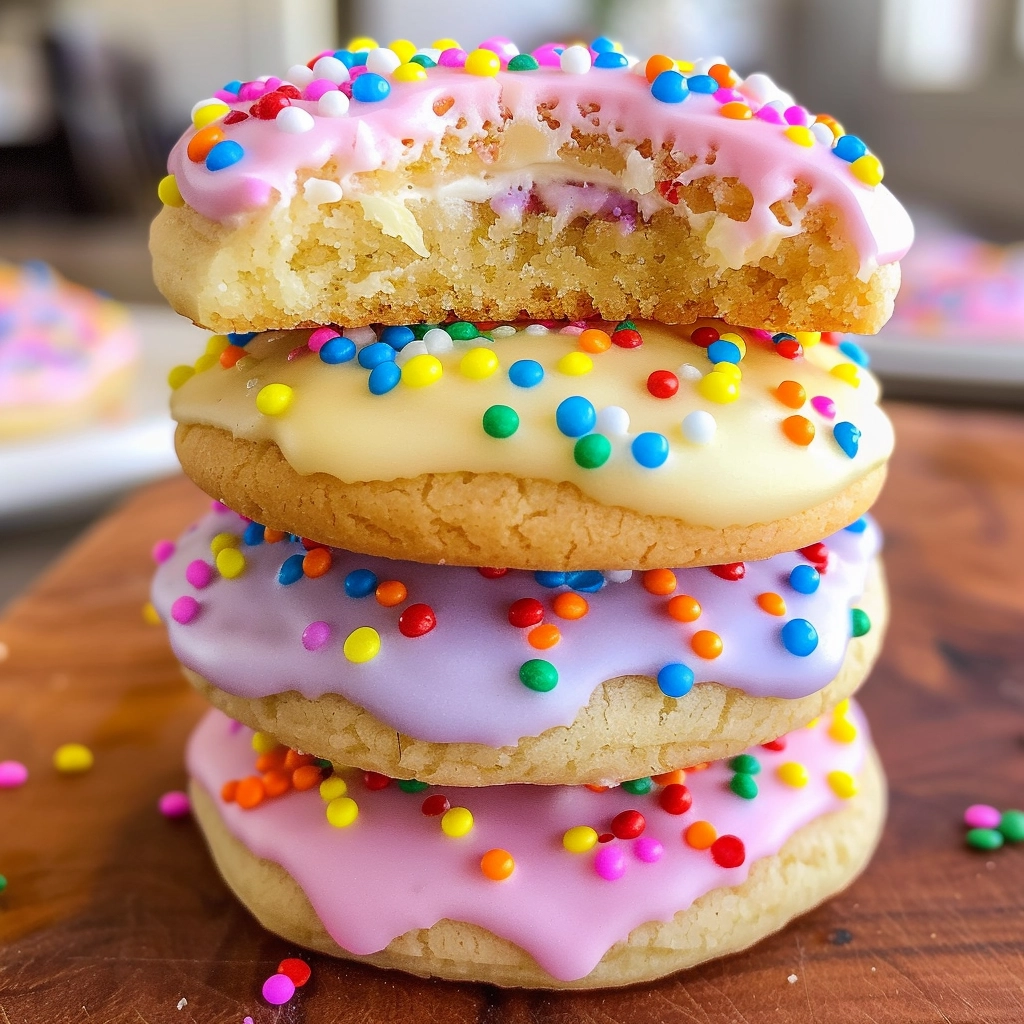
Buttery Italian Easter Cookies are a traditional delight that heralds the arrival of spring and the Easter season in Italy. These cookies, known for their light, airy texture and sweet, buttery flavor, have been a staple of Italian Easter celebrations for generations. The cookies are not just a treat; they’re a symbol of renewal and joy, embodying the essence of the holiday spirit.
The Tradition Behind the Cookies
In Italy, Easter is a time of joyous celebration, marked by various customs and traditions that have been passed down through the ages. Among these, food plays a significant role, with each region boasting its own unique Easter specialties. The Buttery Italian Easter Cookies are a common thread, enjoyed across the country, each family adding a personal touch to the basic recipe.
- Historical Significance: The tradition of baking these cookies dates back to ancient times, serving as a symbol of prosperity and good fortune. The use of eggs, a central ingredient, represents new life and rebirth, themes closely associated with Easter.
- Regional Variations: While the basic ingredients remain largely the same, regional variations exist, with some areas incorporating citrus zest, anise flavor, or almond extract to add a unique twist to the classic recipe.
Ingredients and Preparation
The simplicity of the ingredients and the preparation process is what makes these cookies a beloved treat. The recipe calls for everyday ingredients, including unsalted butter, granulated sugar, eggs, vanilla extract, all-purpose flour, baking powder, salt, and milk. The icing, a simple mix of powdered sugar, milk, and vanilla extract, adds a sweet finishing touch, while sprinkles add color and festivity.
- The Role of Butter: The use of unsalted butter is crucial, lending the cookies their characteristic richness and tender crumb. It’s important to cream the butter and sugar thoroughly to achieve the light texture.
- Eggs and Vanilla Extract: Eggs bind the ingredients together and contribute to the cookies’ lightness, while vanilla extract adds a subtle flavor depth.
Making these cookies is a labor of love, often involving family members in the process, turning baking into an opportunity for bonding and creating memories. The dough is shaped into balls or traditional Easter shapes, then baked until just golden. Once cooled, the cookies are dipped in icing and decorated with colorful sprinkles, ready to be shared and enjoyed.
Celebrating with Buttery Italian Easter Cookies
These cookies are more than just a sweet treat; they’re a means of bringing people together, sharing in the joy of the season. Whether enjoyed after Easter Sunday Mass or given as gifts to friends and family, they’re a testament to the enduring power of tradition and the simple pleasures of homemade baking.
- A Symbol of Sharing and Community: Sharing these cookies symbolizes love, friendship, and community spirit, essential values during Easter celebrations.
- A Versatile Treat: Beyond Easter, these cookies can be adapted for other occasions, proving their versatility and enduring appeal.
In conclusion, Buttery Italian Easter Cookies are a cherished tradition that encapsulates the spirit of Easter in Italy. Through their simple ingredients and the love poured into making them, they continue to be a symbol of renewal, joy, and community across generations. As we explore the nuances of this delightful recipe, we’re reminded of the power of culinary traditions to unite and celebrate life’s special moments.
Crafting the Perfect Buttery Italian Easter Cookies :
Step-by-Step Baking Guide
Creating these Buttery Italian Easter Cookies is a journey that involves simple steps, each adding its own touch to the final delight. Here’s a detailed guide to help you through the process, ensuring your cookies are as authentic and delicious as possible.
- Creaming Butter and Sugar: Start by combining the unsalted butter and granulated sugar in a large mixing bowl. Using an electric mixer, beat them together until the mixture is light and fluffy. This process incorporates air into the butter, setting the foundation for a light, airy cookie.
- Incorporating Eggs and Vanilla: Add the eggs one at a time, beating well after each addition. This ensures each egg is fully integrated into the mixture, contributing to the richness and structure of the dough. Stir in the vanilla extract for that subtle depth of flavor that complements the sweetness.
- Mixing Dry Ingredients: In a separate bowl, whisk together the all-purpose flour, baking powder, and salt. This not only combines these ingredients thoroughly but also helps to aerate the flour, contributing to a lighter cookie texture.
- Combining Wet and Dry Ingredients: Gradually add the dry ingredients to the creamed mixture, alternating with milk. Start and end with the flour mixture. This method helps maintain a smooth, manageable dough, preventing the dough from becoming too stiff or too wet.
- Shaping the Cookies: Once the dough is ready, scoop tablespoonfuls and roll them into balls. Place these on a parchment-lined baking sheet, slightly flattening each ball with the bottom of a glass. This ensures uniform thickness and even baking.
- Baking to Perfection: Bake the cookies in a preheated oven at 350°F (175°C) for 8-10 minutes, or until they just begin to turn golden around the edges. It’s crucial not to overbake them to preserve their tender, moist texture.
- Cooling and Icing: Allow the cookies to cool on the baking sheets for a few minutes before transferring them to wire racks to cool completely. For the icing, whisk together powdered sugar, milk, and vanilla extract until smooth. Dip the top of each cookie into the icing, then sprinkle with colorful decorations for that festive touch.
Tips for Success
- Room Temperature Ingredients: Ensure your butter and eggs are at room temperature before starting. This facilitates easier mixing and a smoother dough.
- Consistent Cookie Size: Use a cookie scoop or measuring spoon for uniform cookie sizes, ensuring even baking and a cohesive presentation.
- Customizing Your Cookies: Feel free to add lemon zest or almond extract to the dough for a personalized flavor twist. The beauty of this recipe lies in its versatility.
Serving and Storage
- Serving Suggestions: These cookies are best enjoyed fresh but can be served at room temperature. They’re perfect for Easter gatherings, as gifts, or simply as a delightful treat with tea or coffee.
- Storage Tips: Store the cookies in an airtight container at room temperature for up to a week. For longer storage, they can be frozen without the icing for up to 3 months.
In crafting these Buttery Italian Easter Cookies, you’re not just baking; you’re participating in a tradition that brings joy and sweetness to the Easter season. Each step, from creaming butter and sugar to adding the final decorative sprinkles, is a testament to the love and care that goes into holiday baking. Enjoy the process, and may these cookies add a touch of Italian festivity to your Easter celebrations.
FAQs on Buttery Italian Easter Cookies :
How Long Do These Cookies Last?
Buttery Italian Easter Cookies, when stored properly, can last and maintain their freshness. At room temperature, they can be kept in an airtight container for up to a week. This ensures they remain moist and delicious. It’s important to wait for the icing to set completely before storing them to prevent the cookies from sticking together. If you’re planning to keep them for a longer period, consider freezing them for extended freshness.
Can I Freeze Buttery Italian Easter Cookies?
Yes, you can freeze these cookies, and they freeze quite well. For best results, freeze the cookies without the icing. Place them in a single layer on a baking sheet to freeze individually, and then transfer them to a freezer-safe bag or container. They can be frozen for up to 3 months. When you’re ready to enjoy them, let them thaw at room temperature and then add the icing and sprinkles. This method helps preserve the texture and taste, ensuring they’re just as delightful as when they were first baked.
Are There Any Gluten-Free Versions of This Recipe?
Absolutely! To make a gluten-free version of Buttery Italian Easter Cookies, simply substitute the all-purpose flour with a gluten-free flour blend. Look for a blend that’s designed to be a 1:1 replacement for regular flour. Additionally, ensure that the baking powder and any other added ingredients are certified gluten-free. Gluten-free flour blends vary in composition, so you might need to adjust the liquid ingredients slightly to achieve the desired dough consistency. With these adjustments, you can enjoy these traditional Easter treats even with dietary restrictions.
Print
Buttery Italian Easter Cookies
- Author: Easy Recipes
- Total Time: 30 minutes
Description
Buttery Italian Easter Cookies are a delightful, traditional treat that brings a touch of Italian sweetness to the Easter celebrations. These cookies are characterized by their light, tender texture and a sweet, buttery flavor that melts in your mouth. Dipped in a simple, yet elegant vanilla icing and adorned with colorful sprinkles, they are as much a feast for the eyes as they are for the palate. Perfect for gatherings, these cookies embody the spirit of Easter with their festive appearance and the joy they bring to both adults and children alike. Whether you’re continuing a family tradition or starting a new one, these cookies are sure to add a special touch to your holiday.
Ingredients
1/2 cup unsalted butter, softened
3/4 cup granulated sugar
3 large eggs
2 teaspoons vanilla extract
3 1/2 cups all-purpose flour
1 tablespoon baking powder
1/2 teaspoon salt
1/4 cup milk
For the icing:
2 cups powdered sugar
3 tablespoons milk
1/2 teaspoon vanilla extract
Sprinkles for decoration
Instructions
- Preheat oven to 350°F (175°C).
- In a large bowl, cream together butter and sugar until light and fluffy. Add eggs one at a time, beating well after each addition. Stir in vanilla extract.
- In another bowl, whisk together flour, baking powder, and salt. Gradually add to the creamed mixture alternately with milk, beginning and ending with flour mixture.
- Scoop tablespoonfuls of dough and roll into balls. Place on parchment-lined baking sheets and slightly flatten with the bottom of a glass.
- Bake for 8-10 minutes or until cookies are just starting to turn golden at the edges. Remove from oven and let cool on baking sheets for 5 minutes, then transfer to wire racks to cool completely.
- For the icing, in a small bowl, mix together powdered sugar, milk, and vanilla extract until smooth. Dip the top of each cookie into the icing, then return to the wire rack and immediately top with sprinkles. Allow icing to set before serving.
Notes
- Ingredient Temperatures: For the best results, ensure that the butter and eggs are at room temperature before you begin. This will help the ingredients to mix more thoroughly and evenly, resulting in a smoother dough.
- Customization: The recipe is quite versatile. Feel free to add lemon zest, almond extract, or even a dash of anise for a personalized flavor twist. The icing can also be flavored or colored as desired to match any theme or preference.
- Decoration: While traditional sprinkles are colorful and festive, you can also use themed or custom decorations to match the occasion. Easter-themed sprinkles, sugar pearls, or even edible glitter can make these cookies stand out.
- Storage: If you plan to store the cookies, whether at room temperature or in the freezer, ensure they are in a single layer in an airtight container to prevent them from sticking together or becoming soggy.
- Gluten-Free Adaptation: For those with gluten sensitivities, substituting all-purpose flour with a gluten-free flour blend can make these cookies just as enjoyable without the gluten. Remember to adjust the liquid ingredients if necessary, as gluten-free flours can absorb moisture differently.
- Making Ahead: These cookies are a great make-ahead option for busy holiday preparations. You can prepare the dough in advance and freeze it, or bake the cookies and freeze them without the icing. Simply thaw and decorate when ready to serve.
- Enjoying the Process: Baking these cookies can be a wonderful family activity. Involve children in rolling the dough, cutting out shapes, or decorating with icing and sprinkles. It’s a delightful way to create memories while also creating delicious treats.
- Prep Time: 20 minutes
- Cook Time: 10 minutes
Nutrition
- Serving Size: Makes about 36 cookies
- Calories: 150 kcal per cookie