
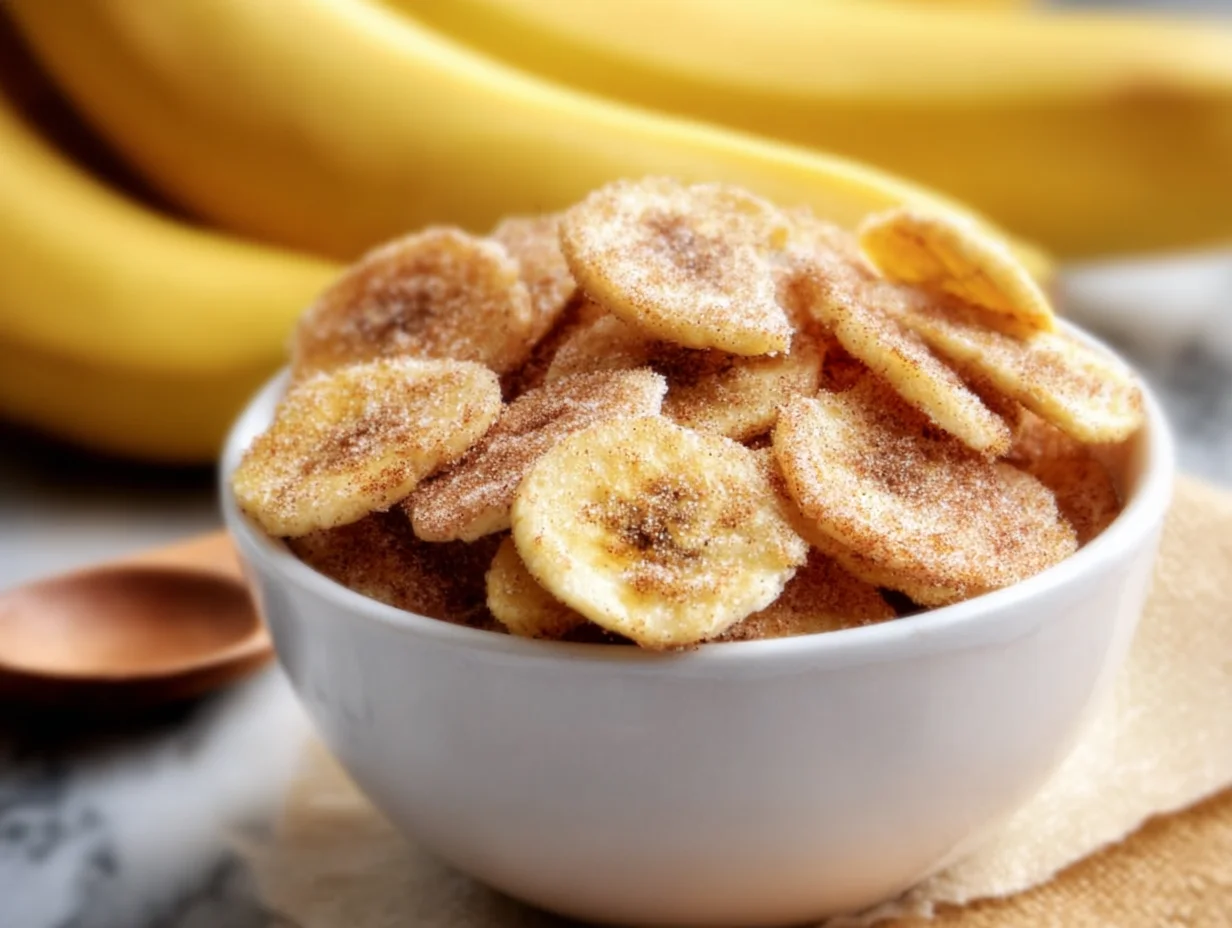
There are some recipes that sneak up on you with how good they are. You try them once, thinking it’ll just be a fun little experiment, and then suddenly you’re making them every single week because everyone in the house can’t get enough. That’s exactly what happened when I made these Crispy Cinnamon Sugar Banana Chips for the first time.
They’re everything you want in a snack—light, crunchy, sweet without being overpowering, and just a little bit warm and cozy thanks to the cinnamon. They’re the kind of snack that feels indulgent but is actually pretty wholesome, which makes them a win-win for both kids and adults.
I originally started making these banana chips when I was on the hunt for healthier lunchbox ideas. Granola bars and store-bought chips are fine, but I wanted something homemade that wasn’t loaded with preservatives or excess sugar. The first batch came out of the oven golden, crispy, and smelling like cinnamon rolls. Needless to say, I was hooked.
And the best part? They’re surprisingly easy to make. With just a few bananas, a sprinkle of cinnamon sugar, and a little patience while they bake low and slow, you’ve got a snack that rivals anything you’d find at the store.
So, whether you’re looking for a crunchy topping for yogurt, a school snack for the kids, or just something to munch on during movie night, these banana chips are about to become your new go-to.
Ingredients You’ll Need
Before we dive into the step-by-step process, let’s go over what you’ll need to make these chips. The ingredient list is short and sweet, which means there’s no reason not to try them today.
-
2 to 3 ripe but firm bananas – This part is important. If your bananas are too soft, they’ll turn mushy in the oven.
-
1 tablespoon lemon juice – Helps keep the bananas from browning too much.
-
1 tablespoon granulated sugar – Just enough sweetness to caramelize while baking.
-
1/2 teaspoon ground cinnamon – The warm spice that ties it all together.
-
Nonstick cooking spray or parchment paper – For easy cleanup and to keep the slices from sticking.
Steps: Let’s Get Baking
Step 1: Preheat the Oven and Prep the Pan
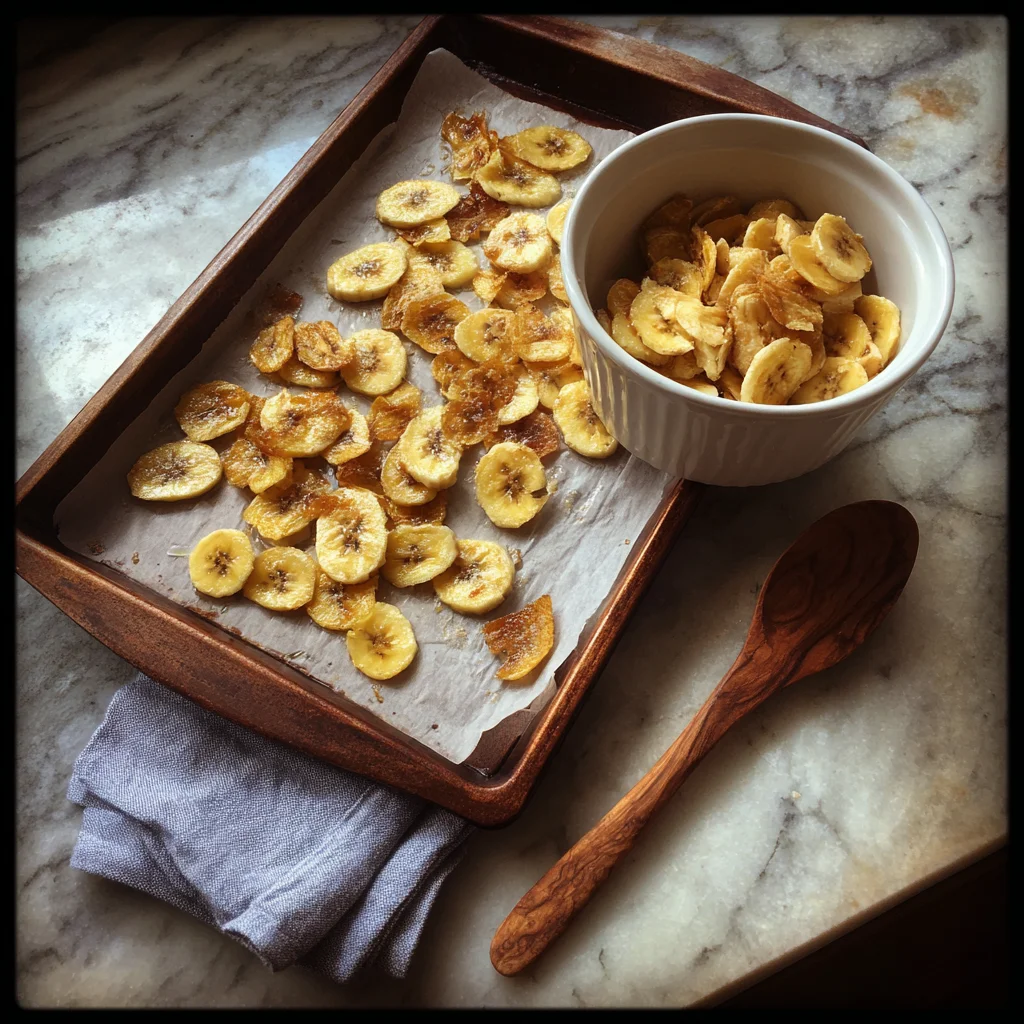
Start by preheating your oven to 225°F. This low temperature is key—it allows the banana slices to dry out and crisp up slowly without burning. Line a large baking sheet with parchment paper or lightly spray it with nonstick cooking spray.

Step 2: Slice the Bananas
Peel your bananas and slice them into thin, even rounds—about 1/8 inch thick. The thinner your slices, the crispier your chips will turn out. If you’ve got a mandoline slicer, this is the perfect time to pull it out. It makes the job quick and ensures all your slices are the same thickness, which means more even baking.
Step 3: Lemon Dip for Freshness
Pour your lemon juice into a small bowl. Lightly dip each banana slice in the juice before placing it on the prepared baking sheet. This step isn’t just for looks—the lemon helps the chips maintain their color and not turn brown while baking.

A Quick Note Before We Continue
At this stage, you’ll already see your baking sheet filling up with neat little rounds of banana. And honestly, if you sneak a bite of a fresh slice with a little lemon on it, I won’t blame you. But trust me when I say, once they’re baked, the flavor and crunch will be on another level.
In the next part, we’ll sprinkle on the magic (that’s the cinnamon sugar!) and walk through the baking process so your banana chips come out perfectly crisp every single time. Plus, I’ll share a few little tricks I’ve picked up along the way to make them even better.
How to Bake Perfectly Crispy Banana Chips
Now that your banana slices are prepped and dipped in lemon juice, it’s time to add the sweet, warm flavor that takes these chips from simple to irresistible. This part is where the kitchen starts to smell amazing, and you’ll know you’re about to make something special.

Steps: Adding Flavor and Baking
Step 4: Sprinkle on the Cinnamon Sugar
In a small bowl, mix together your 1 tablespoon of sugar and 1/2 teaspoon of cinnamon. Once combined, sprinkle this mixture evenly over all the banana slices. Don’t go too heavy-handed—the bananas will caramelize as they bake, and the light dusting is all you need for that perfect crunch and flavor balance.
Step 5: Bake Low and Slow
Place the baking sheet in your preheated 225°F oven. Bake the banana slices for 2 to 3 hours, flipping them halfway through the baking time.
Here’s the key: patience. These chips need time to dry out and crisp up, and the low oven temperature keeps them from burning. Depending on the thickness of your slices and your oven, the total baking time can vary. Around the 2-hour mark, start checking them more frequently to make sure they don’t go from perfectly crisp to overdone.
Step 6: Cool to Crisp
Once your banana chips are golden and look crisp, remove them from the oven. Don’t skip this next part—let them cool completely on the baking sheet. They’ll continue to firm up as they cool, giving you that satisfying crunch you’re looking for.
Tips for the Best Banana Chips
Making banana chips isn’t hard, but there are a few little tricks that can take them from good to great. Here are some tips I’ve learned along the way:
-
Use firm bananas. If the bananas are too soft, they won’t hold their shape while baking. Aim for ripe but still firm bananas.
-
Uniform slices are everything. Thicker slices take longer to bake and may end up chewy instead of crispy. A mandoline slicer works wonders here.
-
Leave the oven door slightly ajar. During the last 30 minutes of baking, you can prop the oven door open just a crack. This allows moisture to escape and helps the chips crisp up even more.
-
Go easy on the sugar. The bananas have natural sweetness, so you don’t need much. In fact, you can skip the sugar entirely if you want a lighter snack.
-
Check often toward the end. Oven temperatures can vary, and banana chips can go from crisp to too dark quickly. Keep an eye on them after 2 hours.
Fun Variations to Try
One of the best things about this recipe is how versatile it is. Once you’ve mastered the basic cinnamon sugar version, you can play around with different flavors:
-
Just cinnamon: Skip the sugar for a naturally sweet and spiced snack.
-
Savory twist: Try a sprinkle of sea salt and a tiny dash of smoked paprika.
-
Cocoa dusted: Mix a little unsweetened cocoa powder with sugar for a chocolatey crunch.
-
Plain and simple: Bake them plain and let the natural banana flavor shine.
Storing Your Banana Chips
Once your banana chips are completely cool, transfer them to an airtight container. They’ll stay fresh and crispy for about a week at room temperature. Though, if your house is anything like mine, they’ll probably disappear long before that.

Crispy Banana Chips FAQ
By now, you know just how easy and rewarding these Crispy Cinnamon Sugar Banana Chips can be. But if you’re like most home cooks, a few questions probably pop up along the way. Don’t worry—I’ve got you covered. Here are some of the most common questions people ask when making homemade banana chips.
FAQ Section
1. Can I make these banana chips without sugar?
Yes! Bananas are naturally sweet, so if you’d like a healthier version, skip the sugar and just sprinkle with cinnamon—or bake them plain. They’ll still crisp up beautifully and taste delicious.
2. Why do my banana chips come out chewy instead of crispy?
This usually happens when the slices are too thick or if they haven’t baked long enough. Make sure your slices are about 1/8 inch thick and give them plenty of time in the oven. Cooling them completely also helps them firm up.
3. Can I use a dehydrator instead of the oven?
Absolutely. A dehydrator works wonderfully for banana chips and often results in an even crunchier texture. Just follow your dehydrator’s instructions and adjust the time as needed.
4. How do I store banana chips to keep them crispy?
Let them cool completely, then place them in an airtight container. If there’s any moisture, they can soften. For longer storage, you can add a little packet of food-safe silica gel to absorb moisture, but usually, they don’t last long enough to need it!
5. Can I make these with very ripe bananas?
Overripe bananas are best for banana bread, not chips. For chips, you’ll want bananas that are ripe enough to be sweet but still firm so they hold their shape while baking.
6. What can I serve these banana chips with?
They’re delicious on their own, but they also make a great topping for yogurt, oatmeal, smoothie bowls, or even ice cream. They add a little crunch wherever you use them.
Conclusion: Why You’ll Love Making These Chips Again and Again
Homemade Crispy Cinnamon Sugar Banana Chips are one of those recipes that check all the boxes—they’re simple to make, healthier than packaged snacks, and so versatile. With just a handful of ingredients and a few hours in the oven, you get a snack that’s crunchy, naturally sweet, and completely addictive in the best way.
What I love most is how family-friendly they are. Kids love them, adults snack on them guilt-free, and they make a perfect addition to lunchboxes or after-school treats. Plus, you can easily switch up the flavors to suit your taste—whether you like them lightly spiced, chocolatey, savory, or plain.
So the next time you’ve got a couple of firm bananas sitting on your counter, don’t let them go to waste. Turn them into a batch of banana chips, and watch how quickly they disappear. And when you do, come back and share how they turned out—I’d love to hear what flavor twists you tried.
Because once you make these crispy, golden banana chips at home, you might never want to go back to the store-bought version again.
Print
Crispy Cinnamon Sugar Banana Chips
- Author: Sophia
Description
Crispy Cinnamon Sugar Banana Chips are a naturally sweet and satisfying snack made from ripe bananas that are thinly sliced, lightly coated, and baked until perfectly crisp. These chips offer a great alternative to store-bought snacks and are perfect for lunchboxes, topping yogurt, or enjoying by the handful. The warm hint of cinnamon paired with the natural sweetness of bananas makes them hard to resist.
Ingredients
2 to 3 ripe but firm bananas
1 tablespoon lemon juice
1 tablespoon granulated sugar
1/2 teaspoon ground cinnamon
Nonstick cooking spray or parchment paper
Instructions
Preheat your oven to 225°F and line a large baking sheet with parchment paper or lightly spray it with nonstick spray.
Peel the bananas and slice them into thin, even rounds, about 1/8 inch thick. Try to keep the slices uniform so they bake evenly.
In a small bowl, mix the sugar and cinnamon together. Dip each banana slice lightly in lemon juice to help prevent browning, then place them in a single layer on the prepared baking sheet.
Sprinkle the cinnamon sugar mixture evenly over the banana slices. Bake for 2 to 3 hours, flipping the chips halfway through the baking time, until they are golden and crisp. Baking time will vary depending on the thickness of your slices and your oven, so keep an eye on them toward the end.
Once fully crisp, remove the banana chips from the oven and allow them to cool completely. They will continue to firm up slightly as they cool.
Store in an airtight container at room temperature for up to one week.
Notes
Use bananas that are ripe but still firm to ensure they hold their shape during baking. A mandoline slicer can help with getting consistent, thin slices. If you prefer a more natural version, you can skip the sugar and just sprinkle with cinnamon or bake them plain for a simple chip. For extra crispness, leave the oven door slightly ajar during the last 30 minutes of baking to help moisture escape.


