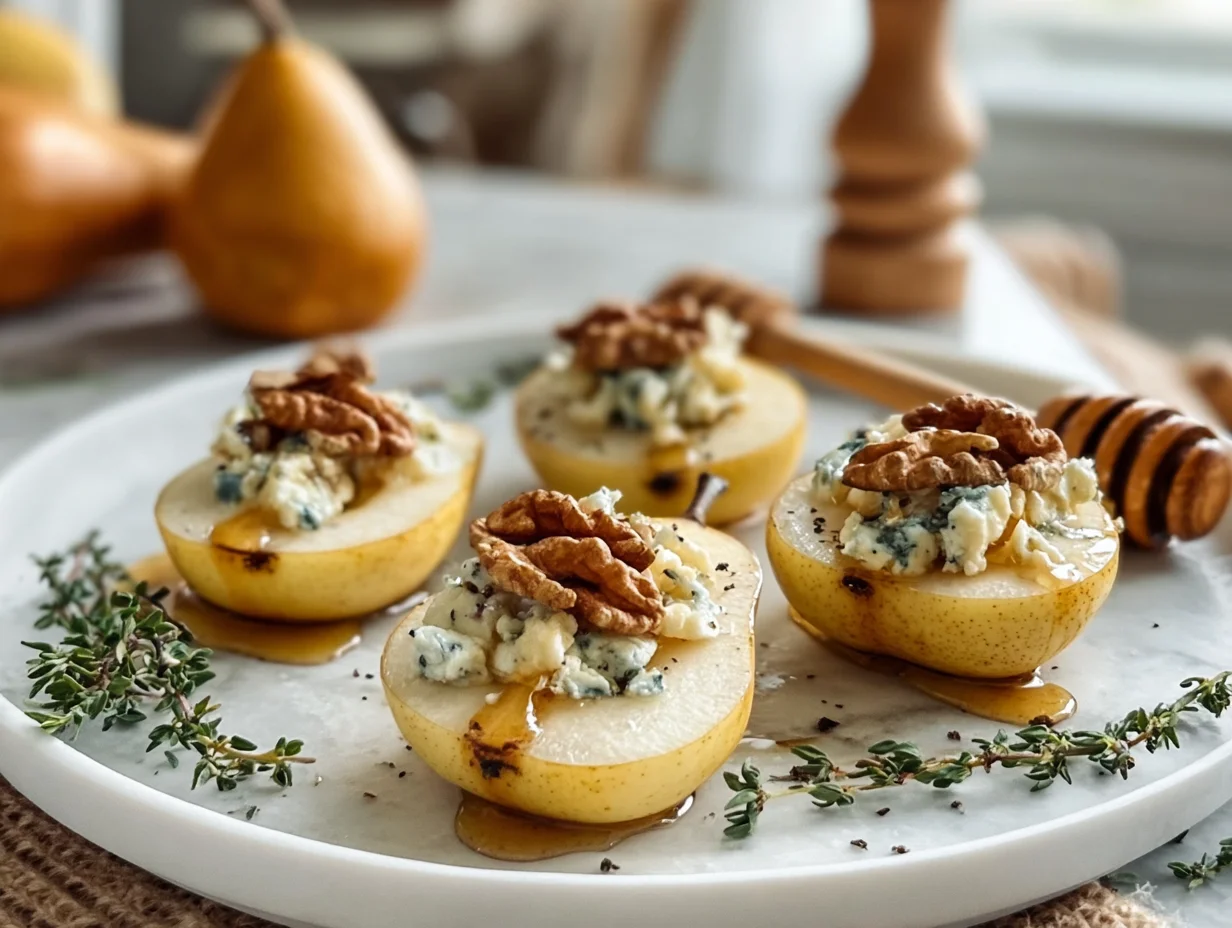
If there’s one thing I love about hosting, it’s surprising guests with a dish that looks like it came from a fancy bistro—but took barely 30 minutes to pull together. These Elegant Blue Cheese Stuffed Pears are exactly that kind of showstopper. They’re equal parts sophisticated and simple, with just the right blend of sweet and savory. Every time I bring these out, someone always asks for the recipe before they’ve even finished their first bite.
Whether you’re planning a dinner party, a wine night with friends, or just want to treat yourself to something a little extra, this dish delivers on all fronts. The soft sweetness of ripe pears contrasts beautifully with the bold tang of blue cheese, and a hint of honey ties it all together. Add a few crunchy walnuts and maybe a sprig of thyme, and you’ve got yourself a small plate that’s big on flavor.
This recipe also reminds me of a time I hosted a small wine tasting night. I wanted something that would pair well with a chilled glass of Chardonnay but still be light enough not to compete with the wine. These stuffed pears were an instant hit—and they’ve been part of my appetizer rotation ever since.
Let’s dive in and walk through the beginning steps to bring this elegant dish to life.

Ingredients You’ll Need
For the pears:
-
2 ripe but firm pears (Bosc or Anjou work best), halved and cored
-
1 teaspoon lemon juice
-
1 tablespoon olive oil
For the filling:
-
3 oz blue cheese, crumbled
-
2 tablespoons cream cheese, softened
-
1 tablespoon honey
-
1 tablespoon chopped walnuts
-
Black pepper to taste
For garnish:
-
Extra chopped walnuts
-
Fresh thyme leaves (optional)
-
Honey for drizzling
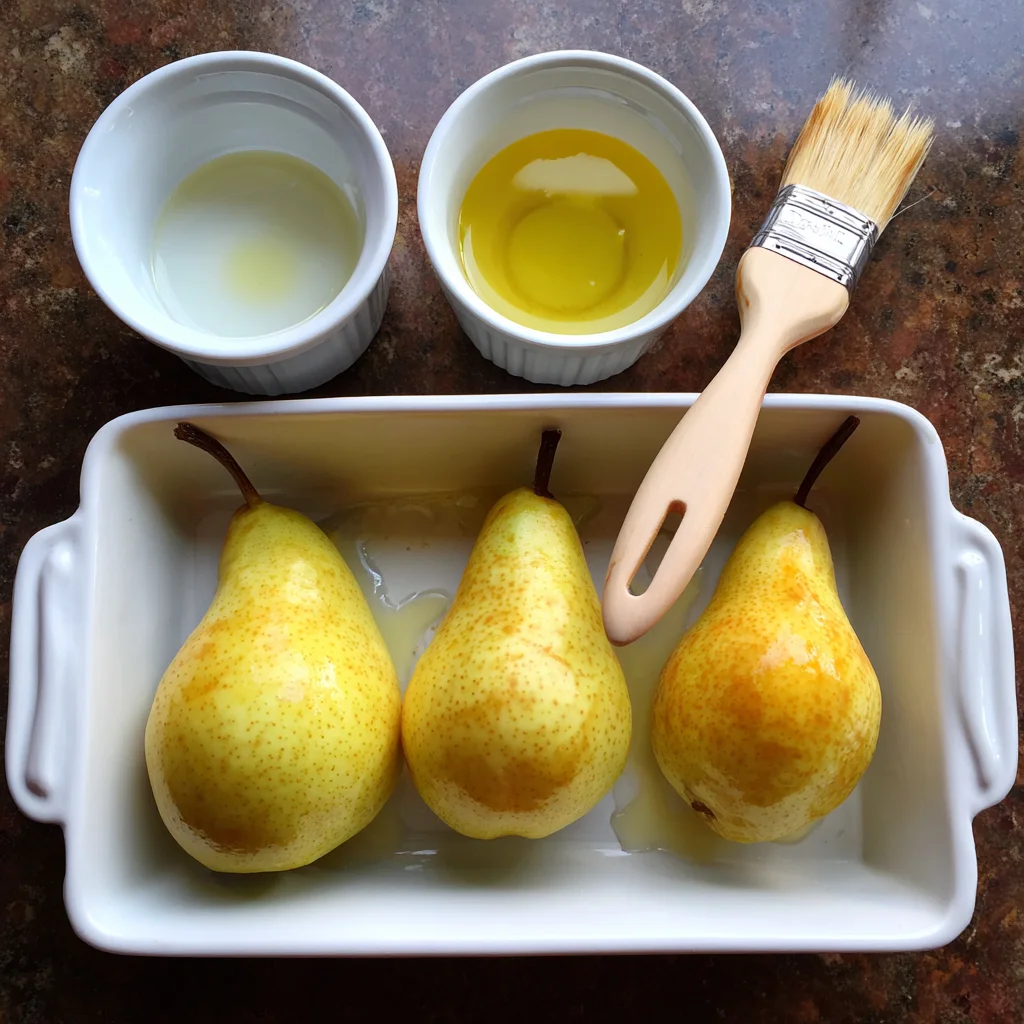
STEP 1: Prep the Pears
Start by preheating your oven to 375°F (190°C). This ensures your pears cook evenly and the filling melts just the right amount.
While your oven warms up, prep your baking dish by lightly brushing it with olive oil. This step helps keep the pears from sticking and adds a little extra richness.
Now, take your pears and slice them in half lengthwise. Gently scoop out the cores using a melon baller or a small spoon. You want to create a nice little hollow for the filling, but don’t dig too deep—you still want the pear to hold its shape.
Brush the cut side of each pear with a bit of lemon juice. This prevents the pears from browning too quickly while they bake and also adds a subtle brightness to balance the cheese.
Once that’s done, lightly coat the pears with olive oil and place them cut side up in your prepared baking dish.
STEP 2: Make the Creamy Filling
In a small bowl, mix together the crumbled blue cheese, softened cream cheese, honey, chopped walnuts, and a generous crack of black pepper.
This filling is what makes the dish so unique. The blue cheese gives it that sharp, tangy flavor, while the cream cheese softens the bite, creating a perfectly balanced blend. The honey adds just enough sweetness to round things out, and the walnuts bring in a satisfying crunch.
Pro tip: Make sure your cream cheese is fully softened before mixing—this makes it easier to blend everything evenly and gives the filling a smooth, spreadable texture.
STEP 3: Fill the Pears
Once your filling is mixed and your pears are prepped, go ahead and spoon the cheese mixture into each hollowed-out pear half.
Try to divide it as evenly as possible so that each pear gets a good amount of filling. It’s okay if the mixture is heaping a little—this will melt slightly in the oven and settle nicely into the center.
At this point, your kitchen is already smelling amazing from the fresh pears and tangy cheese. And we’re just getting started.
Elegant Blue Cheese Stuffed Pears: Baking, Serving, and Flavor Tips
Now that your pears are prepped and beautifully filled, it’s time for the magic to happen in the oven. This next part is all about bringing everything together—melting the cheese, softening the fruit just enough, and adding that final drizzle of sweetness and crunch that makes this dish feel like it belongs on a restaurant menu.
One of the things I love about this recipe is how effortless it feels, especially considering the payoff. Once you’ve got your pears filled and into the oven, the rest is really just finishing touches. But don’t let the simplicity fool you—this appetizer is full of layered flavor and texture. Let’s finish this off the right way.
STEP 4: Bake to Perfection
Place your baking dish into the preheated oven (375°F / 190°C) and bake the pears for about 15 to 18 minutes.
You’re looking for the pears to be tender but still hold their shape. The cheese mixture should be slightly golden on top, with the edges of the filling just starting to brown. That’s when you know it’s done.
It’s important not to overbake here. If the pears get too soft, they won’t plate as nicely, and the filling may melt out too much. I like to check them around the 15-minute mark by gently poking the edge of the pear with a fork. If it slides in with a little resistance, they’re perfect.
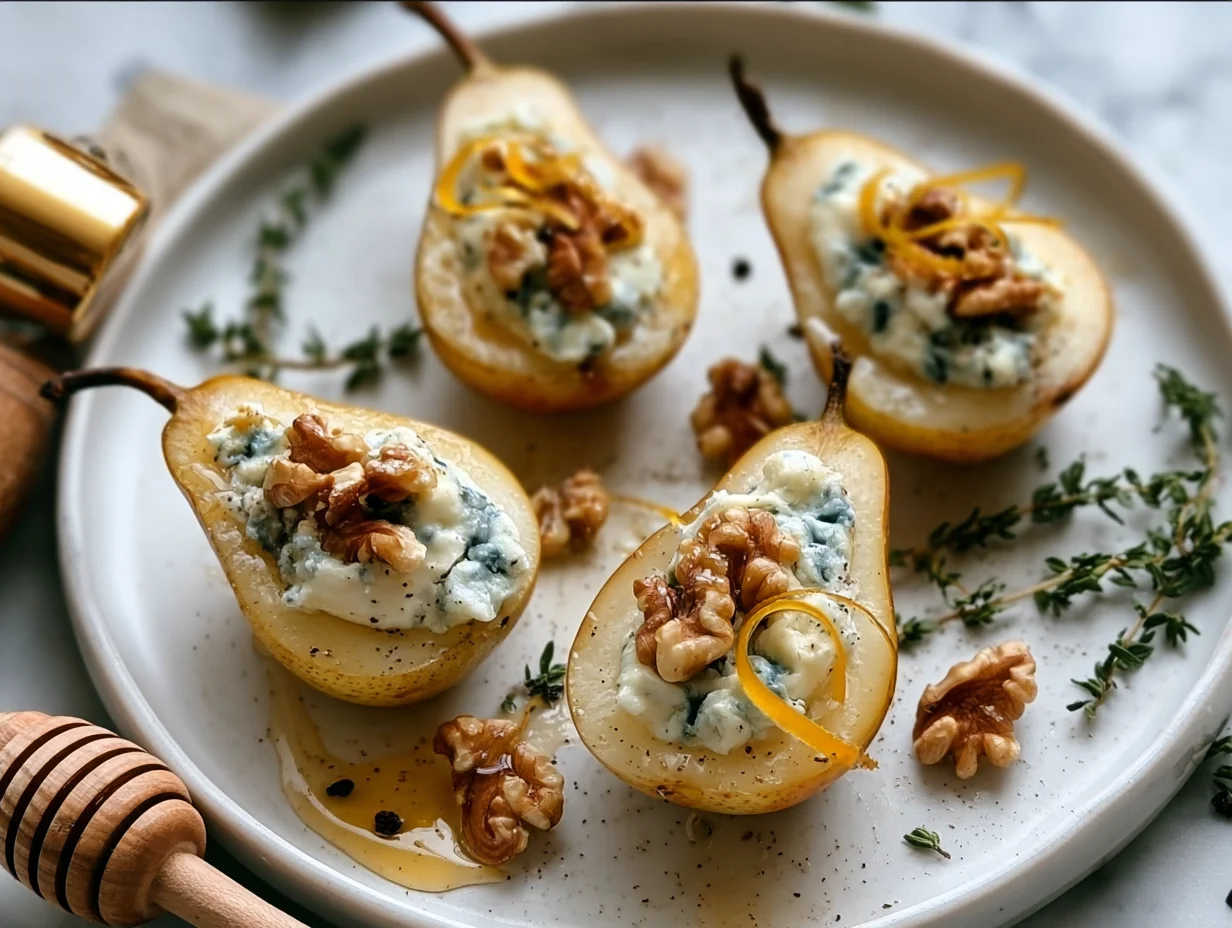
STEP 5: Garnish and Serve
Remove the baking dish from the oven and let the pears cool for just a few minutes. They should still be warm when you serve them, but not piping hot.
Now comes the fun part—garnishing!
-
Drizzle with a little extra honey to enhance the sweetness and give the dish that glossy, finished look.
-
Sprinkle with more chopped walnuts for crunch and contrast.
-
If you’re feeling a little fancy, add a few fresh thyme leaves. They bring a subtle earthiness that balances the honey and cheese beautifully.
Serve these warm as a plated appetizer or place them on a wooden board with wine and other small bites. They pair incredibly well with a crisp white wine like Sauvignon Blanc or even a light sparkling wine. I’ve also served them alongside a salad with arugula and balsamic glaze for a more complete starter.
TIPS TO ELEVATE THIS DISH
This recipe is already delicious as-is, but if you want to personalize or enhance it, here are a few helpful ideas:
-
Choose the right pear: Bosc and Anjou pears are ideal for baking—they hold their shape and offer just the right amount of sweetness. Avoid overly ripe pears; they’ll get mushy fast.
-
Toast the walnuts: Toasting brings out the nutty depth in walnuts and adds an extra layer of flavor. Just toss them in a dry skillet over medium heat for a couple of minutes before chopping.
-
Add a balsamic reduction: For an extra gourmet touch, a light drizzle of balsamic glaze right before serving gives a lovely tang that complements the blue cheese beautifully.
-
Switch up the cheese: Not everyone is a fan of blue cheese. You can try gorgonzola for a milder flavor or even goat cheese if you prefer something softer and less pungent.
-
Make ahead for easy entertaining: You can prep the filling and core the pears a few hours in advance. Store the pears brushed with lemon juice in the fridge and assemble right before baking. It saves time without sacrificing flavor.
Elegant Blue Cheese Stuffed Pears: FAQs and Final Thoughts
By now, you’ve seen just how simple and elegant this recipe is—from prepping the pears to that beautiful golden finish in the oven. Whether you’re serving this for guests or just treating yourself, this dish delivers big flavor with minimal fuss.
Before we wrap things up, let’s go over some frequently asked questions to help you get the most out of your Blue Cheese Stuffed Pears. Whether you’re wondering about substitutions or storage, I’ve got you covered.
Frequently Asked Questions
1. Can I make these ahead of time?
Yes! You can prepare the filling and core the pears a few hours ahead of time. Just brush the pears with lemon juice to prevent browning and keep everything in the fridge. Assemble and bake when you’re ready to serve.
2. What type of pears should I use?
Bosc and Anjou pears are the best choices for baking. They hold their shape well and offer a balance of sweetness and firmness that pairs perfectly with the creamy filling.
3. Is there a substitute for blue cheese?
Absolutely. If you’re not a fan of blue cheese, try using gorgonzola (which is a milder blue cheese), goat cheese, or even brie. Just keep in mind that the flavor profile will change slightly, but the dish will still be delicious.
4. Can I make this recipe nut-free?
Yes, simply omit the walnuts if you have a nut allergy or prefer a nut-free version. You can substitute with toasted seeds (like sunflower seeds) for a similar crunch, or leave them out entirely.
5. Can I serve this dish cold?
While these pears are best served warm, you can enjoy them at room temperature. Just avoid chilling them after baking, as the texture and flavor of the cheese filling won’t be the same.
6. What wines pair well with this appetizer?
This dish pairs beautifully with white wines like Sauvignon Blanc, Chardonnay, or even a dry Riesling. Sparkling wines or champagne also complement the sweet-salty flavors perfectly.
7. Can I use a different sweetener instead of honey?
Yes! Maple syrup or agave nectar are great alternatives if you’re out of honey or prefer a different flavor. Just use the same amount and drizzle lightly over the pears before serving.
Final Thoughts
If you’re looking for a go-to appetizer that’s both beautiful and easy to make, these Elegant Blue Cheese Stuffed Pears should absolutely be at the top of your list. With just a handful of ingredients and less than 30 minutes from start to finish, you’ll have a dish that feels gourmet without being fussy.
This recipe has quickly become one of my favorite ways to impress guests—or honestly, to treat myself to something a little special on a quiet evening at home. The blend of sweet, salty, creamy, and crunchy hits all the right notes, and the presentation couldn’t be prettier.
Print
Elegant Blue Cheese Stuffed Pears
- Author: Sophia
Description
A sophisticated and flavorful appetizer, these blue cheese stuffed pears combine the natural sweetness of ripe pears with the bold, creamy tang of blue cheese. Finished with crunchy walnuts and a drizzle of honey, they strike a perfect balance of sweet, salty, and savory—ideal for dinner parties, wine pairings, or a refined snack.
Ingredients
For the pears:
2 ripe but firm pears, halved and cored
1 teaspoon lemon juice
1 tablespoon olive oil
For the filling:
3 oz blue cheese, crumbled
2 tablespoons cream cheese, softened
1 tablespoon honey
1 tablespoon chopped walnuts
Black pepper to taste
For garnish:
Extra chopped walnuts
Fresh thyme leaves (optional)
Honey for drizzling
Instructions
1 Preheat the oven to 375°F (190°C). Prepare a baking dish by lightly brushing with olive oil.
2 Brush the cut side of the pear halves with lemon juice to prevent browning. Lightly coat them with olive oil and place them cut side up in the baking dish.
3 In a small bowl, mix together the blue cheese, cream cheese, honey, chopped walnuts, and black pepper until well combined.
4 Spoon the cheese mixture into the hollowed centers of each pear half, dividing it evenly.
5 Bake the pears in the preheated oven for about 15 to 18 minutes, or until the pears are tender but still hold their shape and the cheese is slightly golden on top.
6 Remove from the oven and let cool slightly. Drizzle with additional honey and sprinkle with more walnuts and thyme if using before serving.
Notes
For the best flavor, choose ripe but slightly firm pears like Bosc or Anjou. The combination of blue cheese and cream cheese ensures a creamy filling that’s not too overpowering. Feel free to toast the walnuts beforehand for added depth of flavor. This appetizer pairs beautifully with a crisp white wine or champagne.