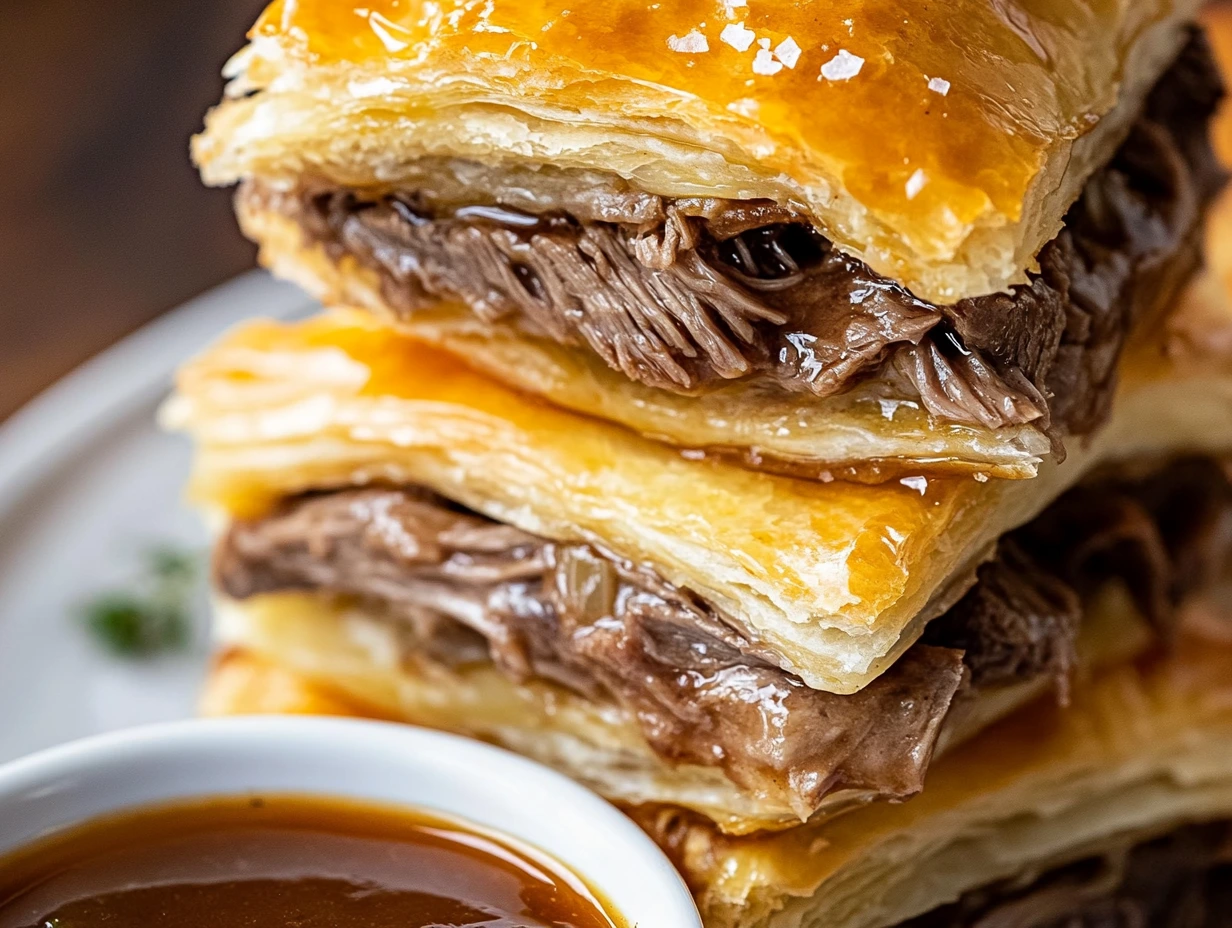
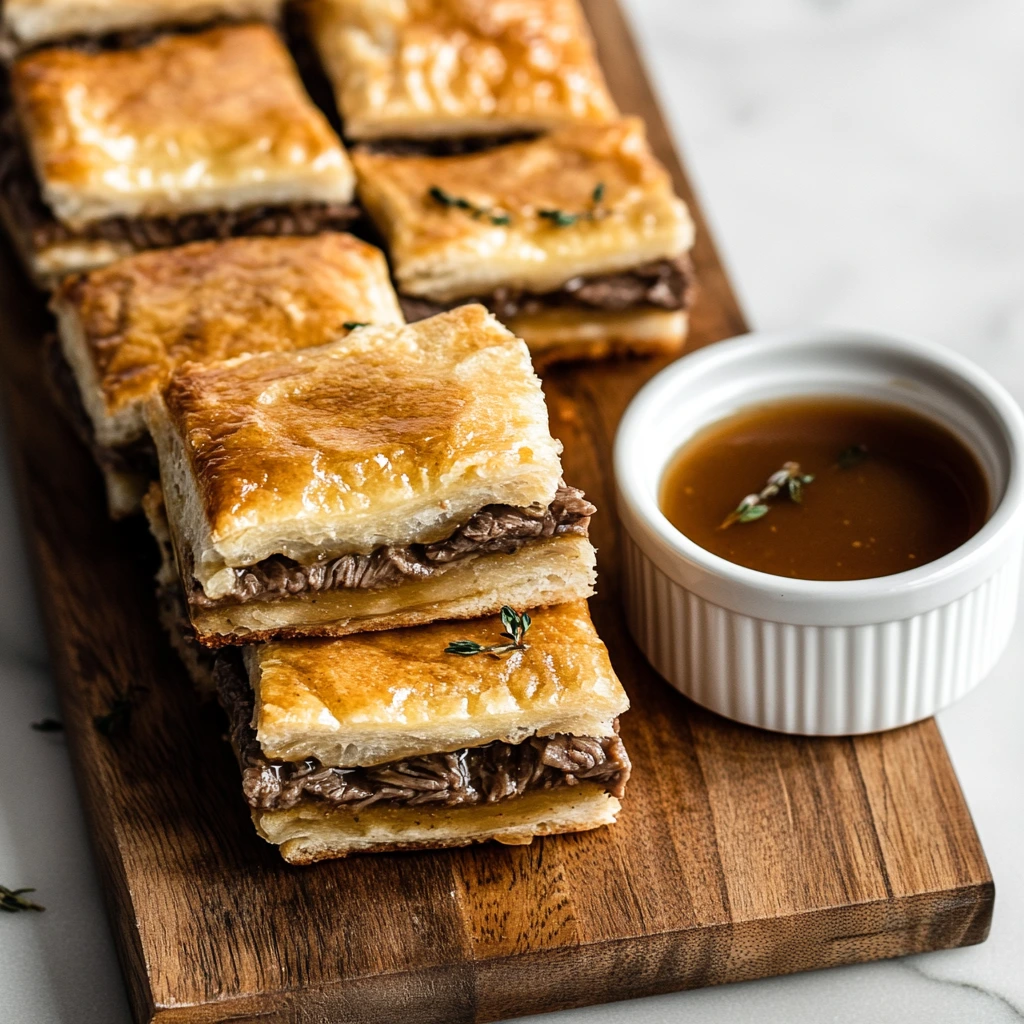
There’s something magical about recipes that combine simplicity with mouthwatering flavor, isn’t there? These French Dip Squares check all the boxes: buttery layers of crescent dough, savory roast beef, melted Swiss cheese, and a drizzle of a rich, onion-infused butter sauce—all served with warm beef broth for dipping. Whether you’re hosting game night or looking for a cozy weekend snack, this recipe is guaranteed to be a crowd-pleaser.
Why You’ll Love This Recipe
If you’re anything like me, you probably have a soft spot for dishes that are easy to make but feel indulgent. French Dip Squares are exactly that. They come together quickly, thanks to a few store-bought shortcuts (hello, crescent rolls!), but the end result is so good, your guests will think you spent hours in the kitchen. Plus, there’s something so satisfying about tearing apart these golden, cheesy squares and dipping them into warm, savory beef broth. Let’s just say this recipe is a keeper.
Getting Started: Prepping for Perfection
Step 1: Preheat and Prep the Pan
Before you dive in, set your oven to 375°F (190°C). While it’s heating, take a 9×13-inch baking dish and give it a quick spray with non-stick cooking spray. Trust me, you don’t want to skip this step—nothing kills the vibe like dough stuck to the pan when you’re ready to serve.
Step 2: The Bottom Layer of Buttery Goodness
Grab one of the two cans of refrigerated crescent rolls and unroll it. Lay the dough flat in the baking dish and press the seams together to create a smooth, solid base. This layer is like the foundation of a house—it needs to be sturdy enough to hold all the delicious fillings you’re about to pile on top.

Building Layers of Flavor
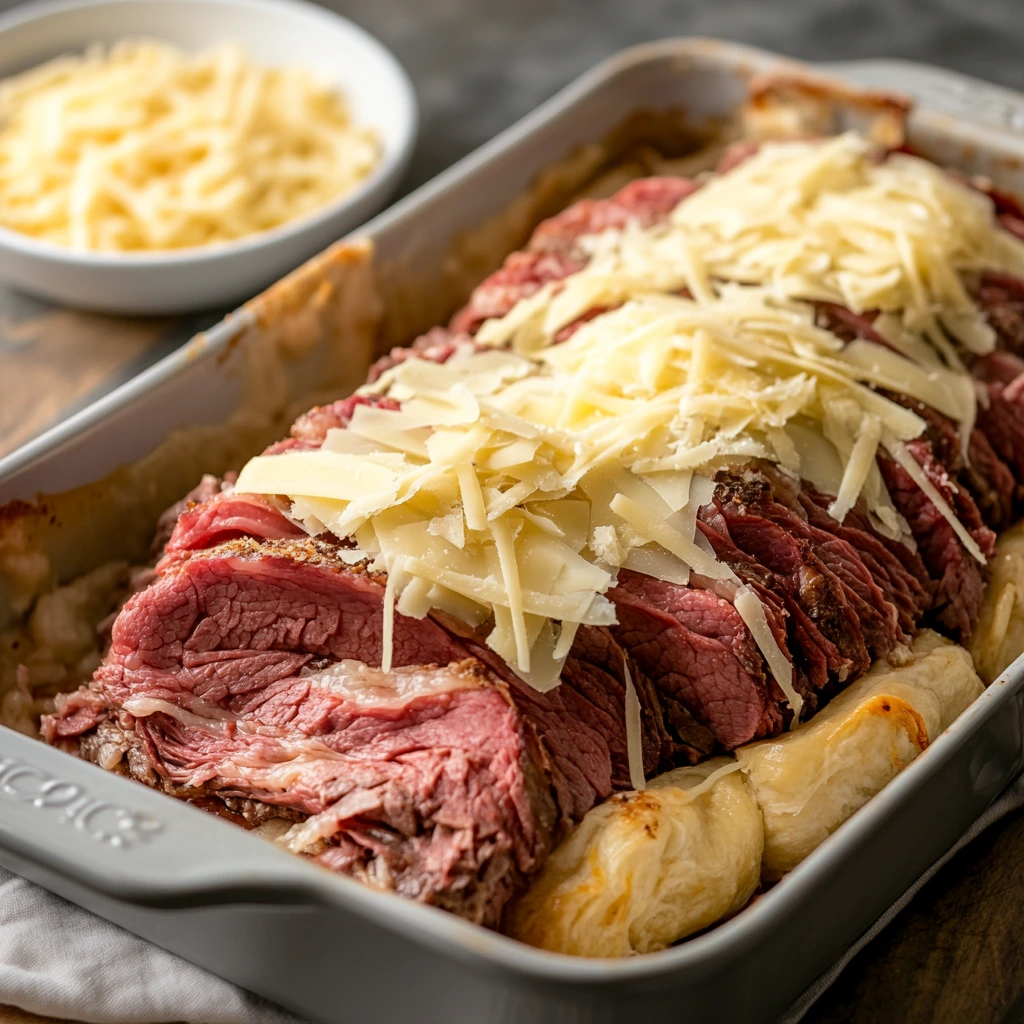
Step 3: Adding the Star Ingredients
Here’s where the magic begins. Lay a generous layer of deli-sliced roast beef across the dough. Try to spread it evenly so every bite is packed with flavor. Next, sprinkle on the grated Swiss cheese—the more, the merrier! The cheese melts beautifully during baking, creating that gooey, irresistible center we all love.
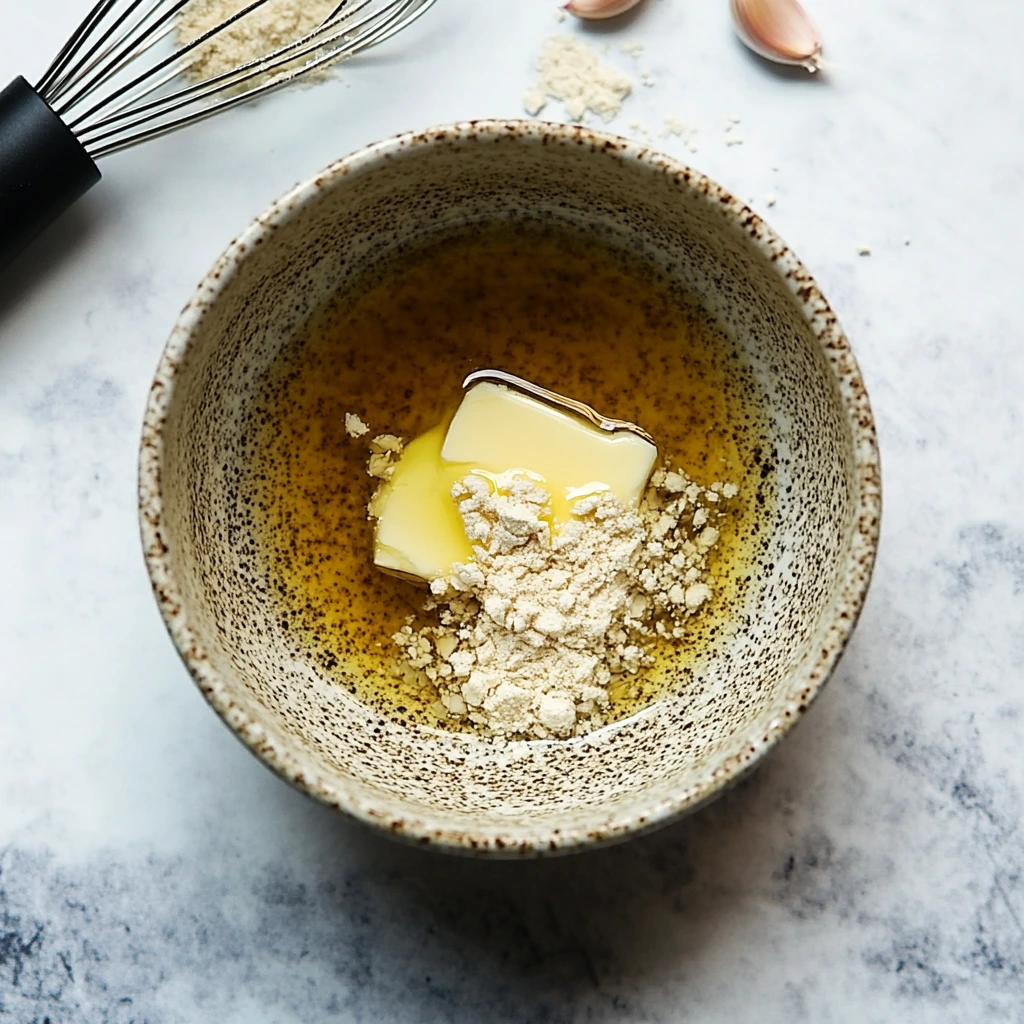
Step 4: The Secret Sauce
This step might just be my favorite part. In a small bowl, whisk together the following:
- 1 packet of dry onion soup mix
- ¼ cup of melted butter
- 1 tsp of Worcestershire sauce
- ½ tsp of garlic powder
Once combined, drizzle this heavenly mixture evenly over the cheese layer. The sauce seeps into the meat and cheese as it bakes, elevating the flavor to new heights.
The Grand Finale: Topping and Baking
Step 5: The Golden Top Layer
Take the second can of crescent rolls and roll it out over the fillings. Just like you did for the base, pinch the seams together to form a smooth top layer. This step seals everything in, so the flavors meld together beautifully during baking.

Step 6: Into the Oven
Place the dish in your preheated oven and bake for 15-20 minutes, or until the top is golden brown and the crescent dough is cooked through. While it’s baking, you’ll notice your kitchen filling with the most tantalizing aroma—it’s a promise of the deliciousness to come.
Perfecting Your French Dip Squares
Now that your kitchen smells like a five-star bakery, it’s time to take this recipe to the next level. While the French Dip Squares are baking to golden perfection, let’s focus on the dipping sauce, presentation, and some fun variations to truly make this dish shine.
The Dipping Sauce: A Must-Have for Maximum Flavor
The dipping sauce is what takes these squares from good to unforgettable. Here’s how to prepare it:
- Grab Your Beef Broth
Pour 1 cup of beef broth into a small pot and place it over medium heat. You can use store-bought broth, but if you want an even richer flavor, you could simmer the broth with a splash of Worcestershire sauce and a pinch of garlic powder for a few minutes. - Heat and Serve
Heat the broth until it’s warm, but don’t let it boil. Pour it into a small bowl or ramekin for serving. Make sure to have enough bowls if you’re serving a crowd—everyone loves their own personal dip!
Serving Your French Dip Squares
By now, your French Dip Squares should be out of the oven, golden and bubbling. Let them cool for about 5 minutes—just enough time to avoid burning your fingers but still warm enough for the cheese to stay gooey.
Slicing Tips
Use a sharp knife or a pizza cutter to slice the squares into even portions. A good rule of thumb is to aim for 12-16 squares, depending on how many people you’re serving. The smaller squares are perfect for appetizers, while larger portions work great for a casual dinner.
Presentation Ideas
- Arrange the squares on a platter with ramekins of warm beef broth placed in the center for dipping.
- Sprinkle a little parsley over the top for a pop of color and freshness.
- If you want to get fancy, add a few sprigs of rosemary around the platter for an elegant touch.
Pro Tips for the Best French Dip Squares
- Seam Perfection
Make sure to pinch the seams of the crescent roll dough tightly. This prevents the filling from oozing out during baking. - Bake It Just Right
Keep a close eye on the squares during baking. Crescent rolls can go from golden to overdone quickly, and you don’t want a dry top layer. - Double the Sauce
Love extra flavor? Make a little more of the onion-butter sauce and brush some on the top layer before baking. It adds a glossy, golden finish and an extra burst of flavor.
Fun Variations to Make It Your Own
Feeling creative? Here are some easy twists to customize your French Dip Squares:
- Spicy Kick
Add a layer of thinly sliced jalapeños or a drizzle of sriracha over the cheese before adding the top layer of dough. - Sweet and Savory
Sprinkle a light layer of caramelized onions over the roast beef for a touch of sweetness that balances the savory flavors. - Cheese Swap
While Swiss cheese is classic, you can substitute it with provolone, mozzarella, or even pepper jack for a different flavor profile. - Herb-Infused Butter
Mix fresh herbs like rosemary or thyme into the melted butter for a more aromatic sauce. - Vegetarian Option
Swap the roast beef for sautéed mushrooms and spinach for a delicious vegetarian take on this recipe.
Don’t Forget the Sides!
French Dip Squares are incredibly versatile, and they pair well with a variety of sides:
- Crispy Fries: Keep the comfort food theme going with a side of seasoned French fries.
- Salad: A fresh green salad with a tangy vinaigrette balances the richness of the squares.
- Pickles: Serve with a small bowl of dill pickles for a sharp, crunchy contrast.
Your Questions Answered + Final Thoughts
By now, you’re ready to impress your guests (or yourself!) with these irresistible French Dip Squares. But before you dive in, let’s tackle a few frequently asked questions and wrap up with some final tips to ensure your baking experience is as seamless as possible.
FAQs About French Dip Squares
1. Can I make these ahead of time?
Absolutely! You can assemble the squares up to a day in advance. Cover the dish tightly with plastic wrap and store it in the refrigerator. When you’re ready to bake, simply remove the wrap and bake as instructed, adding a few extra minutes to account for the chilled dough.
2. Can I use homemade crescent dough instead of canned?
Yes, you can! Homemade dough adds a personal touch and tastes amazing. Just make sure it’s rolled out to the same thickness as the canned version, and follow the same steps for pressing and layering.
3. How do I store leftovers?
Leftovers can be stored in an airtight container in the fridge for up to three days. To reheat, place them in the oven at 350°F (175°C) for about 10 minutes to maintain that crispy texture.
4. Can I freeze French Dip Squares?
Yes! Once baked and cooled, wrap individual squares tightly in foil and freeze them in a freezer-safe container. When you’re ready to enjoy, thaw them in the refrigerator overnight and reheat in the oven.
5. What can I use if I don’t have onion soup mix?
If you’re out of onion soup mix, try this quick substitute: mix 2 tablespoons of dried onion flakes, 1 teaspoon of beef bouillon granules, ½ teaspoon of onion powder, and ¼ teaspoon of garlic powder. This blend will give you similar flavors.
6. What’s the best way to slice the squares neatly?
A pizza cutter works wonders for clean and even slices. Let the dish cool slightly before slicing to prevent the cheese from pulling apart.
7. Can I substitute the roast beef?
Of course! Thinly sliced turkey, ham, or even shredded chicken are great alternatives. You can also use plant-based deli slices for a vegetarian-friendly option.
Final Thoughts: Why French Dip Squares Deserve a Spot in Your Recipe Book
There’s a reason these French Dip Squares are bound to become one of your go-to recipes. They’re quick, versatile, and undeniably delicious. Whether you’re hosting a party, preparing a fun family dinner, or just indulging in a cozy weekend treat, this recipe hits all the right notes.
What I love most about these squares is how customizable they are. You can stick to the classic combination of roast beef and Swiss cheese, or let your creativity run wild with new fillings and toppings. And don’t forget the dipping sauce—it’s the little detail that turns these squares into something truly special.
Let’s Keep the Conversation Going
Have you tried this recipe yet? I’d love to hear how it turned out! Did you make any fun tweaks or try a creative variation? Share your experience in the comments below. And if you’re as obsessed with these French Dip Squares as I am, don’t forget to save the recipe for later and share it with your friends. After all, good food is meant to be enjoyed together.
Print
French Dip Squares
- Total Time: 30 minutes
Description
These French Dip Squares are a perfect combination of buttery crescent dough, savory roast beef, and melted Swiss cheese, baked to golden perfection. Serve with warm beef broth for dipping, and you’ve got an irresistible snack or appetizer!
Ingredients
- 2 cans refrigerated crescent rolls
- ½ lb deli-sliced roast beef
- 1 cup grated Swiss cheese
- 1 packet dry onion soup mix
- ¼ cup melted butter
- 1 tsp Worcestershire sauce
- ½ tsp garlic powder
- 1 cup beef broth (for dipping)
Instructions
1️⃣ Preheat the Oven
Preheat your oven to 375°F (190°C).
Spray a 9×13-inch baking dish with non-stick cooking spray.
2️⃣ Create the Bottom Layer
Unroll one can of crescent rolls and press it into the bottom of the prepared baking dish.
Pinch the seams together to form a solid sheet of dough.
3️⃣ Add the Fillings
Lay the slices of roast beef evenly across the dough.
Sprinkle the grated Swiss cheese on top of the roast beef.
4️⃣ Prepare the Sauce
In a small bowl, mix together the dry onion soup mix, melted butter, Worcestershire sauce, and garlic powder.
Drizzle this mixture evenly over the cheese layer.
5️⃣ Add the Top Layer
Roll out the second can of crescent rolls and place it over the cheese layer.
Pinch the seams together to create a solid top crust.
6️⃣ Bake the Squares
Bake in the preheated oven for 15-20 minutes, or until the top is golden brown and the crescent dough is fully cooked.
7️⃣ Prepare the Dipping Sauce
While the squares are baking, heat the beef broth in a small pot over medium heat until warm.
8️⃣ Serve
Let the French Dip Squares cool slightly before slicing into squares.
Serve with the warm beef broth for dipping.
Notes
- Cheese Substitution: Try provolone or Gruyere cheese for a delicious twist.
- Make Ahead: Assemble the dish up to a day in advance, cover it with plastic wrap, and refrigerate. Bake just before serving.
- Leftovers: Store leftovers in an airtight container in the fridge for up to 3 days. Reheat in the oven for the best texture.
- Prep Time: 10 minutes
- Cook Time: 20 minutes
Nutrition
- Serving Size: 6-8 squares