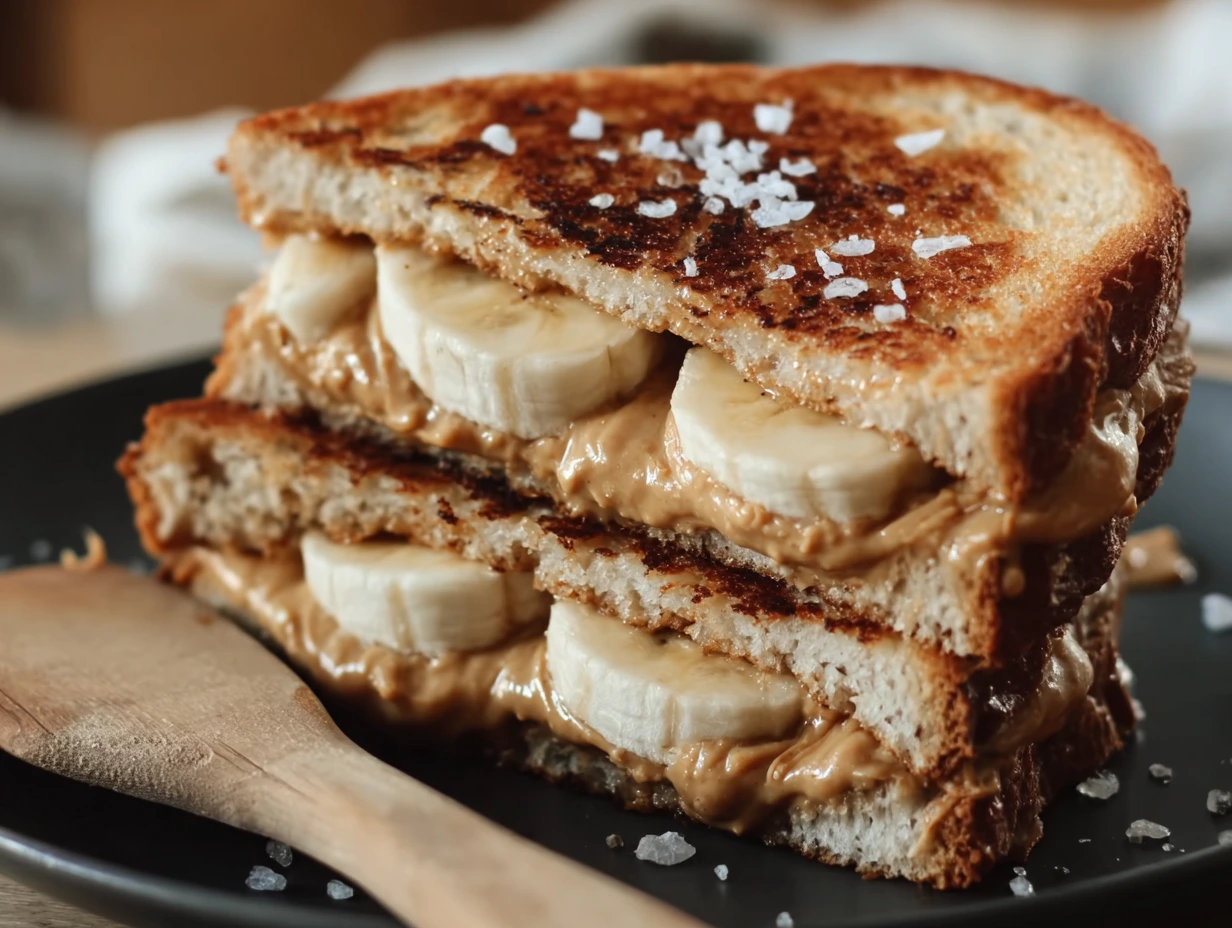
There’s something undeniably comforting about the classic peanut butter and banana combo—the creamy nuttiness of peanut butter married with the gentle sweetness of ripe banana. But, have you ever taken that sandwich up a notch by grilling it until the bread is golden-crisp and the filling turns into a molten, gooey delight? If not, you’re in for a treat. I first stumbled upon this variation on a lazy Saturday morning when I was craving something more interesting than my usual bowl of cereal. With a couple of pantry staples and minimal effort, I discovered a snack that felt like a warm hug in sandwich form.
Growing up, peanut butter and banana was my go-to before soccer practice. Fast forward to adulthood, I decided to reinvent that childhood favorite by adding a sizzling skillet step. The result? A breakfast treat that feels indulgent but takes just minutes to assemble and cook. Plus, it’s endlessly adaptable—add cinnamon for a cozy twist or dark chocolate chips if you’re feeling decadent. Whether you’re whipping this up for a quick breakfast, an afternoon pick-me-up, or even a simple dessert, this grilled sandwich never fails to impress.
In this three-part article, I’ll walk you through everything you need to know to nail this recipe, share tips for perfect crispiness, and answer all the common questions that might come up. Let’s dive into the magic of grilling a peanut butter banana sandwich!

Ingredients You’ll Need
-
4 slices of sturdy sandwich bread (day-old works best)
-
2 tablespoons creamy peanut butter
-
1 ripe banana, peeled and thinly sliced
-
1 tablespoon unsalted butter, softened
-
1 teaspoon honey or maple syrup (optional)
Feel free to swap half of the peanut butter for almond or cashew butter if you want a richer, nuttier flavor. A pinch of cinnamon mixed into the peanut butter or a scattering of chocolate chips among your banana slices also works wonders.
Steps
-
Assemble the Sandwich
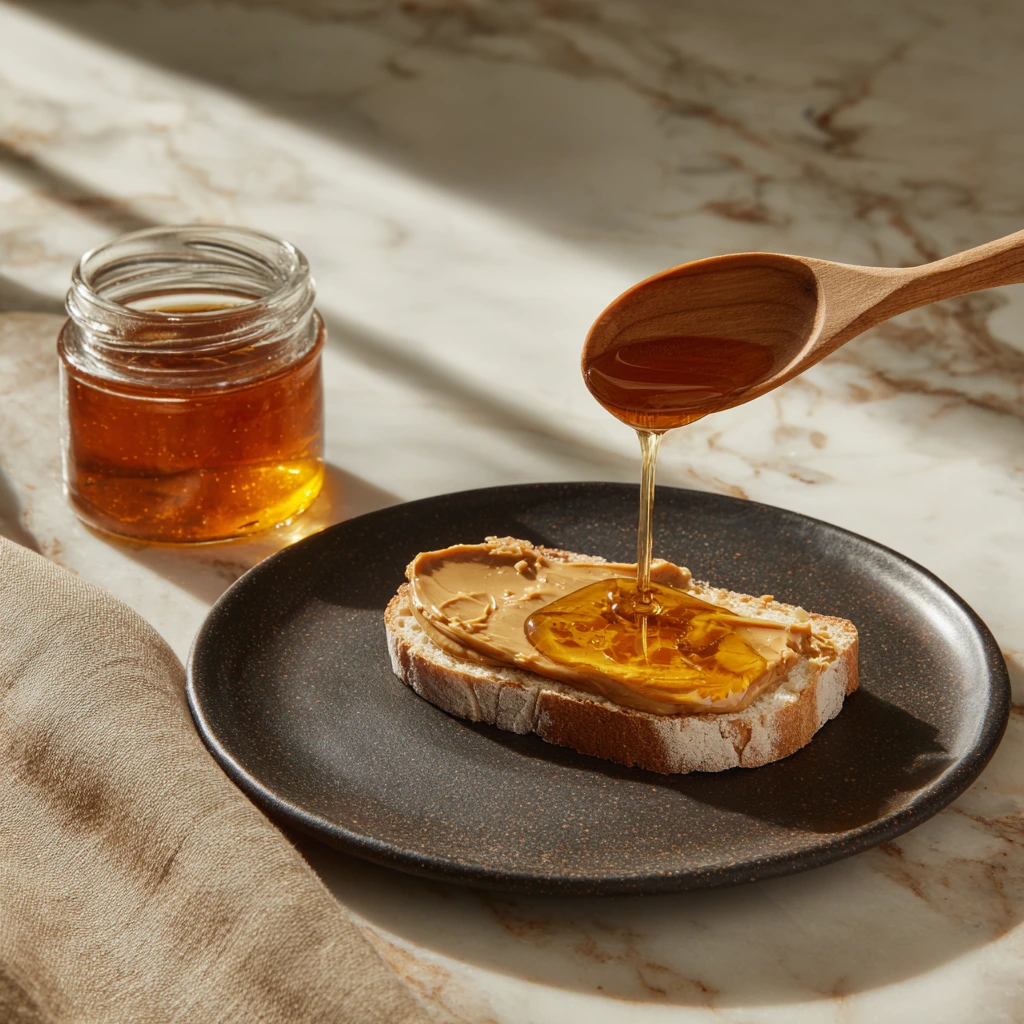
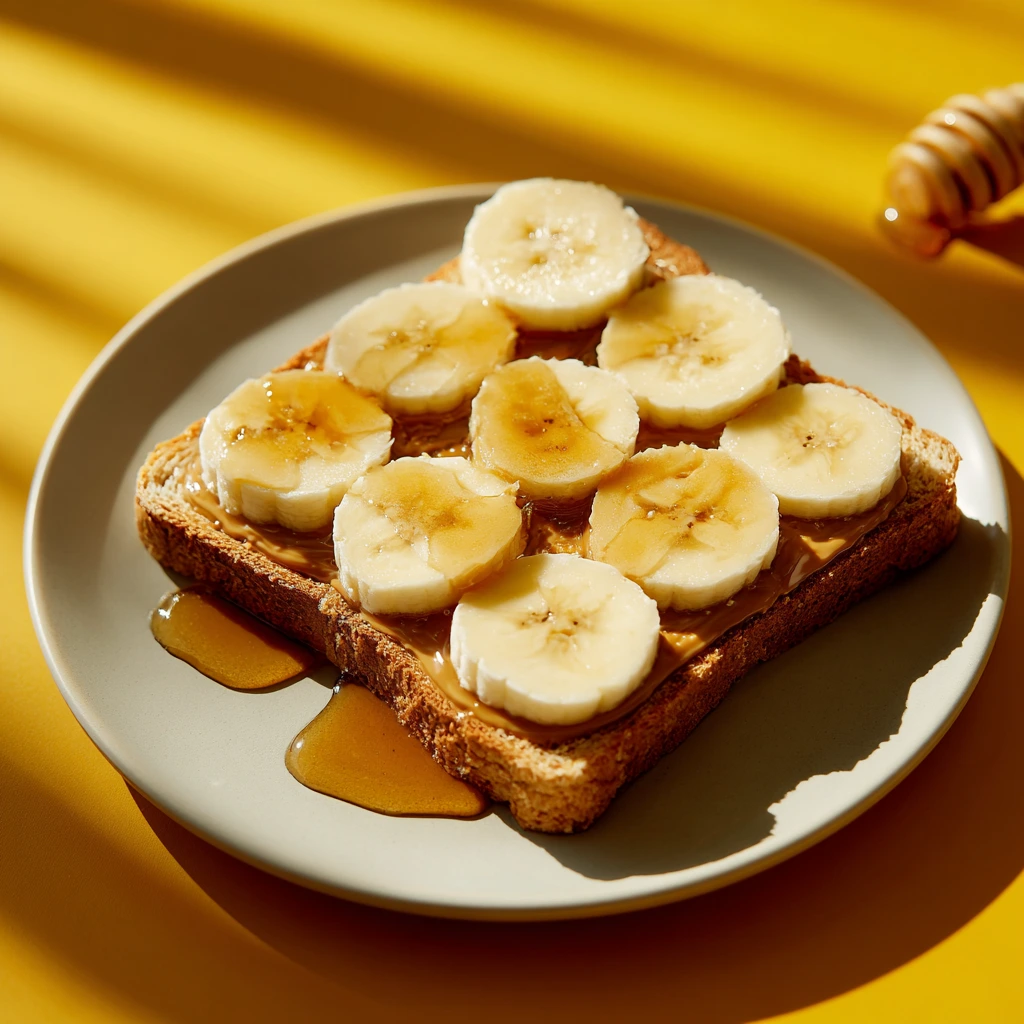
Spread 1 tablespoon of creamy peanut butter on each of two slices of bread. If you’re using honey or maple syrup, drizzle it over the peanut butter now. This little touch of sweetness balances the nuttiness and complements the banana beautifully. -
Layer the Bananas
Arrange the banana slices in a single layer on top of the peanut butter. Aim for even coverage—no one wants a peanut-butter-only bite halfway through! Close each sandwich with the remaining bread slices and give them a gentle press to meld the layers. -
Prep the Pan
Heat a skillet or griddle over medium heat. Add half of the softened butter and let it sizzle until it starts to foam around the edges. This foaming butter is key to getting that golden-crisp exterior without burning. Patience here pays off—keep the heat at medium so your bread browns evenly. -
First Side Grilling
Place both sandwiches, buttered side down, in the skillet. Let them cook undisturbed for about 2–3 minutes, or until the bottom slice turns a beautiful golden brown. Keep an eye on the heat; if it browns too quickly, reduce the flame slightly.
Mastering the Flip and Adding Your Personal Touch
By now, you’ve achieved that gorgeous golden-brown crust on one side of your sandwich and the kitchen is filled with that irresistible aroma of warm peanut butter and banana. The next few steps are all about ensuring that each bite is as perfectly melty and crisp as the first. Plus, I’ll share some of my favorite ways to customize this recipe and a few smart storage tips so you can enjoy leftovers without sacrificing texture.
STEPS
-
Add Butter to the Top
Before flipping, spread the remaining half tablespoon of softened butter on the top slice of each sandwich. This extra pat of butter will help the second side brown evenly and develop that signature, slightly nutty flavor. -
The Art of the Flip
Carefully slide a wide spatula under the sandwich, supporting it fully so the filling stays put. In one swift—but gentle—motion, flip the sandwich over. If your pan is the right temperature (medium heat), you’ll hear a satisfying sizzle as the butter hits the skillet. -
Grill the Second Side
Let the second side cook for another 2–3 minutes, checking occasionally to prevent over-browning. You’re looking for the same golden hue you achieved on the first side. At this point, the peanut butter should be soft and the banana slices warm and slightly caramelized. -
Rest Before Slicing
Once both sides are beautifully golden and crisp, transfer the sandwiches to a cutting board. Allow them to rest for about one minute—this short pause helps the filling settle so it won’t ooze out the moment you slice. Then, using a sharp knife, slice each sandwich diagonally to show off that molten center.

Expert Tips & Flavor Variations
-
Bread Matters: Using day-old or slightly firm bread ensures your sandwich crisps up without turning soggy. If you only have fresh bread, pop your slices in a toaster for 10–15 seconds to dry them out slightly before assembling.
-
Cinnamon Swirl: Add a pinch of ground cinnamon to the peanut butter for a warm, aromatic note that pairs beautifully with ripe banana. You can even swap the cinnamon for pumpkin pie spice in the fall—trust me, it’s a game-changer.
-
Chocolate Lover’s Upgrade: Sprinkle a few dark chocolate chips over the banana layer before closing the sandwich. As the sandwich grills, the chips melt into little pools of chocolate bliss. For an extra indulgence, drizzle a teaspoon of melted chocolate over the finished sandwich.
-
Nut Butter Swap: Almond or cashew butter can replace peanut butter one-to-one for a different nutty profile. You’ll still get that same creamy texture, but with a slightly sweeter or more delicate flavor.
-
Vegan/Dairy-Free Option: Swap the butter for coconut oil or a plant-based margarine. Make sure your bread is vegan-friendly, and you’ve got a dairy-free version that’s every bit as delicious.
-
Panini Press Shortcut: If you own a panini press or sandwich grill, preheat it and cook each sandwich for 3–4 minutes. The result is ultra-crisp bread with perfect, even heat distribution.
-
Storage & Reheating: Leftovers can be stored in an airtight container in the fridge for up to 24 hours. To re-crisp, pop them in a toaster oven at 350°F (175°C) for 3–5 minutes, or reheat in a skillet over medium-low heat, flipping once.
Making this grilled peanut butter banana sandwich is as much about creativity as it is about comfort. Feel free to experiment with different breads (try whole grain or brioche), add a sprinkle of toasted coconut, or even layer in some granola for crunch. No matter how you choose to customize it, the basic formula of warm peanut butter, sweet banana, and golden-crisp bread is foolproof—and endlessly satisfying.
FAQs and Final Thoughts on the Perfect Grilled Peanut Butter Banana Sandwich
Now that you’ve seen how easy (and delicious) this sandwich is to make, let’s answer a few of the most common questions that tend to pop up. Whether you’re planning to serve this as a quick breakfast, afternoon snack, or a cozy late-night treat, these FAQs will help you get it just right every time.
Frequently Asked Questions
1. Can I make this sandwich ahead of time?
You can assemble the sandwich ahead and keep it in the fridge for a few hours before grilling, but I recommend grilling it fresh when possible. Once grilled, the sandwich is best enjoyed hot and crispy. If you do make it ahead, reheat it in a skillet or toaster oven to revive the texture.
2. What kind of bread works best for this sandwich?
A sturdy sandwich bread is ideal—something that holds up well to the filling and grilling. Think sourdough, whole wheat, multigrain, or even brioche. Avoid very soft white bread, which can get soggy and fall apart during cooking.
3. Can I use chunky peanut butter instead of creamy?
Absolutely! Chunky peanut butter adds a bit more texture and works just as well. Just make sure to spread it evenly so the sandwich grills uniformly.
4. Is it okay to use less butter or skip it entirely?
Butter adds flavor and helps get that golden crust, but you can use less if you’re watching your fat intake. For a lower-fat version, lightly brush the bread with olive oil or use a nonstick pan without any added fat—just note the crust won’t be quite as rich or crispy.
5. How ripe should the banana be?
Look for a banana that’s yellow with a few brown spots—it should be soft enough to slice easily and sweet enough to complement the peanut butter. Avoid overly mushy bananas as they can make the sandwich soggy.
6. What’s the best way to reheat leftovers?
Reheat in a toaster oven or skillet over medium-low heat. Avoid the microwave—it’ll warm the filling but leave the bread limp. A few minutes in a dry pan can restore that delicious crispiness.
7. Can I make this in an air fryer?
Yes! Preheat your air fryer to 375°F (190°C), place the assembled sandwich in the basket, and air fry for 4–6 minutes, flipping halfway through. It’s a great hands-off method that still delivers crisp bread and a gooey center.
Final Thoughts: A Simple Comfort with Endless Possibilities
There’s just something magical about the simplicity of this grilled peanut butter banana sandwich. It’s quick, satisfying, and totally customizable—exactly the kind of comfort food you can whip up in under 10 minutes with ingredients you probably already have on hand.
What I love most is how adaptable it is. You can dress it up with chocolate chips and cinnamon, or keep it classic with just peanut butter and banana. It’s nostalgic, but also endlessly modern depending on how you spin it. Whether you’re making it for kids, treating yourself after a long day, or pairing it with a cup of coffee on a slow weekend morning, it just hits the spot every time.
Print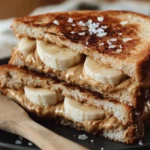
Grilled Peanut Butter Banana Sandwich
- Author: Sophia
Description
A warm, gooey twist on the classic peanut butter and banana sandwich, grilled until the bread is golden and the filling melts into a luscious, sweet-savory treat. Perfect for breakfast, an afternoon snack, or a simple dessert that comes together in minutes.
Ingredients
4 slices of sturdy sandwich bread
2 tablespoons creamy peanut butter
1 ripe banana, peeled and thinly sliced
1 tablespoon unsalted butter, softened
1 teaspoon honey or maple syrup (optional)
Instructions
Spread peanut butter evenly on two slices of bread and drizzle honey or syrup over the peanut butter if using. Arrange banana slices on top, covering the peanut butter layer. Close each sandwich with the remaining bread slices and lightly press together. Heat a skillet or griddle over medium heat and add half of the softened butter. Once the butter begins to foam, place the sandwiches in the pan. Grill until the bottom slice is golden brown and crisp, then spread the remaining butter on the top slice. Carefully flip and grill the other side until it, too, is golden and the filling is warm and slightly melted. Remove from the heat and let the sandwiches rest for a minute before slicing.
Notes
Use day-old or slightly firm bread to achieve the crispiest exterior without becoming soggy. For extra richness, swap half the peanut butter for almond or cashew butter. Add a pinch of cinnamon to the peanut butter layer or a few chocolate chips among the banana slices for a flavor boost. Leftovers can be reheated in a toaster oven to revive the crisp texture.